
Tag: Baked Goods
6 Baking Substitutions That Will Make Your Life Easier
Speaking as a home baker, substitutions in recipes are my very, very good friend, and if you bake, too, I’ll wager you feel the same way. Whether born of an “oh, crap” moment of realization you’re out of an ingredient, or just the desire to bake something a little fancier without having to sign your first-born child away at a specialty foods store, you can always do with the extra kitchen acumen of knowing what can replace what. With a little ingredient do-si-do, you might be surprised what greatness can spring from your mixing bowl. With that in mind, here’s a list of some of my favorite quick and easy ingredient substitutions for baking.
1. Cake flour: When I first graduated from making box-mix cakes to fully homemade cakes, I knew I had to avoid recipes with one ingredient: cake flour. I had seen those $7 “Softasilk” boxes on my grocery store shelf (you know, the one with the box design that makes it look like no one has purchased it since 1978?)

Am I wrong? Does this not look straight out of the ’70s?
and had made the conscious decision not to spend that kind of money on approximately four cups of flour. Then along came the Internet to teach me that making cake flour is ridiculously simple and the Softasilk people have a total racket going on. Here’s how:
For one cup of cake flour, measure one cup all-purpose flour, then remove two Tablespoons. Replace the two Tablespoons with two Tablespoons corn starch. Mix well.
2. Superfine sugar: Like cake flour, I can’t tell you how many recipes I avoided making because they contained superfine sugar. I didn’t know what it was, but I was pretty sure it was going to be expensive, too. It may, in fact, be expensive–I still don’t know; I’ve never purchased it. Because come to find out, all it takes is regular sugar and a food processor:
Place the desired amount of superfine sugar in your food processor with a couple of extra tablespoons to account for reduction in volume; process 1-2 minutes until it feels–you guessed it–super fine, like sand.
3. Half-and-Half: Did you ever wonder what half-and-half is half and half of? It’s half milk and half cream. Therefore, it’s extremely simple to replace by subbing:
1:1 measures of heavy cream and milk (I’d recommend 2%), i.e. 1/2 c. cream + 1/2 c. milk = 1 c. half-and-half.
4. Buttermilk: Buttermilk is a great ingredient for adding richness to breads, pancakes, and desserts. The only problem is figuring out what to do with the rest of that large, perishable carton of buttermilk after the weekend has passed and the pancakes are gone. You have a few options for substituting:
To make 1 c. buttermilk, measure 1 c. milk, then remove 1 Tablespoon. Replace with 1 Tablespoon lemon juice or white vinegar. Let stand at room temperature for 5-10 minutes until curdled.
OR
To make 1 c. of a buttermilk substitute, mix 3/4 c. plain yogurt or sour cream with 1/4 c. milk.
5. Butter/Vegetable Oil: I’d be a fool to say anything can really take the place of butter, but I do frequently want to make my baked goods a bit healthier (though I’m not about to tell you to replace butter with mashed avocado, as I’ve seen on several blogs. Let’s be real here, people.). Even in a rich cake, I’ve found you can get away with substituting up to half of the butter and/or oil content with unsweetened applesauce. I recently did this in a dark chocolate raspberry layer cake and even I would never have guessed it from the taste. Therefore, if you’re actually out of butter, you can:
Mix 1/2 c. unsweetened applesauce with 1/2 c. vegetable oil for 1 c. butter.
OR
To decrease fat content, replace 1/2 of the butter with unsweetened applesauce.
6. Unsweetened Baking Chocolate/Cocoa Powder: I had to roll my eyes the time I was looking for a cocoa powder substitute and found a site that recommended subbing 1 Tbsp. Dutch-process cocoa powder for regular cocoa powder. Like, yeah, I think I would have figured that one out. If you actually are out of one or the other, though, here’s a conversion that works great:
For 1 ounce of unsweetened baking chocolate, use 3 Tbsp. cocoa powder plus 1 Tbsp. softened butter or vegetable oil.
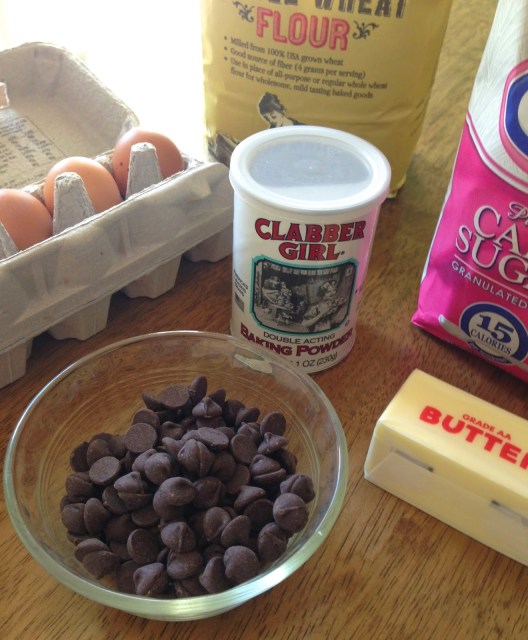
Lastly, one bit of interesting trivia about why the famous baking powder brand pictured above is called Clabber Girl. To “clabber” means to sour, as in soured milk. In the olden days, soured milk was made by leaving milk out at room temperature, to be used as a leavener in baked goods–until 1854, when baking powder was invented. So I guess the Clabber Girl is sparing you the work of actually clabbering, which would take days of waiting for the milk to get sour enough. Thanks, Clabber Girl! Keep on clabbering! Clabber clabber clabber! (Can you tell I really like the word “clabber”?)
At any rate, it’s my sincere hope that this list may keep you from spending extra money on ingredients you don’t need, or running out to the store in your pajamas at 10 PM for some cake flour. Happy baking!
Orange Poppy Seed Shortbread

Recently, I read Gretchen Rubin’s somewhat controversial bestseller The Happiness Project. If you haven’t heard of it, the premise is that the author set out to spend a year of her life becoming happier. The book chronicles her research and experiences in twelve months devoted to different aspects of happiness and well-being. A perfectly commendable pursuit, right? The controversy sets in when you realize that Rubin is an upper-crust Manhattanite with housekeepers and nannies, millions in the bank, and not a single tragic event in her life’s history. Then there’s the problematic issue that the book focuses entirely on her personal well-being, not the well-being of her family or the world at large. (Nary a service project appears in the twelve months.) And, oh yeah, her version of becoming happier is to keep extensive checklists of tasks to complete every day. Not exactly Zen. Strangely, though I was seriously put off by these facts, I ended up reading the entire thing. And strangely again, I got a lot out of it. While I disagreed in major ways with Rubin’s project itself, the research she shared yielded a lot of interesting points about happiness that were real keepers for me. For example, the concept that we are largely in control of our own happiness and can choose it. Or that little things, like putting on the right upbeat music or indulging in a minor splurge (like a pint of fresh raspberries, let’s say), can lift your spirits in a big way. I’ve been trying to keep these truths in mind when I find myself in an irritable, negative state of mind, and have had some genuine success. All in all, I’d say The Happiness Project is worth reading if you can get past its flaws, because ultimately it can serve as a good reminder of how to take responsibility for your own mood.
So why do I bring all that up? And how does it have to do with the orange cookie-type dessert pictured above? Well, I do like to share thoughts on interesting books, but the whole reason I was thinking about The Happiness Project is that I can’t stop thinking about how I laughed out loud at the part where Rubin congratulates herself that she “didn’t grouse when [her husband] made three rich desserts in three nights.” Ha! Not complaining about rich desserts! Ha! Husbands voluntarily making desserts! You sure have it rough, Gretchen!
Sometimes–I won’t say often–I too crave a dessert that’s actually light–not too rich, not chocolate. (Though a rich dessert baked by my husband would seem to me a very welcome surprise, not a nuisance to be suffered. What’s that saying–don’t kick the man out of bed for eating crackers? Or don’t kick him out of the kitchen for making cake, perhaps?) Still, yes, some meals simply call for something delicate to finish. This little shortbread is just right for when the mood strikes for something lighter. (And you can always top it with vanilla ice cream if light isn’t what you’re after.) Served with tea or coffee, it would also make a divine afternoon snack. And did I mention it’s super easy? You don’t even need a bowl; the whole thing is made in the food processor. Maybe I should send the recipe to Gretchen Rubin to give to her husband–or just because with its lovely lightness and hint of orange, making and eating it made me happy. 🙂

Orange Poppyseed Shortbread
(From Real Simple)
Ingredients:
1/2 c. cold unsalted butter, cut into pieces
1 c. all-purpose flour, spooned and leveled
1/2 c. powdered sugar
generous 1/8 tsp. salt
2 tsp. grated orange zest
2 tsp. poppy seeds
Directions:
1. Heat oven to 350 degrees. Grease a 9″ round cake pan or fluted removable-bottom tart pan.
2. In a food processor fitted with the metal blade, process the butter, flour, sugar, and salt until moist clumps form. Add the orange zest and poppy seeds and pulse briefly just to combine.
3. Press the mixture evenly into the prepared pan. Bake until lightly golden, about 25 minutes.
4. Using a serrated knife, cut the warm shortbread into wedges.

Zucchini Bread

In one of my favorite books about food, Animal, Vegetable, Miracle, Barbara Kingsolver writes about her experience with “Zucchini Wars.” You may be picturing galloping hoards hurling green, oblong grenades at each other, but in fact, Zucchini Wars are the annual challenge in the South (where Kingsolver lives on her farm) to rid oneself of excess zucchinis in July. Zucchini seems to be one of those plants that has taken to the old adage “bloom where you are planted” like gangbusters, thriving in any condition to yield a bumper crop year after year. Kingsolver contemplates the concept of an automobile engine that runs on zucchini, and–my favorite line in the chapter–recalls Garrison Keillor’s quote that “July is the only time of year when country people lock our cars in the church parking lot, so people won’t put squash on the front seat. I used to think that was a joke.”
Presumably, this pursuit of using up all your over-abundant zucchini explains the origins of zucchini bread. I can think of no other reason why someone would look at this:

and think of this:

For a long time, I was skeptical of zucchini bread (and reasonably so, I’d say). I wouldn’t jump at the chance to eat asparagus bread or bok choy bread–at least not as a sweet breakfast–so what makes zucchini bread any different?
Frankly, I don’t really know. Except that people don’t seem to have major harvests of asparagus or bok choy to get off their hands, so those haven’t taken off in the form of quick breads (yet). But if you add sugar and other yummy ingredients to just about anything, it seems to work as a breakfast treat.
Here in Arizona, we definitely don’t have Zucchini Wars, but I occasionally end up with a zucchini or two I somehow didn’t use as planned. Enter this recipe. It does the trick of using up my zucchini without me resorting to a clandestine Zucchini Drop in someone’s car while they innocently worship at church. (Though I do live just a quarter mile from my church…wonder what else I could conveniently offload…) Once I finally tried zucchini bread, I was surprised by how much I enjoyed it–the zucchini adds a colorful little crunch you don’t usually find in a quick bread. And since the other ingredients are standard muffin-y things like brown sugar, flour, and cinnamon, you still feel like you’re eating something light and sweet, not a dinner-time side dish.
And now I’m off to develop my soon-to-be famous Asparagus Bread recipe…
Zucchini Bread
(Adapted from Allrecipes.com)
Ingredients:
1 1/2 c. whole wheat flour
1 1/2 c. all-purpose flour
1 tsp. salt
1 tsp. baking soda
1 tsp. baking powder
3 tsp. cinnamon
3 eggs
1/2 c. applesauce
1/2 c. vegetable oil
3/4 c. brown sugar
3/4 c. white sugar
3 tsp. vanilla
2 c. grated zucchini
Directions:
1. Grease two 9 x 5 inch loaf pans. Preheat oven to 325 degrees.
2. In a small bowl, mix dry ingredients: whole wheat flour, all-purpose flour, salt, baking soda, baking powder, and cinnamon.
3. In a large bowl, mix eggs, applesauce, oil, brown sugar, white sugar, and vanilla. Add dry ingredients to wet ingredients and stir until just mixed. Stir in zucchini until completely incorporated. Pour into prepared loaf pans.
4. Bake 40-50 minutes or until a knife inserted in the center comes out clean.
Makes 2 loaves.
Fluffy Lemon Rosemary Layer Cake
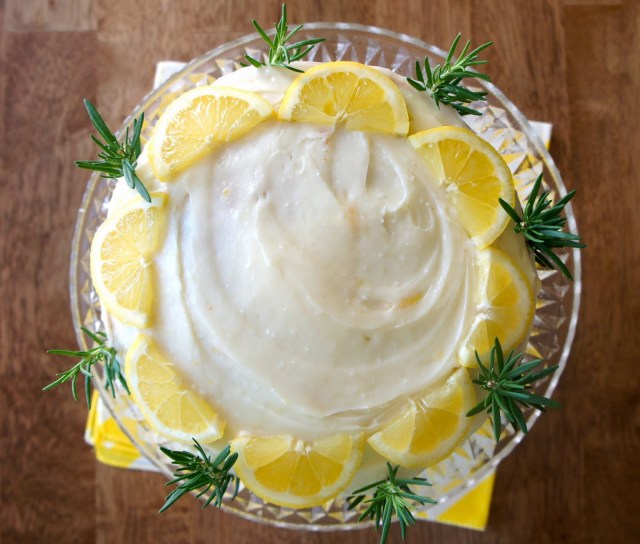
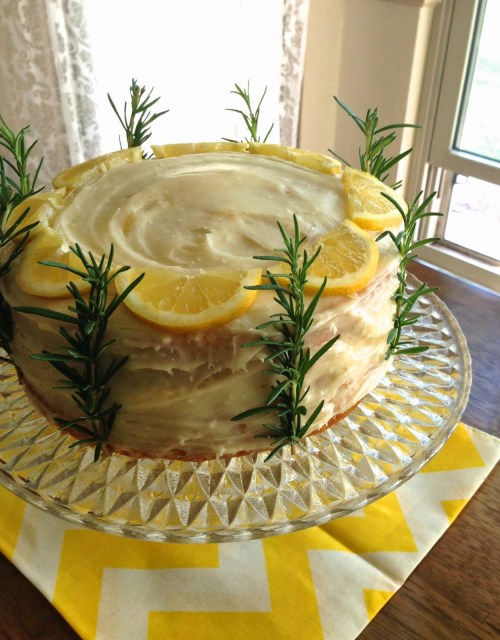
Sometimes I think I should start a separate blog called A Love Letter to Dessert. Or maybe just A Love Letter to Cake. So many flavors, so many fillings, so many different kinds of frosting. It makes me think of the segment of my high school math class about combinations and permutations–remember that? Where you total up the number of all the different ways a collection of things can be combined? Like if you have chocolate, peanut butter, and vanilla, you could make a chocolate cake with peanut butter filling and vanilla frosting–or a vanilla cake with chocolate filling and peanut butter frosting, etc., etc.? There have got to be thousands of cake permutations–or is it combinations? (Either way, look, math was useful! It can be applied to cake! Thanks, Mr. Cox!) I occasionally spend a little too much time thinking about these many configurations, but I’m happy to hit pause on my Cake Permutation daydream for this particular combination of lemon-rosemary cake with lemon cream cheese frosting. It is dessert nirvana. As someone who doesn’t really go for food trends, I am all for the current craze over the marriage of citrus and herbs in sweet treats. (Can we please just let lemon and rosemary get married already–I mean, you love who you love, right?)
I made this delight for my husband’s family’s Easter gathering last month and it received rave reviews. The high number of eggs gives it a light, fluffy texture that matches the lightness of the lemon flavor. Plus, the presentation of the rosemary sentries posted all around the cake make for visual interest. Definitely a special cake for a special occasion!
Fluffy Lemon Rosemary Layer Cake
(Adapted from Baker Bettie, who adapted it from Cook’s Illustrated)
Ingredients:
For the cake:
2 1/2 c. cake flour (make cake flour from all-purpose flour by replacing 2 Tbsp. per cup with corn starch)
1 1/4 tsp. baking powder
1/4 tsp. baking soda
3/4 tsp. salt
1 1/2 c. sugar, divided
10 tbsp. butter, melted and slightly cooled
1 c. buttermilk (make buttermilk from regular milk by replacing 1 Tbsp. per cup with lemon juice or vinegar–let sit 5 minutes, then use)
3 Tbsp. vegetable oil
2 tsp. vanilla
1 Tbsp. lemon zest
1 Tbsp. fresh rosemary, minced
6 large egg yolks
3 large egg whites
1 lemon, sliced
8 sprigs rosemary
For the frosting:
8 oz. cream cheese, softened
1/2 c. butter, softened
1 Tbsp. lemon zest
2 Tbsp. lemon juice
1 tsp. vanilla
2 1/2 c. powdered sugar
Directions:
1. Preheat oven to 350 degrees. Grease two 9-inch cake pans.
2. In a large bowl, combine flour, baking powder, baking soda, salt, and 1 1/4 c. sugar. In another bowl, whisk together the melted butter, buttermilk, vegetable oil, vanilla, lemon zest, minced rosemary, and egg yolks.
3. In a separate bowl bowl, beat egg whites at medium speed until foamy with a hand mixer or stand mixer. Stream in the remaining 1/4 c. sugar. Beat on high speed until stiff peaks form. Set aside.
4. Gradually pour butter mixture into flour mixture, mixing on low until just combined. Gently fold in meringue (egg) mixture one half at a time–a few white streaks are okay. Divide batter evenly between prepared cake pans.
5. Place cake pans on a baking sheet and bake 20-25 minutes, rotating halfway through for best results, until cake does not jiggle in the center.
6. Cool on a wire rack about 20 minutes, then run a knife around the sides of the cakes and invert onto a greased wire rack or wax paper. Allow to cool completely (about another hour) before frosting.
7. Meanwhile, make the frosting by mixing all ingredients on medium speed until creamy.
8. Frost and garnish with sliced lemons and rosemary sprigs.
Lemon Cookie Sandwiches

So lately I’ve been on a history of food/food etymology kick. Because, hey, if you love food, isn’t it fascinating to find out about its history? You never know what you might find out about a seemingly modest comestible. Today I was reading this excellent article on The History of the Sandwich–you know, like a normal person would do in their spare time–and let me tell you, there is more to the sandwich than one food stuffed between two slabs of another food. Here are few of the most compelling tidbits I discovered:
- The first recorded sandwich was made by the 1st century B.C. rabbi Hillel the Elder (but was it kosher?)
- The Earl of Sandwich actually had a name (and it was not Earl, like I always vaguely assumed). His name was John Montagu, and his invention of the sandwich is the subject of hot debate. I bet Rabbi Hillel is rolling in his grave over the fact that we don’t eat Turkey and Cheese Hillels. Also, Montagu was a patron of British explorer Capt. James Cook, which is why Cook named the Sandwich Islands after him.
- The sandwich was not introduced to the United States until 1840, when a British woman named Elizabeth Leslie included it in her cookbook, Directions for Cookery. The recipe probably went something like this: “Put something between two slices of bread. Serves 1.”
- There’s a restaurant in Florida called the Earl of Sandwich, founded by the Earl’s descendant Orlando Montagu (gotta lay claim to the fame of the name, I suppose.)
You may be wondering why I’m going on about sandwiches when, clearly, the photo above is of cookies, not sandwiches…or is it?? Here’s the question: are the above goodies cookies or sandwiches?


Whoa, guys, let’s not get in a Cookie Monster/Earl of Sandwich throwdown! (Though my money’s on Cookie Monster if we do.) We can ALL get along here! Cookies and sandwiches are FRIENDS–see?

Look, it’s the perfect marriage of both! These buttery, zingy lemon cookie sandwiches were somehow left off the list of classic sandwiches in The History of the Sandwich, but once you eat them, my guess is they will make it on your list of favorite cookies–or of favorite sandwiches. Trust me, these are yummy enough to earn a place in the history books….or at least your recipe book.
Lemon Cookie Sandwiches
(Adapted from Ldsliving.com and Great American Home Baking)
Ingredients:
For the cookies:
1/2 c. butter, softened
1 c. sugar
1/2 tsp. vanilla
1 egg
1 tsp. lemon zest
1 Tbsp. fresh lemon juice
1/4 tsp. salt
1/4 tsp. baking powder
1/8 tsp. baking soda
1 1/2 c. all-purpose flour
For the frosting:
3 Tbsp. butter
1/2 tsp. lemon zest
1 Tbsp. fresh lemon juice
1 c. and 3 Tbsp. powdered sugar
Directions:
Make the cookies:
1. Preheat oven to 350 degrees. Grease light colored baking sheet with cooking spray.
2. Cream butter and sugar together in a large bowl. Add vanilla, egg, lemon zest, and lemon juice and combine thoroughly. Stir in all dry ingredients until just combined.
3. Drop by rounded teaspoonfuls onto prepared baking sheet. Bake 9-11 minutes or until cookie bottoms begin to brown.
Make the frosting:
Combine butter, zest, and juice. Beat in powdered sugar at medium speed until fluffy.
Make into sandwiches:
Spread a layer of frosting on the bottom of one cookie. Top with a second cookie to make a sandwich!