Boston Cream Pie

In 2003, the state of Massachusetts made a bold decision. They designated the Boston Cream Donut as the OFFICIAL DONUT of the state. Good call, Massachusetts. Both on your choice of donut and the choice to have an official state donut. (Massachusetts is, in fact, the only state to have an official donut. The other 49 states need to rectify this immediately.) So it’s all well and good that the people of the Bay State get to enjoy this monument to deliciousness in an official capacity.

But guess what, Massachusetts? Somebody beat you to it.

ME!!!!

The Boston Cream donut has been MY official donut since at least 1991.

For as long as I can remember, I have ALWAYS ordered a Boston Cream donut whenever possible at a donut shop. It started when my grandparents from Iowa would come to town and take my brother and me out for lunch at Sizzler and then to Dunkin Donuts for dessert. (The year 1991 is somewhat arbitrary–I was 9 then, which is about when I first recall this ritual with my grandparents starting.) Even at that young age, I can remember the sureness of my decision. No strawberry frosted, no long johns, no chocolate glazed. I want the grand daddy, that pie-within-a-cake, dream-within-a-dream ALL-STAR Boston Cream Donut. Dark chocolate frosting, buttery cake, and glorious cream filling–can you see why I (and, oh yeah, Massachusetts) have appointed it my official donut?

Since it was recently my birthday and I always enjoy making my own birthday cake, I decided this was the year to try actually making a Boston cream pie (which, if you didn’t know, is actually a cake. So in donut form it’s a donut that’s a pie that’s a cake. Still with me?) For as many times as I’ve eaten Boston cream donuts, it’s rare that I have Boston cream pie–and still rarer (as in, never) that I’ve had a homemade Boston cream pie. So giving it a try sounded fabulous. I actually happen to have a cookbook all about the food of Boston, so I pulled it out to find….

Nothing! This cookbook about the distinctive recipes of Boston does not contain a Boston cream pie recipe. Inexcusable.

Disgusted.

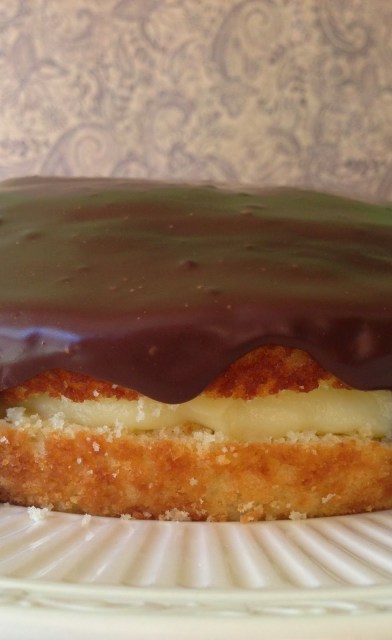
(Though, actually, otherwise it’s a pretty good cookbook.) Anyway, thank goodness for the Internet, which of course yielded countless Boston cream pie recipes. Sifting through them revealed that most of the top hits had only four-star or less ratings, and I knew this birthday called for a five-star cake. I ended up deciding on one from Saveur.com that had all five-star reviews, and was not disappointed! Neither, I’d say, were the other ten or so people who shared it with me. My neighbor, who recently traveled to Boston, said she thought it was better than the version she’d had at a famous bakery there. The chocolate on top is nice and dark–not too sweet–the cake is fluffy, and the vanilla cream set up perfectly, with just the right amount of spreadability.

Trying not to get my hair in the chocolate. Or the fire.

All in all, it made for a happy birthday cake realization of my Official Donut–a cake inspired by a donut inspired by a cake (with the name of a pie).

Boston Cream Pie
(Slightly adapted from Saveur.com)
Ingredients:

For the cake:

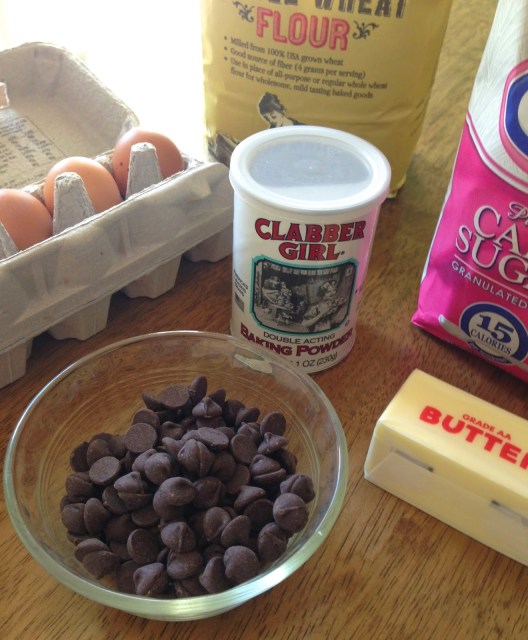
1 1/2 c. all-purpose flour
2 tsp. baking powder
1/2 tsp. kosher salt
12 Tbsp. butter, softened
1 c. sugar
2 tsp. vanilla extract
3 eggs
2/3 c. buttermilk (see my baking substitutions page for other options)

For the filling:

1 c. sugar
1/4 c. corn starch
1/2 tsp. kosher salt
6 egg yolks
1 1/2 c. milk
4 Tbsp. chilled unsalted butter, cubed
2 tsp. vanilla extract

For the glaze:

4 oz. 60% bittersweet chocolate, finely chopped
1/2 c. heavy cream

Directions:

1. Make the cake: Preheat oven to 350 degrees and grease a 9″ round cake pan well. Whisk together flour, baking powder, and salt in a bowl; set aside. In a large bowl, beat butter, sugar, and vanilla until fluffy, about 3 minutes. Add eggs one at a time, beating well after each addition. Alternately add dry ingredients and buttermilk and beat until just combined. Pour into prepared pan and smooth the top. Bake about 35 minutes or until a toothpick inserted in the center comes out clean. Cool in the pan 15 minutes, then invert onto a wire rack to cool completely.

2. Make the filling: In a 4-quart saucepan, whisk together sugar, corn starch, and salt. Add egg yolks and whisk until smooth, then stir in milk. Heat pan over medium heat and cook, stirring constantly, until thickened, about 10 minutes. (Be especially watchful in the last 3 minutes or so, as the mixture goes from liquid-y to pudding-y quite quickly.) Remove from heat and add butter one cube at a time, whisking until smooth. Stir in the vanilla extract. Transfer the pudding to a bowl and cover with plastic wrap. Chill until firmed, at least 2 hours.

3. Make the chocolate glaze: Place chopped chocolate in a bowl. In a 1-quart saucepan over high heat, bring heavy cream just to a boil. Pour cream over chocolate and let sit 1-2 minutes. Slowly stir the chocolate and cream until smooth and shiny, then set aside to cool for 10 minutes.

4. Assemble the cake: Using a serrated knife, carefully slice cake horizontally into two layers, with the top layer being slightly smaller than the bottom. Spread the chilled pudding over the top side of the bottom layer, then cover with the top layer. Pour chocolate glaze evenly over the top of the cake, letting it drip down the sides. Refrigerate until glaze is set, at least 30 minutes. Serve chilled or at room temperature.

Generously serves 10. (But could be stretched for 12!)

Broccoli Cheese Soup


For the last few weeks, my husband has more or less forbidden me from making soup. Not that we have that kind of relationship, where he goes around forbidding me from doing things (“NO MO’ SOUP, WOMAN!!”) but not too long ago we had quite the culinary misadventure with soup. On a hot July day, I had gotten it into my head that roasted cauliflower soup sounded great for dinner. I love that particular soup–creamy, spicy, nutty, and a great source of vegetables. Unfortunately, with the temperature outside being approximately that of a thousand burning suns, a steaming hot bowl of soup really did not hit the spot that night. Any time your napkin functions as a sweat towel instead of a crumb catcher, you know you have a problem–we both sat using our napkins to wipe our glistening foreheads throughout the meal. Hence the whole “forbidding” thing. Actually, it was more of a polite-but-firm request. Regardless, the point was clear (and mostly mutual): no more piping hot foods until the weather settles down to something below sweat lodge conditions.

Well, being the soup lover I am, I held out as long as I could, but dang it, the weather in Phoenix just takes soooooo loooooong to cool off–if, indeed, you can call our 70 degree winters “cooled off.” I can’t tell you how much time I spend fantasizing about living somewhere where in the next month or so leaves will begin changing, sweaters will begin replacing tank tops, and soup will become a reasonable dinner option. And that’s basically what making this soup was for me: fantasy. Pretending that the day’s forecast didn’t contain triple digits. La-la-la I can’t feel you, oppressive heat! I can’t see you, relentless sun! I will eat my delicious steaming bowl of broccoli cheese soup and not need a cold shower afterwards!

And you know what? It kind of worked. I enjoyed this soup, as I always do, and managed to not feel feverishly hot while doing so. Maybe the weather really is changing, ever so slightly? Or maybe my husband turned down the A/C in anticipation of dinner?

A final note: this recipe comes (adapted) from the book The Cleaner Plate Club, which I highly recommend. It’s part cookbook, part manifesto about improving children’s diets in America today. If you want to get educated on how to cook healthily for your child(ren), check this one out!

Broccoli Cheese Soup
(Adapted from The Cleaner Plate Club)

Ingredients:

2 Tbsp. olive oil
1 c. chopped celery
1 c. chopped carrot
3/4 c. chopped onion
4 c. chicken broth (homemade if possible; vegetable broth may be substituted)
1 bay leaf
2 tsp. dried thyme
4.5 c. broccoli florets
1 Parmesan cheese rind
1 Tbsp. butter
2 Tbsp. all-purpose flour
1 c. whole milk (2% could work in a pinch)
8 oz. grated Parmesan cheese (about 2 cups)
salt and pepper

Directions:

1. Heat the olive oil in a large stockpot over medium heat. Add the celery, carrot, and onion and cook about 10 minutes.

2. Add the chicken broth, bay leaf, and thyme. Bring to a boil, then reduce the heat to a simmer. Add the broccoli and cheese rind and simmer until the broccoli is tender, about 20 minutes.

3. Meanwhile, in a separate small saucepan, prepare the roux: melt the butter over medium-low heat, then whisk in the flour. Cook, whisking constantly for about 2 minutes. Add the milk. Bring to a simmer, then add the Parmesan and whisk to melt evenly.

4. Remove the bay leaf and cheese rind from the soup. Carefully puree about half the vegetables with an immersion blender (or blend half the soup in a regular blender, covering the lid with a kitchen towel to prevent a hot mess), bringing it to a texture you like.

5. Stir in the cheese sauce. Bring to a boil, then reduce heat and simmer 10 minutes. Season with salt and pepper to taste.

Serves 4 as a main dish.

Almond Butter Oatmeal Muffins

Whoa, it’s been a busy couple of weeks! The fall semester has started, which means I am knee deep in Medical Nutrition Therapy (loving it so far), last week was my birthday (cake recipe forthcoming), and this weekend we hosted a big surprise birthday bash for my sister-in-law’s 30th! (I was going to write a post about all the party food and games, but again, things got so busy that I didn’t even take many pictures, and what’s a food blog post without pictures?) One thing I DO have pictures of, though, are these tasty nut butter oatmeal muffins.

Up until recently, I had never purchased almond butter, mostly because it’s hard to justify spending as much on one jar as I would on a pizza to feed my whole family AND because I already love peanut butter so much that experimenting with other nut butters hardly seemed necessary. Why mess with a good thing? And wouldn’t it make the peanut butter feel bad? Then a few weeks ago, Maranatha almond butter was on sale for a mere 5 bucks, which is bargain basement for almond butter, so I splurged.

Assuming one uses almond butter in all the same ways as peanut butter (you know, as shaving cream, leather cleaner, hair moisturizer…seriously, these are actual ways people claim to use peanut butter), I figured I’d go a traditional route by giving it a whirl in these oatmeal muffins. Aaaaand success! These were simple to whip up, reasonably healthy, and as an established fan of oatmeal muffins, I really enjoyed the uniqueness of the almond taste paired with the quasi-nuttiness of oats. It was like being in a Peanut Butter Parallel Universe.

(Sorry, peanut butter. We can still be friends. I promise I’ll still slather you on ice cream eat you in heart-healthy portions.)

You could, of course, use peanut butter instead of almond in this recipe. Either would be delicious.

P.S.: Days after making and eating these muffins, I received a call from the grocery store saying this particular brand of almond butter had been recalled for salmonella. Awesome. Is that why it was so cheap? Still gonna buy it again.

P.P.S.: None of us got salmonella. And neither will you from looking at the pictures. Just be sure to buy non-bacterially infected almond butter. Or peanut butter. Either will work. 🙂

Almond Butter Oatmeal Muffins
(Adapted from The Cooking Actress)

Ingredients:

1 1/4 c. whole wheat flour (white whole wheat is especially good because of its lighter texture)
1 c. quick or rolled oats
1 tsp. baking powder
1 1/2 tsp. baking soda
1 tsp. salt
1/4 c. brown sugar
1/3 c. honey
1/2 c. almond or peanut butter
1/2 c. Greek yogurt
1 egg
1 tsp. vanilla extract
3/4 c. milk

Directions:

1 Preheat oven to 375. Spray a 12-cup muffin tin with cooking spray.

2. In a large bowl, combine flour, oats, baking powder, baking soda, salt, and brown sugar.

3. In a smaller bowl, whisk together honey, almond or peanut butter, yogurt, egg, vanilla, and milk.

4. Stir the wet ingredients into the dry until combined. Divide evenly into prepared muffin tin, filling about 2/3 full.

5. Bake 17-20 minutes, or until a toothpick inserted in the center comes out clean.

Makes about 12 muffins.

True Food Kitchen Kale Salad

At the 2014 Nutrition and Health Conference back in May, I was fortunate enough to have a second row seat to watch Dr. Andrew Weil, founder of the Arizona Center for Integrative Medicine and originator of this recipe for lemon-parmesan kale salad, prepare it on stage with cookbook author Rebecca Katz. The two of them worked together to whip up an entire intriguingly seasoned, plant-based meal in 30 minutes, just like a really healthy version of a Food Network show, complete with pre-prepped bowls of ingredients and witty banter.

Unfortunately, the only picture that ended up saving to my photo stream from my four days at the conference in Dallas was the one of the cake and bread I snuck out of a session to purchase because I JUST COULDN’T TAKE ANOTHER MEAL WITHOUT SUGAR AND CARBS.

Conveniently hidden in my purse.

I know. Terrible. I’m going to be the worst dietitian ever. (But that carrot cake was soooo worth it.)

My little exodus in search of sweetness and wheat was not motivated by not enjoying the food served at the conference. It was fresh, expertly prepared, and genuinely delicious. I just really needed some bread and dessert to go with it.

So, sadly enough, I do not have any photos of Dr. Weil preparing this famous side dish served at all his True Food Kitchen restaurants across the country. It’s a real shame, because it was a joy to watch him cook. His familiarity with the recipe was apparent, and his adjustments and flourishes were like watching a master painter create a masterpiece. Seriously, if I were a single 60-something lady, well….that’s all I’m going to say about that.

Let’s get back to the salad. Right, the salad. Like I said, this delightful green dish is a staple at Dr. Weil’s True Food Kitchen restaurants, which are based around his anti-inflammatory diet philosophy (now with locations in Arizona, California, Colorado, Georgia, Texas, and Virginia–if you live in one of these states, I highly recommend checking it out!) Having dined at the restaurant many times, I was familiar with this salad, as it and a sweet potato hash are the two side dishes offered with most entrees. I enjoy both, but I usually choose the salad. So tonight, when I was making dinner and needed something to liven up the half a bag of kale sitting in my fridge, I figured it was as good a time as any to try my hand at this recipe. Having watched Dr. Weil make it, I knew it was not complicated and used simple ingredients.

I have another kale salad recipe that I enjoy and eat with due diligence, but WHOA, this one had me eyeing the bowl, wondering if anyone else is going to eat the rest before I could get to it. It’s actually a little baffling how a salad that is basically just kale with parmesan and a simple dressing could be so appealing and taste so mouthwateringly good. But there you have it. I actually forfeited eating dessert after dinner in favor of eating more of this salad. And THAT’S saying something. Perhaps a little redemption from my furtive cake run at the conference a few months ago. (Though I stand by it. That carrot cake totally hit the spot.)

True Food Kitchen Kale Salad
(From DrWeil.com)

Ingredients:

4-6 c. kale, loosely packed (Dr. Weil recommends black kale, but I used standard green kale, which also worked great)
Juice of 1 lemon (about 1/4 c.)
3-4 Tbsp. extra-virgin olive oil
2 cloves garlic, pressed
Salt and pepper to taste
Red pepper flakes to taste
2/3 c. Pecorino or Parmesan cheese
1/2 c. freshly made bread crumbs from lightly toasted bread

Directions:

1. Whisk together lemon juice, olive oil, garlic, salt, pepper, and a generous pinch of red pepper flakes.

2. Pour over kale in a serving bowl and toss well (tossing with your hands works well, as it covers more surface area of the kale).

3. Add 2/3 of the cheese and toss again.

4. Let kale sit for at least 5 minutes. Meanwhile, toast and crumble bread. Add bread crumbs, toss again, and top with remaining cheese.

Serves 4-6.

6 Baking Substitutions That Will Make Your Life Easier

Now, which of you will we replace?

Speaking as a home baker, substitutions in recipes are my very, very good friend, and if you bake, too, I’ll wager you feel the same way. Whether born of an “oh, crap” moment of realization you’re out of an ingredient, or just the desire to bake something a little fancier without having to sign your first-born child away at a specialty foods store, you can always do with the extra kitchen acumen of knowing what can replace what. With a little ingredient do-si-do, you might be surprised what greatness can spring from your mixing bowl. With that in mind, here’s a list of some of my favorite quick and easy ingredient substitutions for baking.

1. Cake flour: When I first graduated from making box-mix cakes to fully homemade cakes, I knew I had to avoid recipes with one ingredient: cake flour. I had seen those $7 “Softasilk” boxes on my grocery store shelf (you know, the one with the box design that makes it look like no one has purchased it since 1978?)


Am I wrong? Does this not look straight out of the ’70s?

and had made the conscious decision not to spend that kind of money on approximately four cups of flour. Then along came the Internet to teach me that making cake flour is ridiculously simple and the Softasilk people have a total racket going on. Here’s how:

For one cup of cake flour, measure one cup all-purpose flour, then remove two Tablespoons. Replace the two Tablespoons with two Tablespoons corn starch. Mix well.

2. Superfine sugar: Like cake flour, I can’t tell you how many recipes I avoided making because they contained superfine sugar. I didn’t know what it was, but I was pretty sure it was going to be expensive, too. It may, in fact, be expensive–I still don’t know; I’ve never purchased it. Because come to find out, all it takes is regular sugar and a food processor:

Place the desired amount of superfine sugar in your food processor with a couple of extra tablespoons to account for reduction in volume; process 1-2 minutes until it feels–you guessed it–super fine, like sand.

3. Half-and-Half: Did you ever wonder what half-and-half is half and half of? It’s half milk and half cream. Therefore, it’s extremely simple to replace by subbing:

1:1 measures of heavy cream and milk (I’d recommend 2%), i.e. 1/2 c. cream + 1/2 c. milk = 1 c. half-and-half.

4. Buttermilk: Buttermilk is a great ingredient for adding richness to breads, pancakes, and desserts. The only problem is figuring out what to do with the rest of that large, perishable carton of buttermilk after the weekend has passed and the pancakes are gone. You have a few options for substituting:

To make 1 c. buttermilk, measure 1 c. milk, then remove 1 Tablespoon. Replace with 1 Tablespoon lemon juice or white vinegar. Let stand at room temperature for 5-10 minutes until curdled.

OR

To make 1 c. of a buttermilk substitute, mix 3/4 c. plain yogurt or sour cream with 1/4 c. milk.

5. Butter/Vegetable Oil: I’d be a fool to say anything can really take the place of butter, but I do frequently want to make my baked goods a bit healthier (though I’m not about to tell you to replace butter with mashed avocado, as I’ve seen on several blogs. Let’s be real here, people.). Even in a rich cake, I’ve found you can get away with substituting up to half of the butter and/or oil content with unsweetened applesauce. I recently did this in a dark chocolate raspberry layer cake and even I would never have guessed it from the taste. Therefore, if you’re actually out of butter, you can:

Mix 1/2 c. unsweetened applesauce with 1/2 c. vegetable oil for 1 c. butter.

OR

To decrease fat content, replace 1/2 of the butter with unsweetened applesauce.

6. Unsweetened Baking Chocolate/Cocoa Powder: I had to roll my eyes the time I was looking for a cocoa powder substitute and found a site that recommended subbing 1 Tbsp. Dutch-process cocoa powder for regular cocoa powder. Like, yeah, I think I would have figured that one out. If you actually are out of one or the other, though, here’s a conversion that works great:

For 1 ounce of unsweetened baking chocolate, use 3 Tbsp. cocoa powder plus 1 Tbsp. softened butter or vegetable oil.

Lastly, one bit of interesting trivia about why the famous baking powder brand pictured above is called Clabber Girl. To “clabber” means to sour, as in soured milk. In the olden days, soured milk was made by leaving milk out at room temperature, to be used as a leavener in baked goods–until 1854, when baking powder was invented. So I guess the Clabber Girl is sparing you the work of actually clabbering, which would take days of waiting for the milk to get sour enough. Thanks, Clabber Girl! Keep on clabbering! Clabber clabber clabber! (Can you tell I really like the word “clabber”?)

At any rate, it’s my sincere hope that this list may keep you from spending extra money on ingredients you don’t need, or running out to the store in your pajamas at 10 PM for some cake flour. Happy baking!