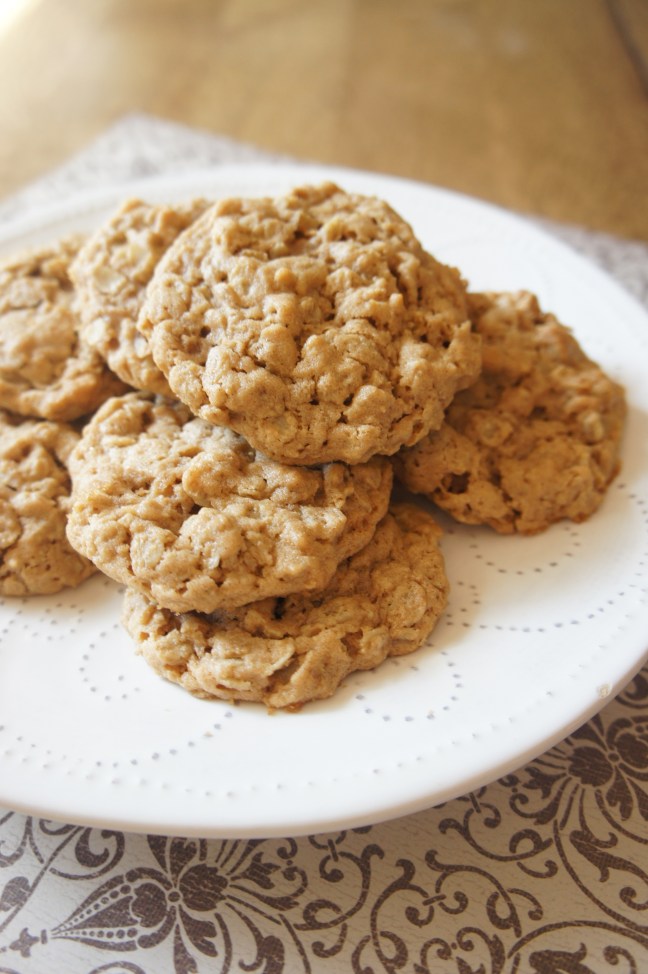
Cashew Butter Oatmeal Cookies

Cashew butter puts a unique spin on the expected in these chewy Cashew Butter Oatmeal Cookies.

Not too long ago, I received an assignment from one of the publications I write for about the nutrition of cashew butter. Having limited experience with this particular nut butter, I was basically starting at square one. I’m your typical American when it comes to nut butters–as in, peanut butter is my gold standard. When our family lived in Germany a few years ago, the lack of this grocery staple in stores led to much weeping and gnashing of teeth (until my mom arrived from the States bearing some precious PB).

Doing a bit of research for my article led to some interesting revelations about cashew butter. Even though it has a teeny bit more calories than peanut butter, its fats are 80% unsaturated (aka the healthy kind). Plus–how weird is this?–certain antioxidant compounds in cashews have been associated with improved vision and eye health. You can read my full article with all cashew butter’s health benefits here.

Coincidentally, I happened to receive a few samples of cashew butter shortly after writing my article. One of which was this intriguing salted caramel variety.


Up until now, I’ve been noshing it slathered on graham crackers and as a dip for green apples. (Not sure if it’s giving me superhuman vision yet, but it sure is tasty.) With its creamy texture and comparable flavor to peanut butter, I figured I could put it to work in some of the other vehicles I’d normally use PB for…like cookies!


These Cashew Butter Oatmeal Cookies are a twist on the usual peanut butter oatmeal cookies. They’ve got the craveable crispy-on-the-outside, tender-on-the-inside you know and love in the best peanut butter oatmeal cookies, with a slightly different taste. I especially enjoyed the hint of salted caramel in the variety I used, but you can easily use any kind of cashew butter here.

I guess I’ve come full circle on my cashew butter journey. Now that I know a bit more about it and have used it in several ways, I’m all aboard on the nut train. And I’m pretty sure if you try these cookies, you will be, too.

Print Recipe
3.67 from 3 votes

Cashew Butter Oatmeal Cookies

Put a unique spin on the usual oatmeal cookies with cashew butter! These cookies have the crispy-on-the-outside, soft-on-the-inside texture you crave.
Prep Time10 mins
Cook Time12 mins
Servings: 2 dozen

Ingredients

  • 1/2 c. butter, softened
  • 1/2 c. cashew butter
  • 1/3 c. brown sugar
  • 1/2 c. white sugar
  • 1 tsp. vanilla extract
  • 1 egg
  • 1 1/2 c. old fashioned oats
  • 1/2 c. all-purpose flour
  • 1/2 tsp. baking soda
  • generous 1/4 tsp. salt
  • 1/2 tsp. cinnamon

Instructions

  • Preheat oven to 350 degrees and grease a large baking sheet with cooking spray.
  • In a large bowl, combine butter, cashew butter, brown sugar, white sugar, vanilla, and egg. Blend with a hand mixer until well mixed, 1-2 minutes.
  • Add oats, flour, baking soda, salt, and cinnamon. Mix by hand until combined.
  • Form into balls and drop onto greased baking sheet. Bake about 12 minutes until tops of cookies are set. Cool 10 minutes and store in an airtight container.

Notes


Maple Almond Latte

This Maple Almond Latte is a quick and easy way to turn an ordinary cup of coffee into something extra special!


I drink coffee every day, without fail. In fact, being a creature of habit of almost robot-level proportions, I’m a bit militant about it. Get up in the morning, go to the bathroom, brush my teeth (yes, before breakfast, I know it’s weird), make coffee. This is my essential morning routine. In fact, when my husband and I recently binge-watched our way through the TV series Alone, where contestants fend for themselves in the wilderness, living off the land for up to 100 days, I wasn’t thinking so much about how much I’d miss my family and friends if I were on the show. I was thinking: I could NOT go without coffee that long.

So it’s a little strange how little I seem to experiment with the stuff. I’m a drip-coffee-plus-creamer gal to my core.

Before I got tuned in to (mostly) healthy eating and ultimately became a nutritionist, I was no stranger to the Starbucks super-sized dessert disguised as coffee. Many of my college study sessions were fueled by grande brownie frappuccinos. (The only reason they weren’t venti is I was too poor.) Once I realized that I didn’t really want to drink so many calories, though, I gradually transitioned to my standard order of coffee plus cream, even at coffee shops. Now, I’d say I get it 90% of the time.

Then again, as a foodie, I can’t help the occasional experimentation with my favorite beverage. Especially with fall at least sort of on the horizon–it arrives in Phoenix around November 15th–hot coffee calls my name with increasing frequency. Maybe there’s more I could do with my same old, same old cup of drip coffee.

Yea, verily, there is. With just a few simple ingredients, this recipe for a Maple Almond Latte is proof that it doesn’t take special equipment or fancy add-ins to elevate a simple cup of coffee into something a little more special. And, bonus–it doesn’t take that much time, either.

The latte is made simply by pouring brewed coffee over maple syrup, then adding a bit of almond extract. Milk heated in the microwave and shaken turns into the frothy stuff of lattes you’d look for at Starbucks. Dust with cinnamon for added sensory experience and you’re all set. If you’re a fan of anything maple or almond, I think you’ll dig blending the two dreamy flavors together.

My favorite part? Drinking this aromatic latte doesn’t mean taking in a whole meal’s worth of calories, or a donut’s worth of sugar. At 96 calories, it’s the perfect slightly sweet drink to pair with an afternoon snack without filling you up well past dinner.

Print Recipe
4 from 1 vote

Maple Almond Latte

A coffeeshop quality drink (with half the calories) in just 5 minutes! Sweet maple and earthy almond flavors blend perfectly with coffee.
Prep Time5 mins
Servings: 1
Calories: 96kcal

Ingredients

  • 12 oz. brewed coffee (I used a dark roast)
  • 1 Tbsp. maple syrup
  • 1/3 c. 2% milk
  • 4 drops almond extract
  • cinnamon, to dust on top

Instructions

  • Brew coffee.
  • Wihle coffee brews, heat milk in a mason jar or other sealable container for 30-45 seconds until hot. Screw the lid on tightly and shake vigorously for 30 seconds or until milk gets frothy.
  • Pour maple syrup into a mug, then stir in coffee, frothed milk, and almond extract. Sprinkle with a bit of cinnamon, if desired.

Notes

A Love Letter to Food original recipe.

The Easiest Baked Brown Rice

The absolute easiest way to make brown rice! Baking makes for fluffy, no-mess rice.

If you had to name a food everyone can agree is healthy, you really couldn’t go wrong with brown rice. (Okay, unless you’re one of those people who think all grains are bad…which, for the record, has been disproven time and again.)

Brown rice is packed with fiber (3.5 grams per cup), protein (5 grams per cup), and important micronutrients like magnesium and selenium. It’s got a relatively low glycemic index of 50, meaning  it won’t spike your blood sugar. Plus, it’s pretty dang low calorie at about 215 cals per cup. It goes with just about everything, from casseroles to Mexican food to meat dishes.

Only trouble is, well, making it.

Seems like every time I try making brown rice on the stovetop, I end up with a sticky mess that hangs on to the bottom of my saucepan like grim death. I dread cleaning any pot that has touched brown rice.

What I never realized–until recently–is that there’s actually a much better way to get fluffy, chewy brown rice that doesn’t involve scraping burnt grains off the pot for an hour after dinner. How, you ask? By baking it!

I’ll ‘fess up and say I didn’t come up with this bright idea on my own. In fact, my moment of brown rice enlightenment actually came from my kids’ favorite cookbook, America’s Test Kitchen’s Complete Cookbook for Young Chefs. My 11-year-old son decided he wanted to try making baked brown rice, and it turned out to be totally easy enough for a preteen to manage without burning the house down. Essentially, all it takes is boiling some water in a kettle, then pouring it over grains in a baking dish (with a bit of butter, of course!). Cover and bake for an hour and you’re all set.

The beauty of this recipe is not only its simplicity, but the fact that it cooks the rice perfectly evenly–unlike the stovetop method, which can yield wet rice on top and crispy grains on the bottom. And, wonder of wonders, miracle of miracles, it doesn’t stick to the baking pan.

Look how easily it scoops! No sticking!

Since learning about this easy method, I’ve been making brown rice like a fiend, and I’m not sorry about it. It’s a versatile, healthy side dish I can always find a use for. I’ll never make brown rice on the stovetop again.

So tell me…am I just late to the game? Have you tried baking brown rice in the oven? Are you as enthused about it as I am?

Print Recipe
5 from 1 vote

The Easiest Baked Brown Rice

Baking brown rice makes for a fluffy finished product that won't stick to the pan!
Prep Time10 mins
Cook Time1 hr
Servings: 5

Ingredients

  • 1 1/2 c. brown rice
  • 1 Tbsp. butter
  • 2 1/3 water

Instructions

  • Preheat oven to 375 degrees. Spread brown rice in an 8 x 8-inch glass baking dish. Cut butter into small pieces and dot over rice.
  • In a kettle, bring water to a boil. Carefully pour over rice. Cover tightly with two sheets of aluminum foil.
  • Bake for 1 hour, uncover, fluff, and serve.

Notes

Adapted from America's Test Kitchen's Complete Cookbook for Young Chefs.

I Tried the Vitamix FC-50 FoodCycler Countertop Composter

Check out my honest review of the Vitamix FC-50 “FoodCycler” Countertop Composter!

I’ve probably mentioned this before, but as a food and nutrition writer, I often get offers to try out up-and-coming foods and food-related products. Sometimes these products are totally random, like keto-friendly Fruity Pebbles-like cereals or a skirt that somehow reduces muscle soreness after you work out. Sometimes they’re freebies that might be useful to someone else but that I don’t really use. (So. Many. Aprons.) And sometimes they’re just downright awesome.

Not long ago, I received an offer to try out the Vitamix FC-50 “FoodCycler”–a countertop composter that takes your kitchen scraps and turns them into usable fertilizer in just hours. I love having a garden, but since I have a black thumb and I more or less live on the surface of the sun (aka the Sonoran desert), my outdoor plants have been looking pretty sad for quite some time.

Exhibit A: Seems like some extra fertilizer could only do them good!

On the other hand, keeping up with traditional composting is, frankly, a hassle. You’ve got the smell of nasty old banana peels and slimy spinach wafting through your kitchen. And then there’s the issue of those intractable fruit flies. Gross. Although we have a compost bin in our backyard, the truth is, we hardly use it because of all the work it takes.

Enter this handy-dandy countertop appliance! Vitamix’s FC-50 FoodCycler purports to take some of the work out of doing your part for the planet (and your lovely garden). So how does it work, and is it worth the $400 price tag?

First up, a few specs: the FoodCycler is somewhat large, at about 14 inches tall by 12 deep by 10.5 wide. Yes, it should fit on your countertop, but it’s a pretty sizable box. It didn’t take long to set up, though, with just a few instructions for installing filters. After that, the little beast was ready to go.

Inside the black box, the setup is simple. A small bucket slides in and out of the box so you can set it nearby as you chop veggies for dinner, take the peel off an orange, or perform any other kitchen tasks that leave you with compostable odds and ends. Lately, when I’ve made salad or salsa, it’s been super handy to slide scraps into the bucket instead of into the trash.


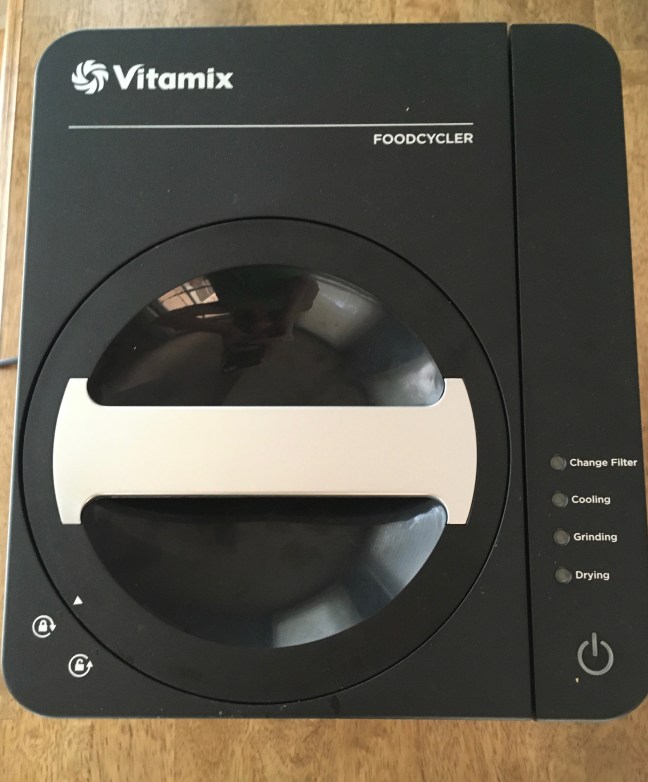
Once the bucket is full, starting the FoodCycler’s composting magic couldn’t be easier. Place the bucket back into the box, close the lid in the “lock” position, and–ready for it?–hit the power button.

Lock position at bottom left, power button at bottom right

Now all you have to do is wait. The FoodCycler takes three to eight hours to dry and churn your refuse into a pulverized, broken-down organic matter you can spread in your garden.  It’s literally like having a machine digest the food you’re not going to eat. (Or maybe I just think of it that way because I’m a nutritionist…)

For a visual, in a few hours, the machine turns this:

into this:

Literally this is what that batch of scraps turned into.

A few things to know about the FoodCycler

  • As the FoodCycler does its work, it’s a bit loud. I’d compare it to an unusually boisterous dishwasher.
  • There are certain foods you’re not supposed to put in the FoodCycler: high-sugar fruits, large animal bones, sauces (obviously), and a few other things.
  • The FoodCycler won’t turn your food scraps directly into soil, so don’t expect to open the lid and see lush brown dirt. Rather, you’ll get a dried mixture that should be ready to get sprinkled onto or mixed into soil.

Overall, even though the FoodCycler probably isn’t something I would have invested in on my own, I’ve totally enjoyed it! It’s great to know that our family’s unusable foodstuffs can be repurposed to grow the herbs and tomatoes in our backyard, rather than just get tossed out. If you’re into gardening, or if you find traditional composting as labor-intensive as I do, you’ll probably be very pleased with a FoodCycler.

Hope you enjoyed my Vitamix FC-50 FoodCycler Countertop Composter review! Let me know if you end up purchasing this unique little appliance, and what you think of it if you do.

Sweet Potato Kale Curry

This easy Sweet Potato and Kale Curry is packed with nutrients and just happens to be vegan!

Before I dive into telling you of the wonders of this Sweet Potato and Kale Curry, allow me to remind everyone that I am not a vegan—not even close. Though I do like to limit my meat consumption, especially red meat, it’s rare for me to eat a meal that’s totally vegan. Which is what always makes it surprising when a vegan dinner becomes one of my favorites…like this amazing recipe.

These days, in the throes of the coronavirus pandemic, I’m always looking for meals that are healthy and easy to pull together. With my kids home very day doing online school, I swear all they’re doing is sitting on laptops eating Sour Cream and Cheddar Ruffles (except for the times when I force them to go outside or run around the house a few times). And then there’s me. I’ll confess, my pandemic eating habits haven’t been stellar. With reduced activity and a dip in diet quality, I’m especially motivated lately to feed us all a healthy dinner.

This Sweet Potato and Kale Curry has been a particular lifesaver. It’s full of nutrients like vitamin A from sweet potatoes, vitamin K from kale, and fiber off the charts from the veggies and chickpeas. Not to mention, with minimal prep and about 18 minutes total cooking time, it’s a genuine 30 minute meal.

Now, this may sound well and good for health nuts who don’t mind flavorless food, but hold your peace until you’ve tried the coconut milk broth in this curry. Mild but rich, it’s the kind that makes you wish you’d made an entire separate batch just for sipping.

If you’re like me, I think you’ll find a little sweet potatoes and kale over rice will do your average pandemic dinnertime a world of good, whether you’re a vegan, a meat eater, or somewhere in between.

Sweet Potato and Kale Curry

Ready in 30 minutes, this easy vegan curry is a great choice for a healthy weeknight. Its coconut milk broth is especially delish!
Prep Time10 mins
Cook Time20 mins
Servings: 4

Ingredients

  • 1 Tbsp. vegetable oil
  • 1 Tbsp. minced fresh ginger
  • 2 cloves garlic, minced
  • 1 Tbsp. curry powder
  • 3 small or 2 medium sweet potatoes, peeled and diced into 1/2 inch pieces
  • 1 15-oz. can chickpeas, drained
  • 1 15-oz. full-fat coconut milk
  • 1/2 c. water
  • 1 tsp. salt
  • 1/4 tsp. black pepper
  • 5 c. torn kale leaves
  • 4 c. cooked jasmine rice

Instructions

  • Heat oil in a large non-stick skillet over medium heat. Add ginger and garlic and saute for about 2 minutes, until fragrant. Add curry powder and cook an additional minute.
  • Add diced sweet potatoes, chickpeas, coconut milk, water, salt, and pepper. Bring to a boil, cover, and reduce heat to a simmer. Simmer 15 minutes or until sweet potatoes are soft.
  • Add kale to the skillet and cook until wilted, about 2 minutes. Serve over cooked jasmine rice.

Notes

Adapted from The Kitchn.