
Author: Sarah
Almond Orange Streusel Coffee Cake
This Almond Orange Streusel Coffee Cake features the most delicious, crunchy, nutty streusel. It balances beautifully with the hints of orange throughout the cake.

Well, hello there! It’s been awhile since I’ve shared any new recipes on the site, but I’m back in blogging business because I’ve just made a recipe that’s TOTALLY worth putting out into the universe: Almond Orange Streusel Coffee Cake!
A little anecdote about the making of this delicious cake: My neighbor Renee, who is a good friend, just spent a month visiting her daughter in London. When Renee is gone, it’s almost like having my own mother out of town–she’s such a dear, caring friend I look to as a mentor-slash-mother-figure. So when she returned (and then I myself finally got back into town after the Today’s Dietitian Symposium in Savannah, Georgia), I really wanted to catch up.
Normally, the two of us would go for a walk around our neighborhood, but let’s be real, it’s 100 freaking degrees out in Mesa, AZ, so that’s pretty much off the table until November. Instead, I decided to whip up a yummy coffee cake so we could chat and nibble at the same time.
Funny enough, this recipe didn’t come from any favorite blog. Rather, it’s a riff on an ancient recipe from Great American Home Baking, one of those ’90s subscription recipe books. Much like the Columbia Record Company of bygone days, this cookbook was assembled over time vial mail with individual recipe cards. I remember baking from it back in my junior high years (including a very memorable accident where I forgot to bake the crust in a Baked Alaska pie). Anyway, though the cookbook was my mom’s, I somehow ended up with it. Believe it or not, I continue to use it, cheesy ’90s photos and all!
Even in all the years of use, I had never made this Almond Orange Streusel Cake, but I’m so glad I did. It was the perfect Sunday afternoon company kind of treat. It’s got the most perfect almondy crunch on top and spread throughout the cake, and the orange juice and zest adds a nice complexity of flavor and moist texture. Give it a try!
Almond Orange Streusel Coffee Cake
Just the thing for having company over on a Sunday afternoon! This cake features a crunchy almond streusel and hints of sweet orange throughout.
Prep Time25 mins
Cook Time35 mins
Servings: 12
Ingredients
For the streusel
- 1 c. packed brown sugar
- 1 c. slivered almonds, broken into smaller pieces
- 1/4 c. all-purpose flour
- 3 Tbsp. butter, melted
- 2 tsp. orange zest
For the cake
- 1/2 c. butter, softened
- 1/2 c. white sugar
- 3 large eggs
- 2 tsp. orange zest
- 1/2 tsp. vanilla extract
- 2 c. all-purpose flour
- 1 tsp. baking powder
- 1 tsp. baking soda
- 3/4 tsp. cinnamon
- 1/2 tsp. salt
- 2/3 c. orange juice
For the glaze
- 3/4 c. powdered sugar
- 1 Tbsp. orange juice
Instructions
Make the streusel
- In a medium bowl, mix together brown sugar, crushed slivered almonds, and flour. Add melted butter and orange zest and stir until a crumbly texture forms.
Make the cake
- Preheat the oven to 350 degrees and grease a 9- or 10-inch Bundt pan.
- In a large bowl, beat together the butter and sugar with a hand-held mixer until fluffy. Add the eggs one at a time and beat until combined. Mix in orange zest and vanilla extract.
- Add the flour, baking powder, baking soda, cinnamon, and salt and mix well. Pour in the orange juice and beat until just combined.
- Spread half the streusel mixture evenly in the bottom of the Bundt pan. Cover with half the batter. Sprinkle on the remaining half of the streusel batter and spoon on the remaining half of the cake batter.
- Bake in the preheated oven for about 32-35 minutes. Let cool completely before turning out onto a cake plate.
Make the glaze
- In a small bowl, combine powdered sugar and orange juice. Drizzle over the finished cake.
Notes
Adapted from Great American Home Baking.
Tour of Lundberg Family Rice Farm
I had the privilege of spending a full day on a tour of Lundberg Family Rice Farm in Richvale, CA. Here’s what I discovered about how this family-owned business takes rice from farm to table!

Hellooooooo again! It’s been a ridiculously long time since I’ve posted here on the blog and it’s good to be back. Life has ratcheted up from busy to bonkers as my freelance food and nutrition writing career has taken me in new directions.
One such direction: the opportunity to occasionally travel on press trips. Last week I had the chance to go to Chico, CA for an insider’s look at Lundberg Family Farms, the rice giant whose products you may know and love at Trader Joe’s, Whole Foods, and tons of other stores around the country. Owner Bryce Lundberg and his daughter Brita, along with several other members of the Lundberg family, graciously invited me and several other food writers on a day and a half of in-depth education about all things rice, rice cakes, rice syrup, and more. If you ever wanted to know, well, anything about the world’s most popular grain, they’re your folks. And now, to a much smaller degree, so am I.
Here’s a little bit about what I learned on my Rice 101 tour.
Kicking things off in a party bus
I’d be remiss if I didn’t start this post by mentioning possibly the coolest (and funniest) aspect of my time in Chico. To transport the six of us writers and two accompanying PR ladies around the Chico area, the Lundbergs chartered–wait for it–a party bus. As we climbed in to head to dinner the first evening, one of my fellow writers jokingly called it “the world’s most awkward bachelorette party,” since here we were, a group of total strangers piling onto a bus tricked out with neon lights and a mini bar.

But hey, but the end of our 36 hours together we got to know each other pretty well. We were practically like…
![]()
After a lovely dinner at The Red Tavern in Chico, which featured Lundberg mini rice cakes as part of a charcuterie board as well as some delicious black rice as the base for a cod entree, we headed back to the hotel to rest up for the day ahead.

Touring the farm
Our morning kicked off with an informative presentation about life on the rice farm–the company’s history as a pioneer in the organic farming movement, the fact that each season comes with different tasks and priorities, and how Lundberg is committed to providing a habitable environment for the waterfowl population of northern California, among other cool facts.

From there, we headed to the greenhouse, where one of Lundberg’s in-house botanists showed us the painstaking process of creating new rice varieties. Believe it or not, this is done by hand! The botanist carefully snips off the hulls of each rice grain in a “panicle” (AKA a “branch” of rice)–like the one below.

After snipping the rice grains open, the botanist pollinates each one with particles from a different breed of rice. The panicle gets covered for about 10 days and then, voila! a new breed is ready for planting.
Next up, we headed out to the rice fields for a two-part experience. We first had the chance to meander through a field that grows multiple rice types to snip off individual panicles, creating our own unique bouquet. Since Lundberg Farms grows a total of 17 types of rice and quinoa, from short-grain to long-grain and from white to red to black, it wasn’t hard to assemble an assortment with variations in color and texture.

Part two of the experience in the fields was participating in the harvest! October is rice harvesting season in northern California, and our small part to play (which I kept thinking would have absolutely thrilled my sons when they were little) was to ride in the big yellow combine as it threshed the heck out of the ripe rice grains.

The real surprise here: the inside of the combine was super cushy and comfortable. I had no idea modern combines have A/C and internal technology that practically looks like the inside of a military jet cockpit.

There was one more quick stop before lunch: a visit to the drying silos, where the rice is (you guessed it) dried and stored.

We even stepped inside one of the giant structures, but I must confess all I could think of was the scene in Witness where the villain gets killed from being trapped inside a silo as corn suffocates him. Still, wow! It’s a really impressive operation.

The Lundbergs then treated us to a lovely lunch at one of their homes overlooking the rice fields. Afterward, for a breather, we even spent an hour with a relaxing paint-and-sip guided paint activity! (No picture of this–I promise you don’t want to see my “art.”)

Finally it was time for the final stop of the tour: a walk-through of the rice cake production facility. Unfortunately, I didn’t bring my camera on this portion of the tour, but suffice it to say, it was super interesting, much like an episode of How It’s Made.

We watched rice cakes shuttle their way from blank canvases on the production line all the way to flavor-infused, prettily-packaged sleeves ready to hit store shelves. We also discovered that 95% of Lundberg’s waste goes to renewable uses and that they pay close attention to best practices for employee ergonomics.
To cap off the day, we were treated to a dinner of the most delicious arancini rice balls I’ve ever tasted, plus chicken over wild rice and a coconutty rice pudding for dessert. Yum!
As a whole, the day was a great way to experience farming up close and personal, and a meaningful reminder of the fact that food comes from real people working real land. And for me, it was meaningful relationship-building with a company whose values I respect and whose products I really enjoy.
Favorite Rice Recipes
Finally, I can’t finish things off without some favorite rice recipes of my own! If you’re looking for some tasty ways to use rice from Lundberg Family Farms (or any other brand), check out these options:
What’s in a Nutritionist’s Kitchen?
What’s in a nutritionist’s kitchen? Consider this your backstage pass.

Have you ever wondered exactly what your dentist does for his teeth or what regimen your glowing aesthetician uses on her skin? I know I have. And before I became a nutritionist, I really wondered what people in this profession actually ate. Dietitians and nutritionists are supposed to be the ultimate healthy eating gurus, right? So what do they actually stock in their pantries and make their meals with?
Now that I’ve been licensed as a nutritionist for almost five years (my anniversary is coming up on April 1st!), the tables have turned a bit. I can tell you that when I grocery shop, I often notice what people put in their carts. And, just like some folks might get a thrill from snooping through other people’s medicine cabinets or private drawers, I’m always curious to see what foods people have in their home kitchens.
On the flip side, I totally get it when people are interested to know what my family eats in the everyday. I’ll DEFINITELY admit that my own home pantry, fridge, and freezer are far from perfect (both in terms of their contents and their organization). But in the interest of transparency–and hopefully in the interest of education on real-world healthy eating–I thought I’d share *exactly* what goes on behind closed pantry doors at my house.
Ready? Let’s start the VIP backstage pass tour of a nutritionist’s kitchen. (I feel like there’s a reality show premise in here somewhere.)

Pantry
About a year ago, we finished a kitchen remodel that gave us tons of extra space–everywhere except the pantry. Whereas we used to have a walk-in pantry closet with a real door, now our dry goods are housed in more traditional pantry cabinets with pull-out drawers. Here’s a look.
Canned Goods

If you ask me, canned goods are where mealtime magic happens. They add flavor, they’re cheap, and they last forever. I almost always have canned tuna, chicken and vegetable broth, several varieties of beans, and spaghetti sauce on hand. Other usual suspects in my pantry are jarred veggies like artichokes, roasted red peppers, and olives.
Cereals

We’re not a huge cereal family, but when I do buy cereal, I like to look for brands that have limited sugar (like 8 grams per serving or less) and hopefully a hint of protein (like 3 grams or more).
Snack Drawer

Everyone needs a snack drawer! I try to fill ours with nutritious options that are high in fiber, protein, and/or healthy fats and relatively low in sugar. I also make a point not to get too many snacks in the ultra-processed category–aka artificial colors, lots of additives, and tons of sweetener. That’s why this drawer usually looks about like this. Nuts and seeds, dried fruits (if they’re not, like $800 at the store), whole grain crackers, and popcorn are pretty standard.
Grains

As you can see by now, my pantry isn’t the most pristine or well-ordered. (I warned you!) But I do at least try to keep pantry drawers organized by category, and this one is for grains–except for those lentils that snuck in.
As a nutrition professional, I take to heart the USDA’s recommendation to make at least half our grains whole. Hence the quinoa, oatmeal, and whole grain pastas you see here. Then again, having some refined grains on hand is A-ok with me. White rice, lasagna noodles, and pancake mix have their place in my pantry.
Baking Needs


Baking is therapy and you can’t tell me otherwise! I won’t go into too much detail here except to say that I’m a huge fan of King Arthur flour and buy it whenever I can. It’s an employee-owned company that makes never-bleached, American-grown wheat with a higher protein content than other brands. Need I say more?
Oils and Vinegars

In my pantry, olive oil is non-negotiable. It’s the ultimate healthy fat that works for everything. I use it in baking, cooking, roasting, sautéing, the works. Other go-to oils include vegetable, canola, sesame for Asian foods, and avocado for a splurge. Behind these oily giants I keep a variety of vinegars, like red wine, balsamic, and champagne.
Spice Cabinet

Like canned goods, herbs and spices jazz up meals for pennies (and not many calories). And, uh, yeah, I buy a lot of Kroger spices. I’ve almost never noticed a difference between them and more expensive name-brand herbs and spices.
Fridge


A few things that are always in my fridge:
- Yogurt
- Olive oil mayo
- Butter
- Lean meats and fish like chicken, salmon, and ground turkey
- Cheese (sliced and shredded)
- Deli meat (usually turkey or chicken but sometimes ham or roast beef)
- Milk and almond milk
- Natural coffee creamer like Chobani or Natural Bliss
- Nut butters (peanut and almond)
- Kombucha
- Fruits and veggies
- Salad dressings and mustards
- Eggs
- Hummus
- Wine
Freezer

Frozen foods get a bad rap, but done right, they can be a fabulously convenient part of a healthy diet. Some of my top frozen choices include:
- Frozen berries
- Frozen veggies like peas, corn, broccoli, and green beans
- Frozen meats
- Whole wheat bread (doesn’t have to be frozen, but it can help with shelf life)
And yes, that’s a package of Klondike bars underneath the banana cacao smoothie on the left. 😊
Deep Freezer

Our house came with a deep freezer when we bought it 11 years ago, and we have made good on the investment. Especially during Covid, having a deep freezer was a major help. I love stocking up on meats and fish when I find them at good prices, then popping them in the deep freezer for later use.
And, in case you were wondering, yes, nutritionists eat frozen pizza. At least, I do! The Private Selection salami and marinated peppers version in this pic is one of my absolute favorites.
Last Word
Okay, you might be wondering, what aren’t you showing? Not much! I occasionally buy ice cream or other sweets (if you’ve looked at this blog’s dessert page, you’ll know sweets are NOT off limits in my house). In general, though, my policy is to make most desserts from scratch. I prefer the freshness and quality of homemade treats, and since it takes effort to make them, it probably means we have them less often than if I stocked up on Oreos and candy each week.
So that’s it! A 360-degree look at my not-too-organized, mostly-but-not-entirely healthy food supply. Now tell me in the comments: What’s one thing YOU always stock in your kitchen?
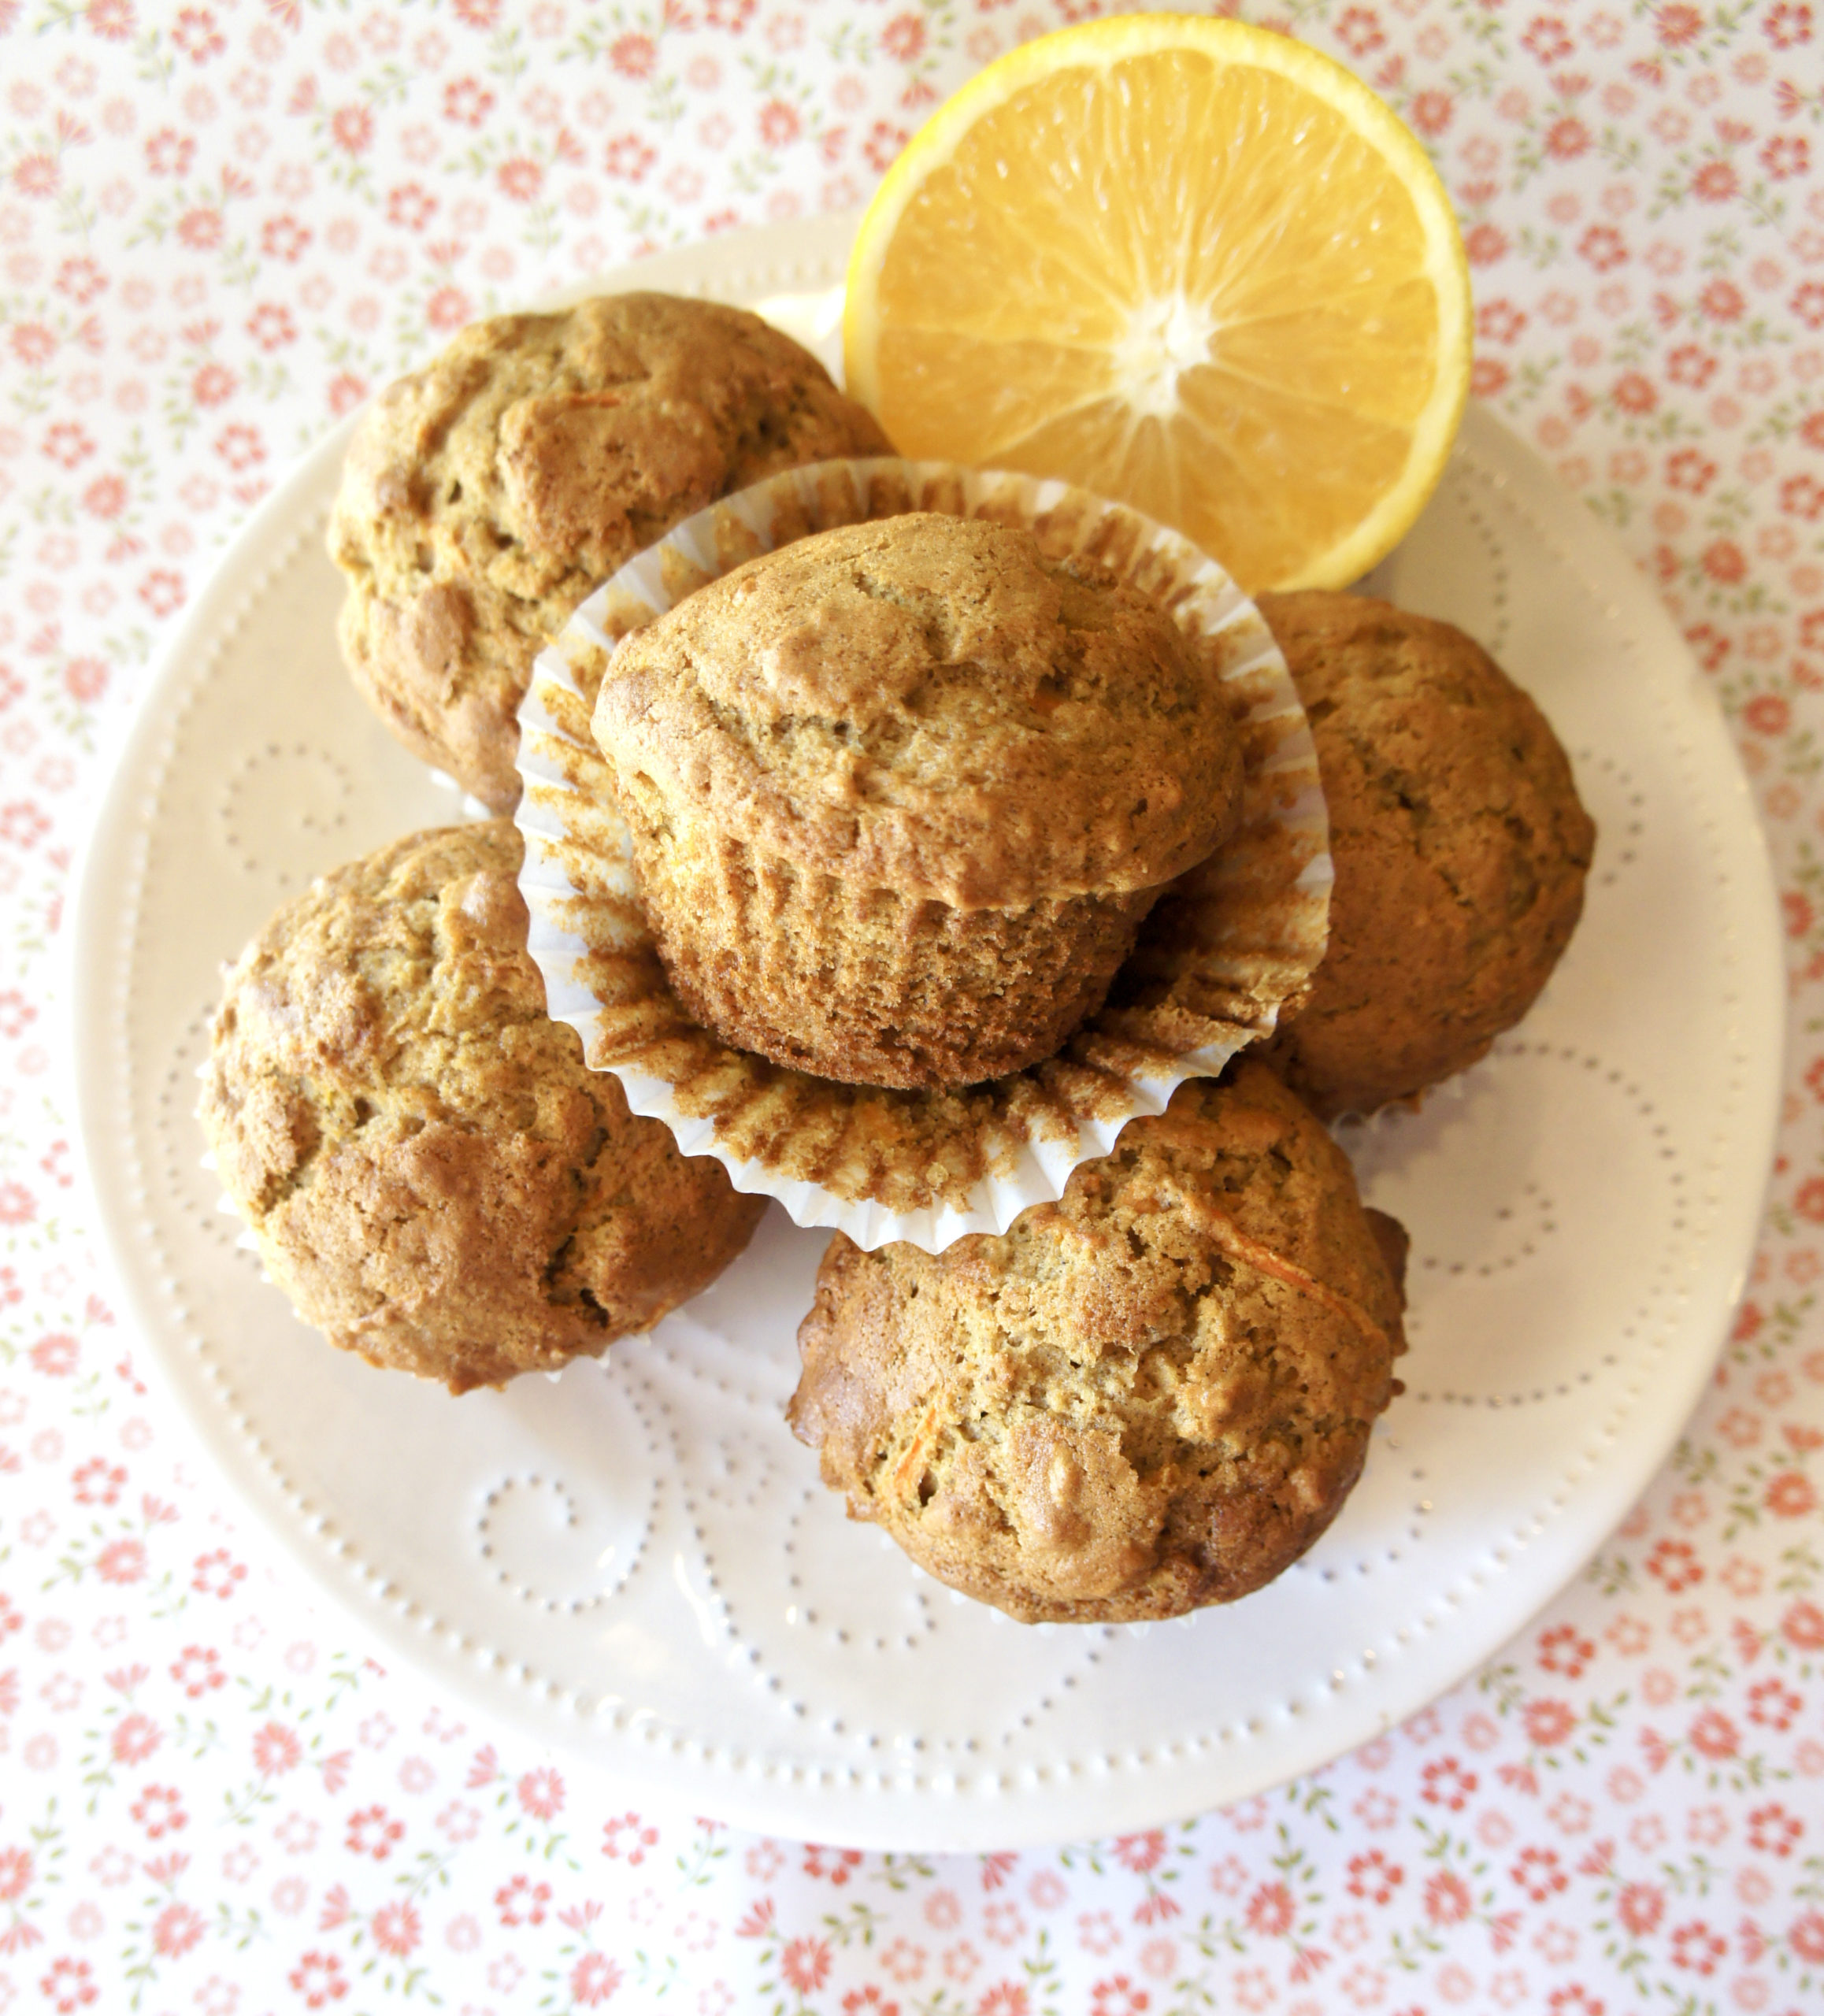
Spiced Orange Carrot Muffins
These Spiced Orange Carrot Muffins are crunchy on the outside and tender on the inside. A tasty winter breakfast treat!

Back in college, I hosted a Rainbow Foods Dinner Party. Each invitee was asked to provide a dish featuring a particular color for an ultimate Roy G. Biv spread. (Oh, and they were supposed to wear their color too!) There was a grape salad for purple, spinach soufflé for green, and maybe something with strawberries for red? It’s been awhile. All told, it was a goofy, fun, sorta random event–the stuff college memories are made of. Somewhere I have a picture of eight or so of my floormates dressed in chromatic order, each holding a tray of homemade food.
If I had to choose a single color of food to consume most often, though, I think I’d have to go with orange. I mean, you’ve got pumpkin, sweet potatoes, butternut squash, carrots, citrus fruits, orange bell peppers, and more. Even mac and cheese is orange, and who could live without that?

Choosing orange foods was something of the inspiration behind these Spiced Orange and Carrot Muffins, since orange foods have a tendency to be nutrient-dense. In fact, many orange foods are rich in beta-carotene, vitamin C, potassium, and antioxidants like lycopene, lutein, and zeaxanthin. At least, naturally orange foods have these nutrients. Can’t say the same for orange Sour Patch Kids or orange Jell-O.
Anyway, since I’m currently slightly under the weather, I wanted to bake up something for breakfast that would combine the healthy, vitamin-rich goodness of whole grains, fruits, and vegetables–and, not surprisingly, ended up with an orange finished product.
When it comes to baking, you really only have a short list of options for veggies (carrots, zucchini, um…are there others?) My go-to is almost always carrots. From there, which fruits complement carrots? Why, oranges, of course! And when you wrap it all up with cinnamon, ginger, cloves, and cardamom, plus whole wheat flour and oats, you get a muffin that’s not only orange-hued, but sooooo delicious.

These Spiced Orange and Carrot Muffins are a little heavy on the prep side (zesting and juicing an orange, shredding carrots, etc.) but definitely worth the effort. Fresh out of the oven, their tops are perfectly crunchy, giving way to a moist, tender crumb beneath. They’re not too sweet and their warming blend of spices make for a magical winter breakfast. Plus (fingers crossed), their ample nutrients could help you–and hopefully me, too–bounce back from winter illness.
Spiced Orange Carrot Muffins
With a slightly crunchy exterior and tender interior, these spiced orange carrot muffins are a yummy, not-too-sweet breakfast.
Prep Time25 mins
Cook Time20 mins
Servings: 12 muffins
Ingredients
- 1/2 c. old-fashioned oats
- 1 c. whole wheat flour
- 3/4 c. white whole wheat flour or all-purpose flour
- scant 1/2 tsp. salt
- 1 tsp. baking powder
- 1 tsp. baking soda
- 1 1/2 tsp. cinnamon
- 3/4 tsp. ground ginger
- 1/4 tsp. ground cloves
- 1/2 tsp. ground cardamom
- 2/3 c. brown sugar
- 3/4 c. fresh-squeezed orange juice
- 1/2 c. almond or other milk
- 2 eggs
- zest of 1 large orange
- 1 tsp. vanilla
- 1/2 c. vegetable oil
- 1 c. shredded carrots
Instructions
- Preheat oven to 400 degrees. Generously grease a 12-cup muffin tin.
- In a large bowl, combine the dry ingredients: oats, flours, salt, baking powder, baking soda, spices, and brown sugar.
- In a small bowl or large measuring cup, combin the wet ingredients: orange juice, almond milk, eggs, orange zest, vanilla, and vegetable oil.
- Add the wet ingredients to the dry, stirring until just incorporated, then stir in shredded carrots.
- Divid the batter evenly among prepared muffin cups. Bake 20 minutes. Cool and store in an airtight container.
Notes
Adapted from Table for Two Blog.
Butternut Squash Lasagna with No-Boil Noodles
A creamy, savory, oh-so-unique roasted butternut squash lasagna with no-boil noodles!

Hi hi! Happy belated Thanksgiving!
What was the best thing you ate over the weekend? I’d have to say my faves were these crispy honey mustard Brussels sprouts I took to the extended family feast or the classic can’t-go-wrong Libby’s pumpkin pie our immediate family devoured in a matter of hours.
When I asked my kids what their favorite Thanksgiving food had been, though, I bet you’ll never guess their answer.
Lasagna.
Lasagna at Thanksgiving, you ask? Wait, what?
In my husband’s New York Italian family, there is no occasion that doesn’t involve lasagna–including Thanksgiving. Every year his mom or grandma brings a giant tray of homemade lasagna, which, to former Brooklynites, is just as critical a part of the meal as the turkey. It’s a gooey, meaty, cheesy concoction that sticks to your ribs.
As for me, though I’ve been a part of the Garone family for 17 years (and of course I love lasagna), I can’t quite get into it as a Thanksgiving food. Something about red sauce and ground beef just doesn’t go with mashed potatoes and stuffing in my book. That said, I could get on board with a lasagna that incorporates Thanksgiving-esque flavors–like this roasted butternut squash lasagna with no-boil noodles! (And no shade on my mother-in-law’s lasagna. It really is delicious; just not my personal fave at Thanksgiving.)
This unique, fall-flavored lasagna starts out with roasted butternut squash sprinkled with garlic, shallots, and fresh thyme. Mash up this mixture for your savory filling, which contrasts nicely with a cooler, milder second filling of spinach and cheese. And though there are several steps involved in putting together this pasta masterpiece, no-boil noodles eliminate some time and effort.
If you’re looking for something a little different (but just right for fall), this is it!

Butternut Squash Lasagna with No-Boil Noodles
Spiced roasted butternut squash mingles with spinach and plenty of cheese in this creamy no-boil lasagna.
Prep Time40 mins
Cook Time50 mins
Servings: 6
Ingredients
- 8 c. butternut squash, cut into 1/2-inch cubes
- 1 Tbsp. olive oil
- 1/2 tsp. salt
- 1/2 tsp. pepper
- 1 medium shallot, diced
- 2 cloves garlic, minced
- 1 Tbsp. fresh thyme leaves
- 2 c. milk, divided
- 2 c. ricotta or cottage cheese, divided
- 1 egg
- 3 c. fresh spinach, chopped
- 2 1/4 c. shredded mozzarella cheese
- 9 wide no-boil lasagna noodles
- 1/2 c. grated Parmesan cheese
Instructions
- Preheat oven to 425 degrees. Spread cubed butternut squash on a large rimmed baking sheet, drizzle with olive oil, and sprinkle with salt and pepper. Stir. Roast 15 minutes, then add the shallot, garlic, and thyme and stir. Return to the oven and roast an additional 20 minute or until squash is soft.
- While squash roasts, prepare the spinach filling. In a medium bowl, combine 1/2 c. milk, 1 1/2 c. ricotta, egg, chopped spinach, and 1 3/4 c. mozzarella.
- Reduce oven temperature to 400 degrees. Place roasted squash mixture in a large bowl and mash until mostly smooth. Add 1/2 c. ricotta and 1/2 c. milk and stir well.
- Assemble the lasagna. In an 11 x 7 baking dish, spread about 1/2 c. spinach mixture. Cover with three lasagna noodles, followed by 1/3 of the squash mixture, then 1/2 the remaining spinach mixture. Repeat with another layer of noodles, 1/3 of the squash, and the last 1/2 of spinach. Finish off with three more noodles, the last of the squash mixture, and a final sprinkle of mozzarella and Parmesan.
- Cover the lasagna tightly with foil and bake 30 minutes. Remove foil and bake another 15 minutes. Let stand 10 minutes before slicing.
Notes
Adapted from Kristine's Kitchen Blog.