
Tag: Desserts
Almond Orange Streusel Coffee Cake
This Almond Orange Streusel Coffee Cake features the most delicious, crunchy, nutty streusel. It balances beautifully with the hints of orange throughout the cake.

Well, hello there! It’s been awhile since I’ve shared any new recipes on the site, but I’m back in blogging business because I’ve just made a recipe that’s TOTALLY worth putting out into the universe: Almond Orange Streusel Coffee Cake!
A little anecdote about the making of this delicious cake: My neighbor Renee, who is a good friend, just spent a month visiting her daughter in London. When Renee is gone, it’s almost like having my own mother out of town–she’s such a dear, caring friend I look to as a mentor-slash-mother-figure. So when she returned (and then I myself finally got back into town after the Today’s Dietitian Symposium in Savannah, Georgia), I really wanted to catch up.
Normally, the two of us would go for a walk around our neighborhood, but let’s be real, it’s 100 freaking degrees out in Mesa, AZ, so that’s pretty much off the table until November. Instead, I decided to whip up a yummy coffee cake so we could chat and nibble at the same time.
Funny enough, this recipe didn’t come from any favorite blog. Rather, it’s a riff on an ancient recipe from Great American Home Baking, one of those ’90s subscription recipe books. Much like the Columbia Record Company of bygone days, this cookbook was assembled over time vial mail with individual recipe cards. I remember baking from it back in my junior high years (including a very memorable accident where I forgot to bake the crust in a Baked Alaska pie). Anyway, though the cookbook was my mom’s, I somehow ended up with it. Believe it or not, I continue to use it, cheesy ’90s photos and all!
Even in all the years of use, I had never made this Almond Orange Streusel Cake, but I’m so glad I did. It was the perfect Sunday afternoon company kind of treat. It’s got the most perfect almondy crunch on top and spread throughout the cake, and the orange juice and zest adds a nice complexity of flavor and moist texture. Give it a try!
Almond Orange Streusel Coffee Cake
Just the thing for having company over on a Sunday afternoon! This cake features a crunchy almond streusel and hints of sweet orange throughout.
Prep Time25 mins
Cook Time35 mins
Servings: 12
Ingredients
For the streusel
- 1 c. packed brown sugar
- 1 c. slivered almonds, broken into smaller pieces
- 1/4 c. all-purpose flour
- 3 Tbsp. butter, melted
- 2 tsp. orange zest
For the cake
- 1/2 c. butter, softened
- 1/2 c. white sugar
- 3 large eggs
- 2 tsp. orange zest
- 1/2 tsp. vanilla extract
- 2 c. all-purpose flour
- 1 tsp. baking powder
- 1 tsp. baking soda
- 3/4 tsp. cinnamon
- 1/2 tsp. salt
- 2/3 c. orange juice
For the glaze
- 3/4 c. powdered sugar
- 1 Tbsp. orange juice
Instructions
Make the streusel
- In a medium bowl, mix together brown sugar, crushed slivered almonds, and flour. Add melted butter and orange zest and stir until a crumbly texture forms.
Make the cake
- Preheat the oven to 350 degrees and grease a 9- or 10-inch Bundt pan.
- In a large bowl, beat together the butter and sugar with a hand-held mixer until fluffy. Add the eggs one at a time and beat until combined. Mix in orange zest and vanilla extract.
- Add the flour, baking powder, baking soda, cinnamon, and salt and mix well. Pour in the orange juice and beat until just combined.
- Spread half the streusel mixture evenly in the bottom of the Bundt pan. Cover with half the batter. Sprinkle on the remaining half of the streusel batter and spoon on the remaining half of the cake batter.
- Bake in the preheated oven for about 32-35 minutes. Let cool completely before turning out onto a cake plate.
Make the glaze
- In a small bowl, combine powdered sugar and orange juice. Drizzle over the finished cake.
Notes
Adapted from Great American Home Baking.
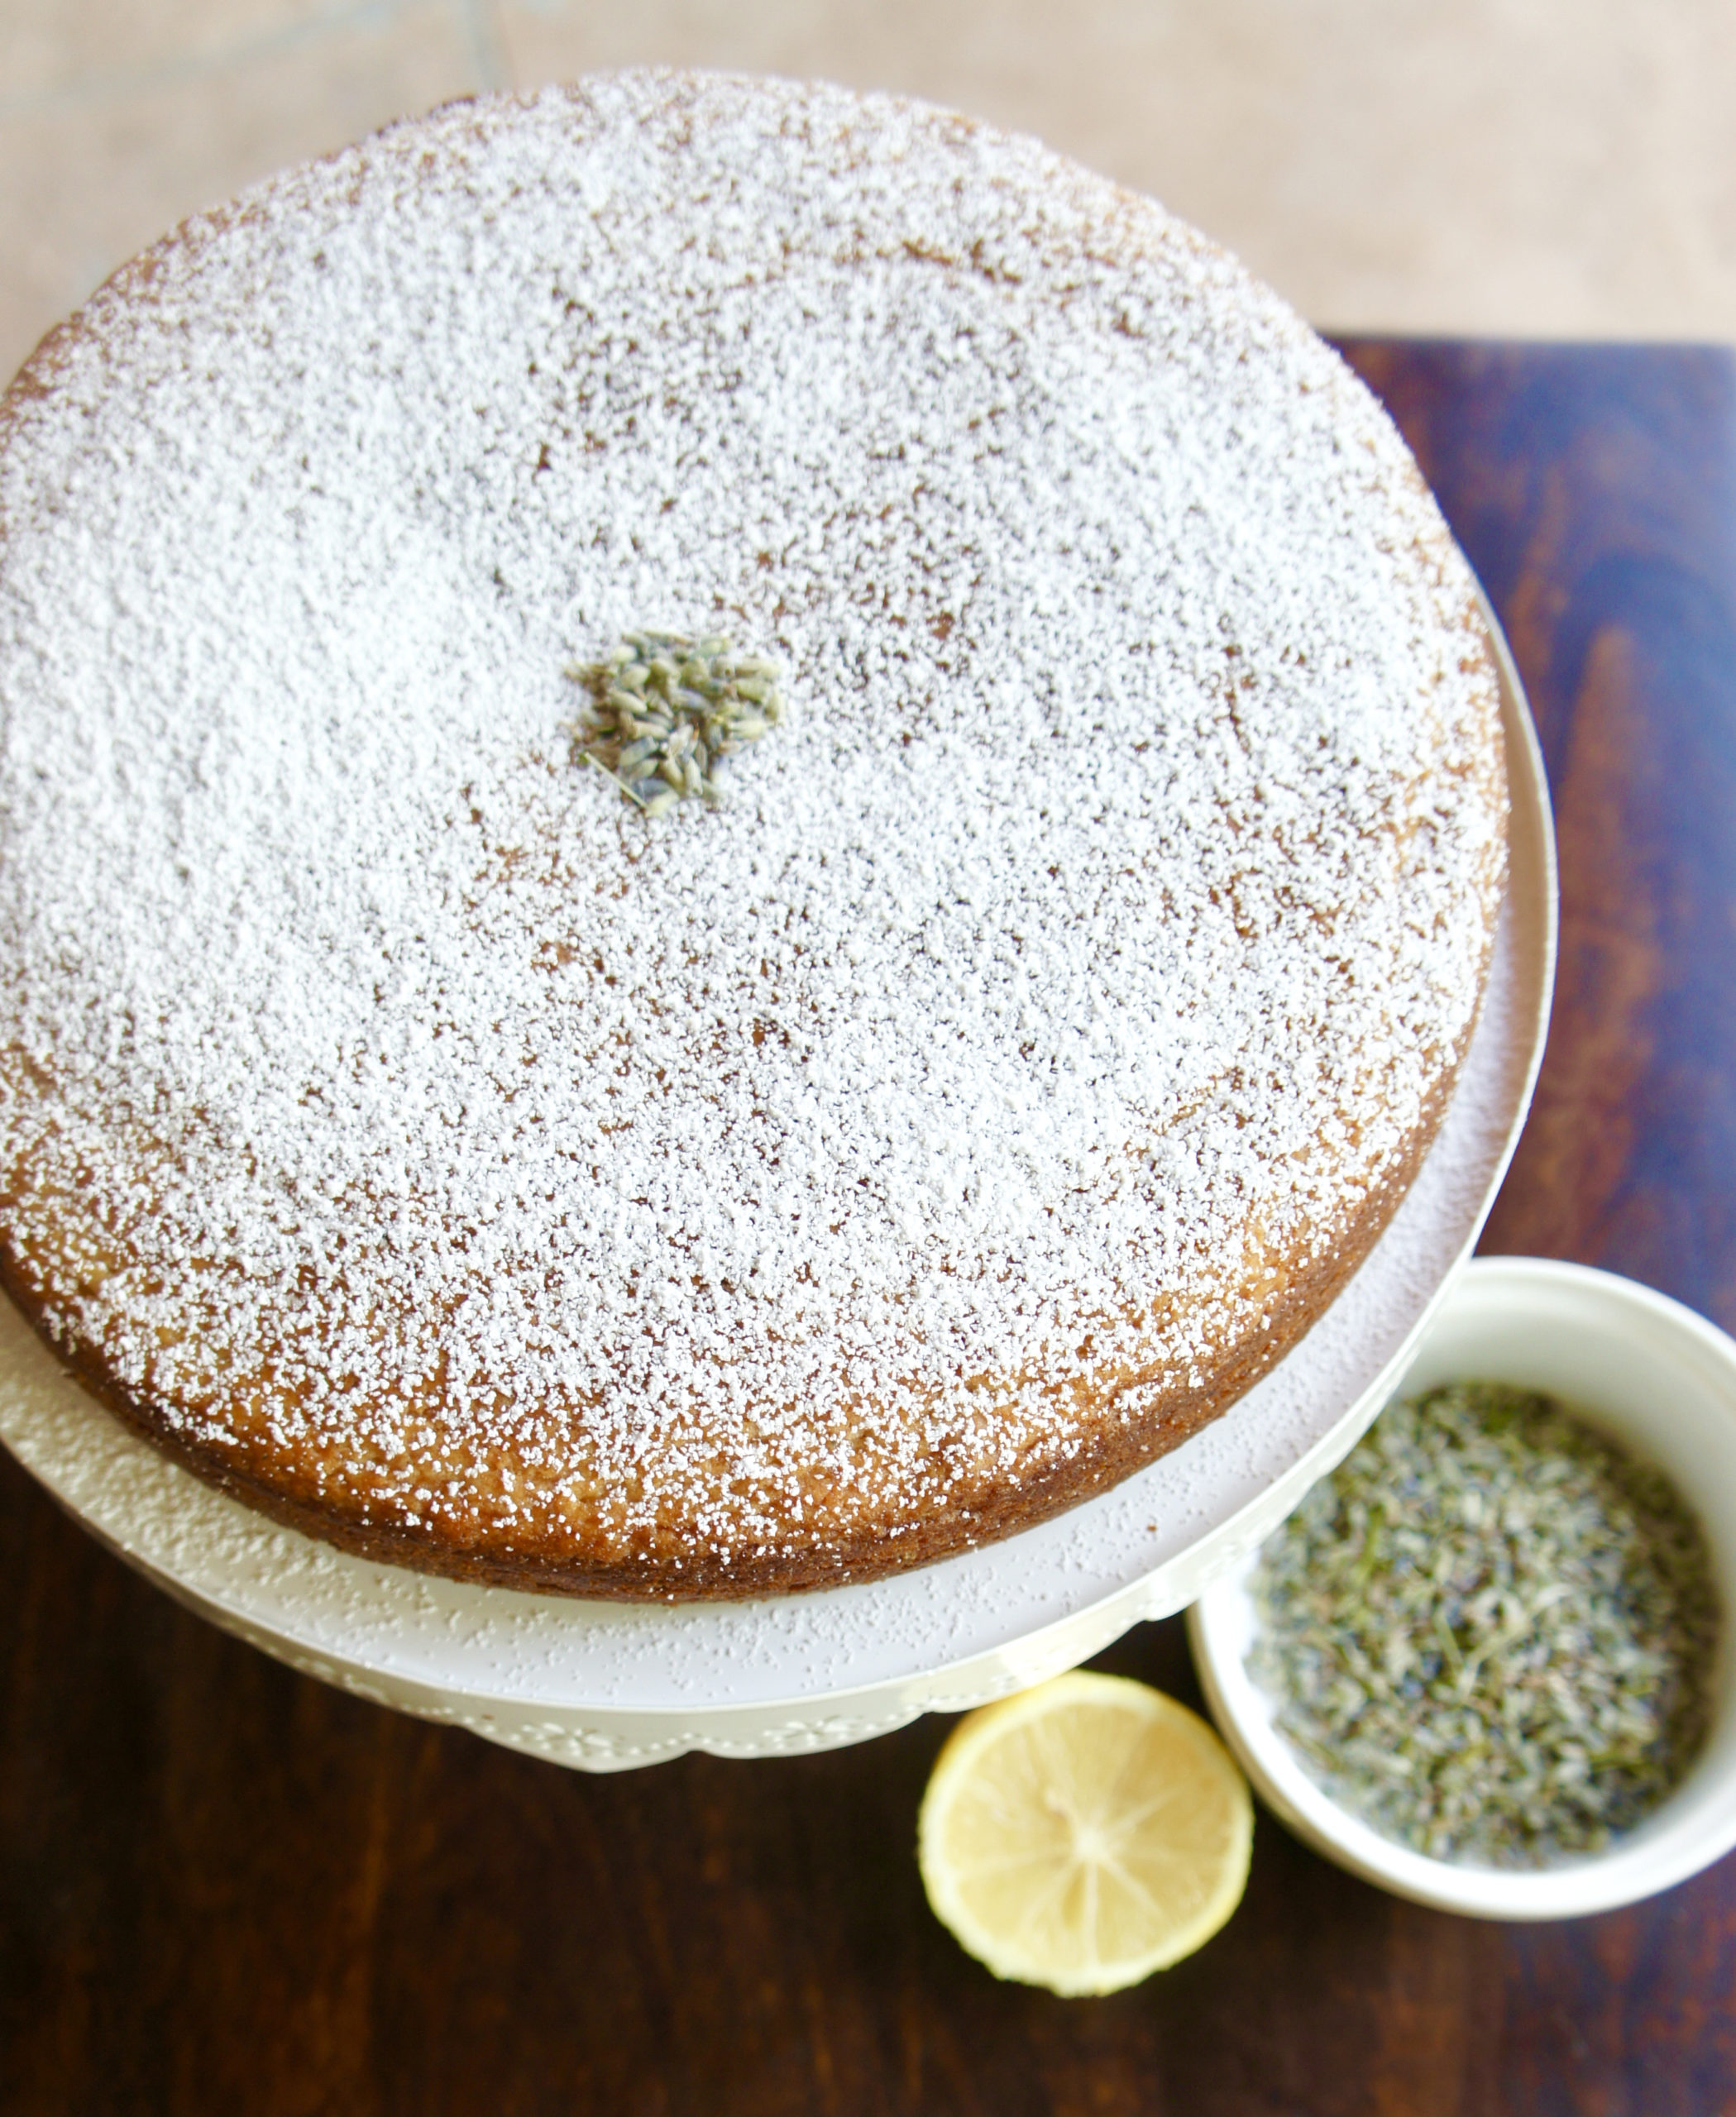
Lemon Lavender Cake
This moist lemon lavender cake has culinary lavender baked right in! Perfect for a bridal or baby shower, tea, or light afternoon sweet.

I’ve been a little obsessed with lavender lately. Like, lavender anything. Lavender tea, lavender essential oil, lavender pillow spray, and most definitely this lemon lavender cake.

It all started with a unique cocktail recipe I wanted to serve at my birthday party earlier this month: a blueberry lavender vodka spritzer. Hence, I headed to Amazon to purchase some culinary lavender…which of course arrived in a package large enough to last the rest of my natural life. (The cocktail, by the way, was delicious–not too sweet with an earthy undertone!)

In a strange twist of fate, I’ve also been having trouble sleeping lately AND, for work, was assigned to write an article about pillow sprays for better rest. So *obviously* I was going to have to investigate lavender as a remedy for insomnia. (Results pending…I’ve been trying out ThisWorks pillow spray. I so want it to work, but not bowled over just yet.)

Long story short, it’s a lavender-palooza up in here lately. And what with that giant bag of culinary lavender staring me down from the pantry shelf, I knew a baked good recipe had to been the pipeline. Something with lemon, perhaps? The bright tang of citrus sounded like the perfect foil for lavender’s more subtle, floral flavor.
I found this lemon lavender cake recipe over on Food52. What drew me to it was its simple list of Mediterranean diet-friendly ingredients. (I mean, okay, it has way more sugar than you’d find on a true Med diet, but at least you’ve got Greek yogurt and olive oil going for you here.) Besides calling for culinary lavender, this comes together with familiar baking basics you’re likely to have on hand. And after a quick whizz of the lavender and sugar in the food processor, this recipe is ultra-simple.
Since I’m a frosting-a-holic, I was convinced the cake was going to need frosting, or at least a scoop of vanilla ice cream to add richness, but was floored by how it stands alone as a moist, flavorful dessert. A dusting of powdered sugar is all it needs for finishing off.
With its pretty look and easy slice-ability, I’d say this one would be just right for a bridal or baby shower, afternoon tea, or any time that calls for something light, sweet, and absolutely unique.

Lemon Lavender Cake
This moist lemon lavender cake has culinary lavender baked right in! Perfect for a bridal or baby shower, tea, or light afternoon sweet.
Prep Time20 mins
Cook Time40 mins
Servings: 12
Ingredients
- 1 1/2 c. white sugar
- 3/4 tbsp. dried culinary lavender
- 1 1/2 c. all-purpose flour
- 1/2 tsp. baking soda
- 1/2 tsp. baking powder
- 1/4 tsp. salt
- 2 eggs
- 1 c. Greek yogurt
- 1/2 c. light olive oil
- zest from 1 lemon
- 1 tbsp. fresh lemon juice
- powdered sugar, for dusting
Instructions
- Preheat oven to 350 degrees. Line the bottom of a 9-inch springform pan with parchment paper and spray the sides with non-stick spray.
- In the bowl of a food processor, pulse the sugar and dried lavender until well mixed and the lavender has broken down.
- In a large bowl, mix flour, baking soda, baking powder, and salt. In a separate small bowl or large measuring cup, mix the eggs, yogurt, and olive oil. Make a well in the dry ingredients and pour in the wet, stirring to combine. Stir in the lemon zest and juice.
- Pour the batter into the prepared pan and bake about 40 minutes, or until the top is golden and springs back when pressed. Cool about 5 minutes, then remove from the springform pan and plate. Sprinkle with powdered sugar.
Notes
Adapted from Food52.
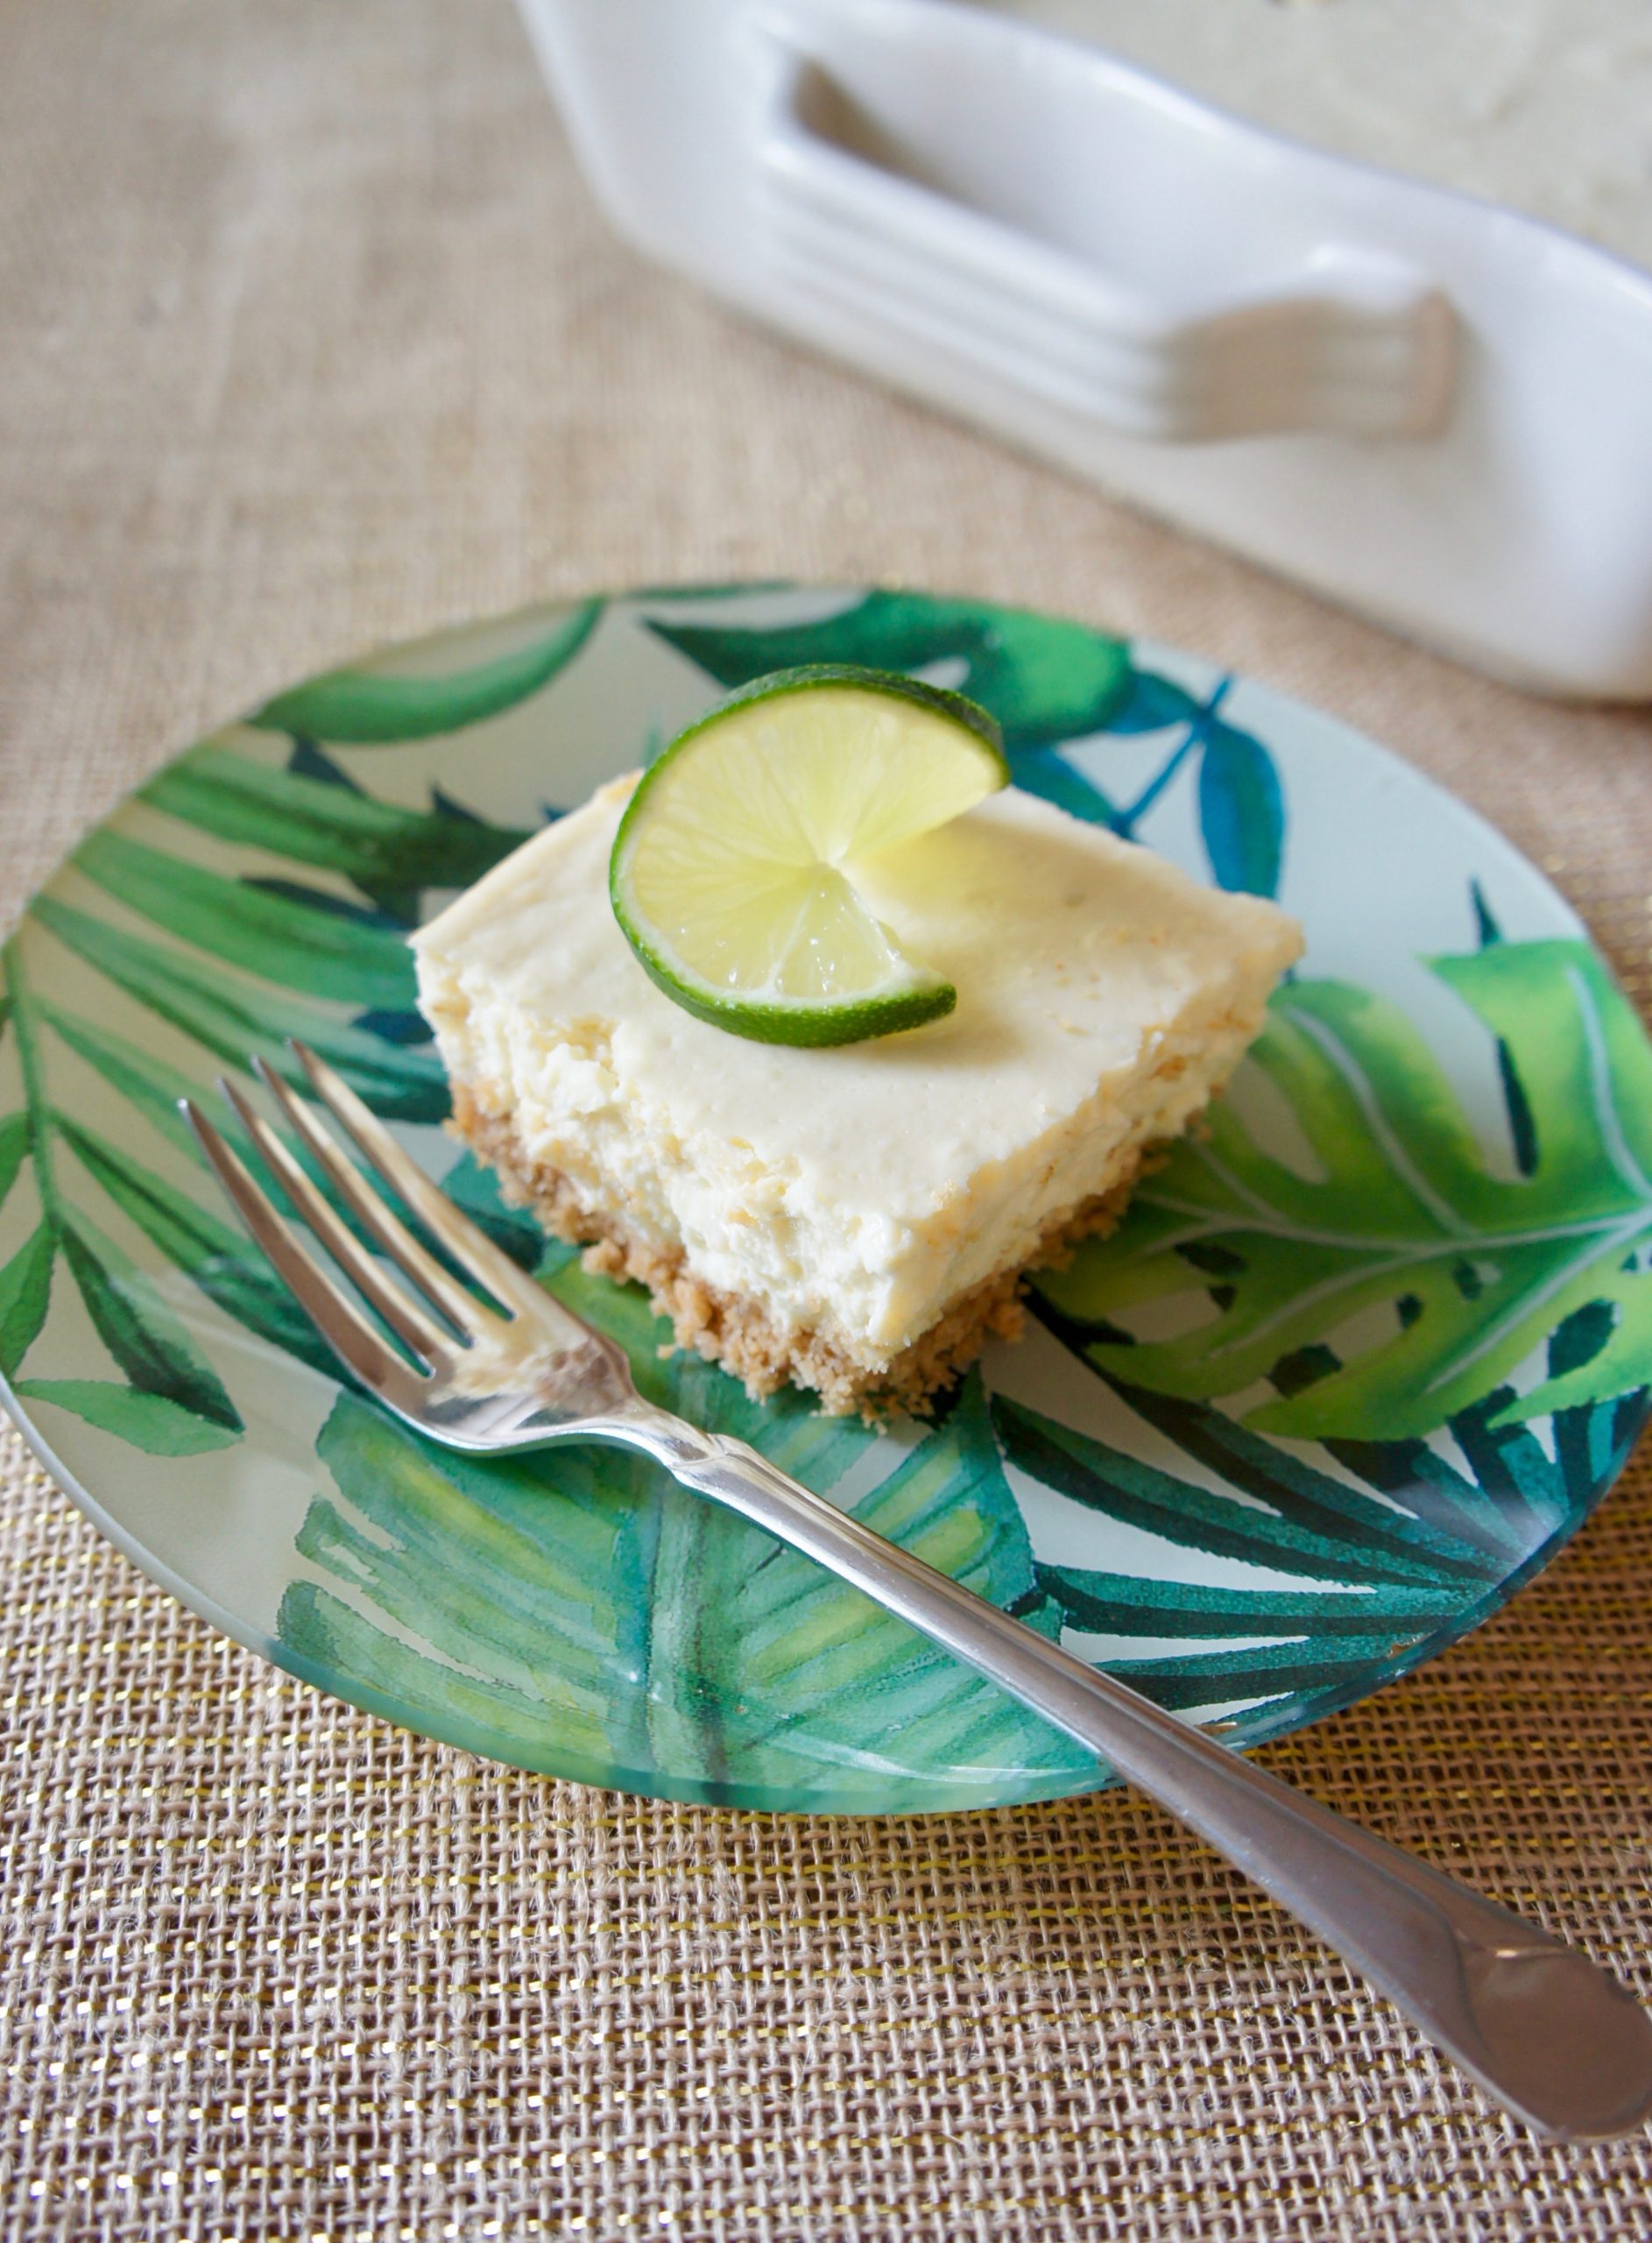
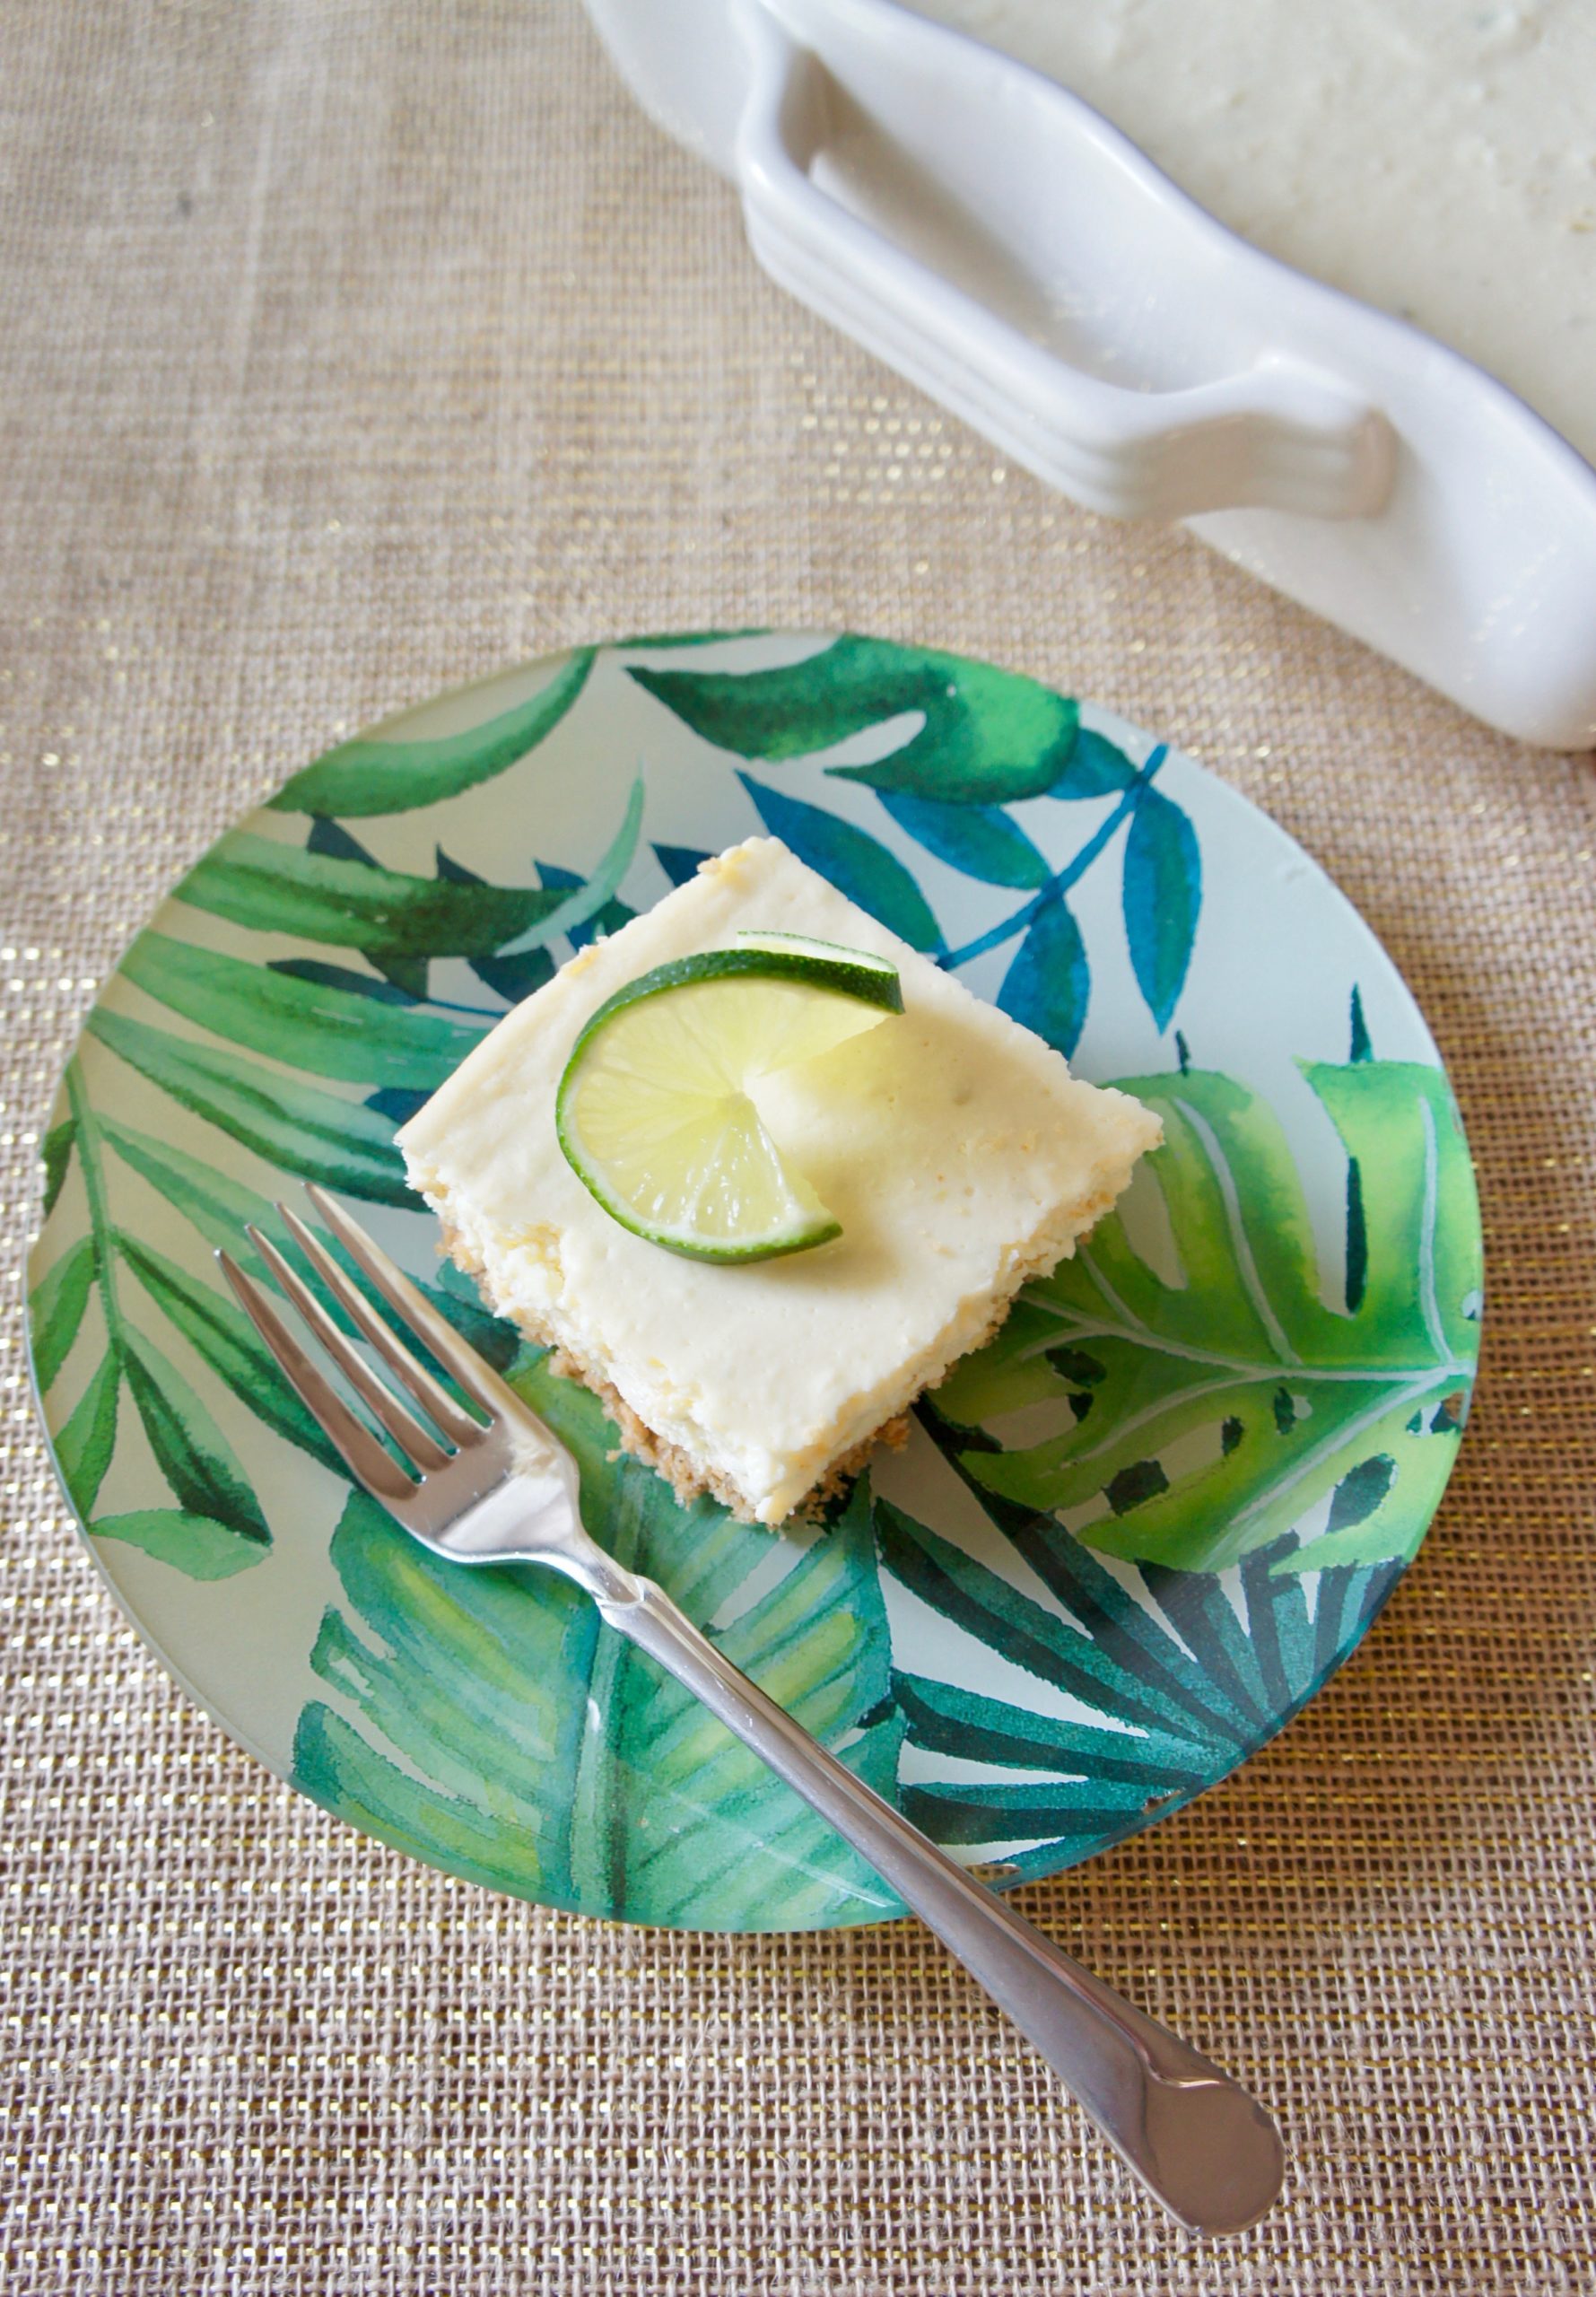
Lime Cheesecake Bars
A cool, creamy lime filling rests atop a thick layer of graham cracker crust in these delicious Lime Cheesecake Bars!
Having lived in Arizona for most of my life–93.5% of my life, to be exact, because I’m a nerd and was just calculated the percentage–I’m no stranger to Mexican food. Like, good Mexican food. None of this Swiss-cheese-on-a-burrito business I sometimes encountered while at college in the Chicago area. Good Mexican food to me means crispy tortilla shells, marinated meats with a zesty mix of the right spices, fresh veggies for the perfect salsa, and a hint of something cool and creamy to balance it all out. Like most Arizonans, I’m basically *always* in the mood for Mexican.
But there’s one perpetual problem I have when serving Mexican food to guests: what to make for dessert. There’s the usual flan or dulce de leche-flavored anything, but I find these can tire out pretty quickly. And as much as I love chocolate cookies or carrot cake, they just aren’t quite right after Mexican. So when my husband’s high school friend group was recently scheduled to join us for an evening of a Mexican dinner and movie night, I needed something appropriate for dessert.
With a bit of tinkering from a handful of other recipes, I was able to create these thick and creamy Lime Cheesecake Bars, which totally fit the bill! I think bright, peppy citrus always goes well with Mexican spices like cumin, chili powder, or oregano, and the combo of and more mellow cream cheese provides a satisfying coda to a spicy meal. I ended up serving these with my Veggie-ful Slow Cooker Chicken (which also feeds a crowd), plus chips and guac (a party prerequisite). Their graham cracker crust is extra thick–because thin lil’ slivers of crust are soooo disappointing–while the filling is the stuff of New York-style cheesecake dreams, but with a generous dose of lime flavor. And like many flavor-melding foods, these bars were even better the next day.
Of course, don’t let me stop you from enjoying Lime Cheesecake Bars with other cuisines (or all by themselves)! They’d be equally at home with Caribbean food, Creole food, or underneath a mountain of whipped cream. But in case you like Mexican…

Don’t miss more these south-of-the-border recipes to serve with Lime Cheesecake Bars!
- Dysfunctional family recipe salsa
- Vegetarian Mexican stuffed peppers
- 7-layer Mexican tortilla pie
- Loaded sweet potato nachos
- The best black bean burritos
Lime Cheesecake Bars
These bars are cool and creamy on top with a sturdy graham cracker crust. The hint of lime is just right for serving with a spicy dinner.
Servings: 18
Ingredients
- 3 1/2 c. graham cracker crumbs
- 2 Tbsp. white sugar
- 6 Tbsp. butter, melted
- 16 oz. cream cheese, softened
- 16 oz. Greek yogurt-cream cheese blend, softened
- 3 large eggs
- 2 14-oz. cans sweetened condensed milk
- 1 c. fresh-squeezed lime juice
- 2 Tbsp. lime zest
- whipped cream for garnish
Instructions
- Preheat oven to 350 degrees and grease a 9 x 13 inch baking dish with cooking spray.
- In a medium bowl, combine graham crackers, sugar, and melted butter. Press into the bottom of the prepared pan evenly. Bake 10 minutes.
- In a large bowl, beat all cream cheese until smooth. Add eggs and beat until smooth, then pour in sweetened condensed milk and lime juice and continue beating on low until no lumps remain. Stir or beat in lime zest until incorporated.
- Pour the cream cheese mixture over the graham cracker crust and smooth. Bake about 25 minutes or until filling is no longer jiggly. Let cool completely before slicing and garnish with whipped cream. Store in the refrigerator.
Notes
A Love Letter to Food Original Recipe
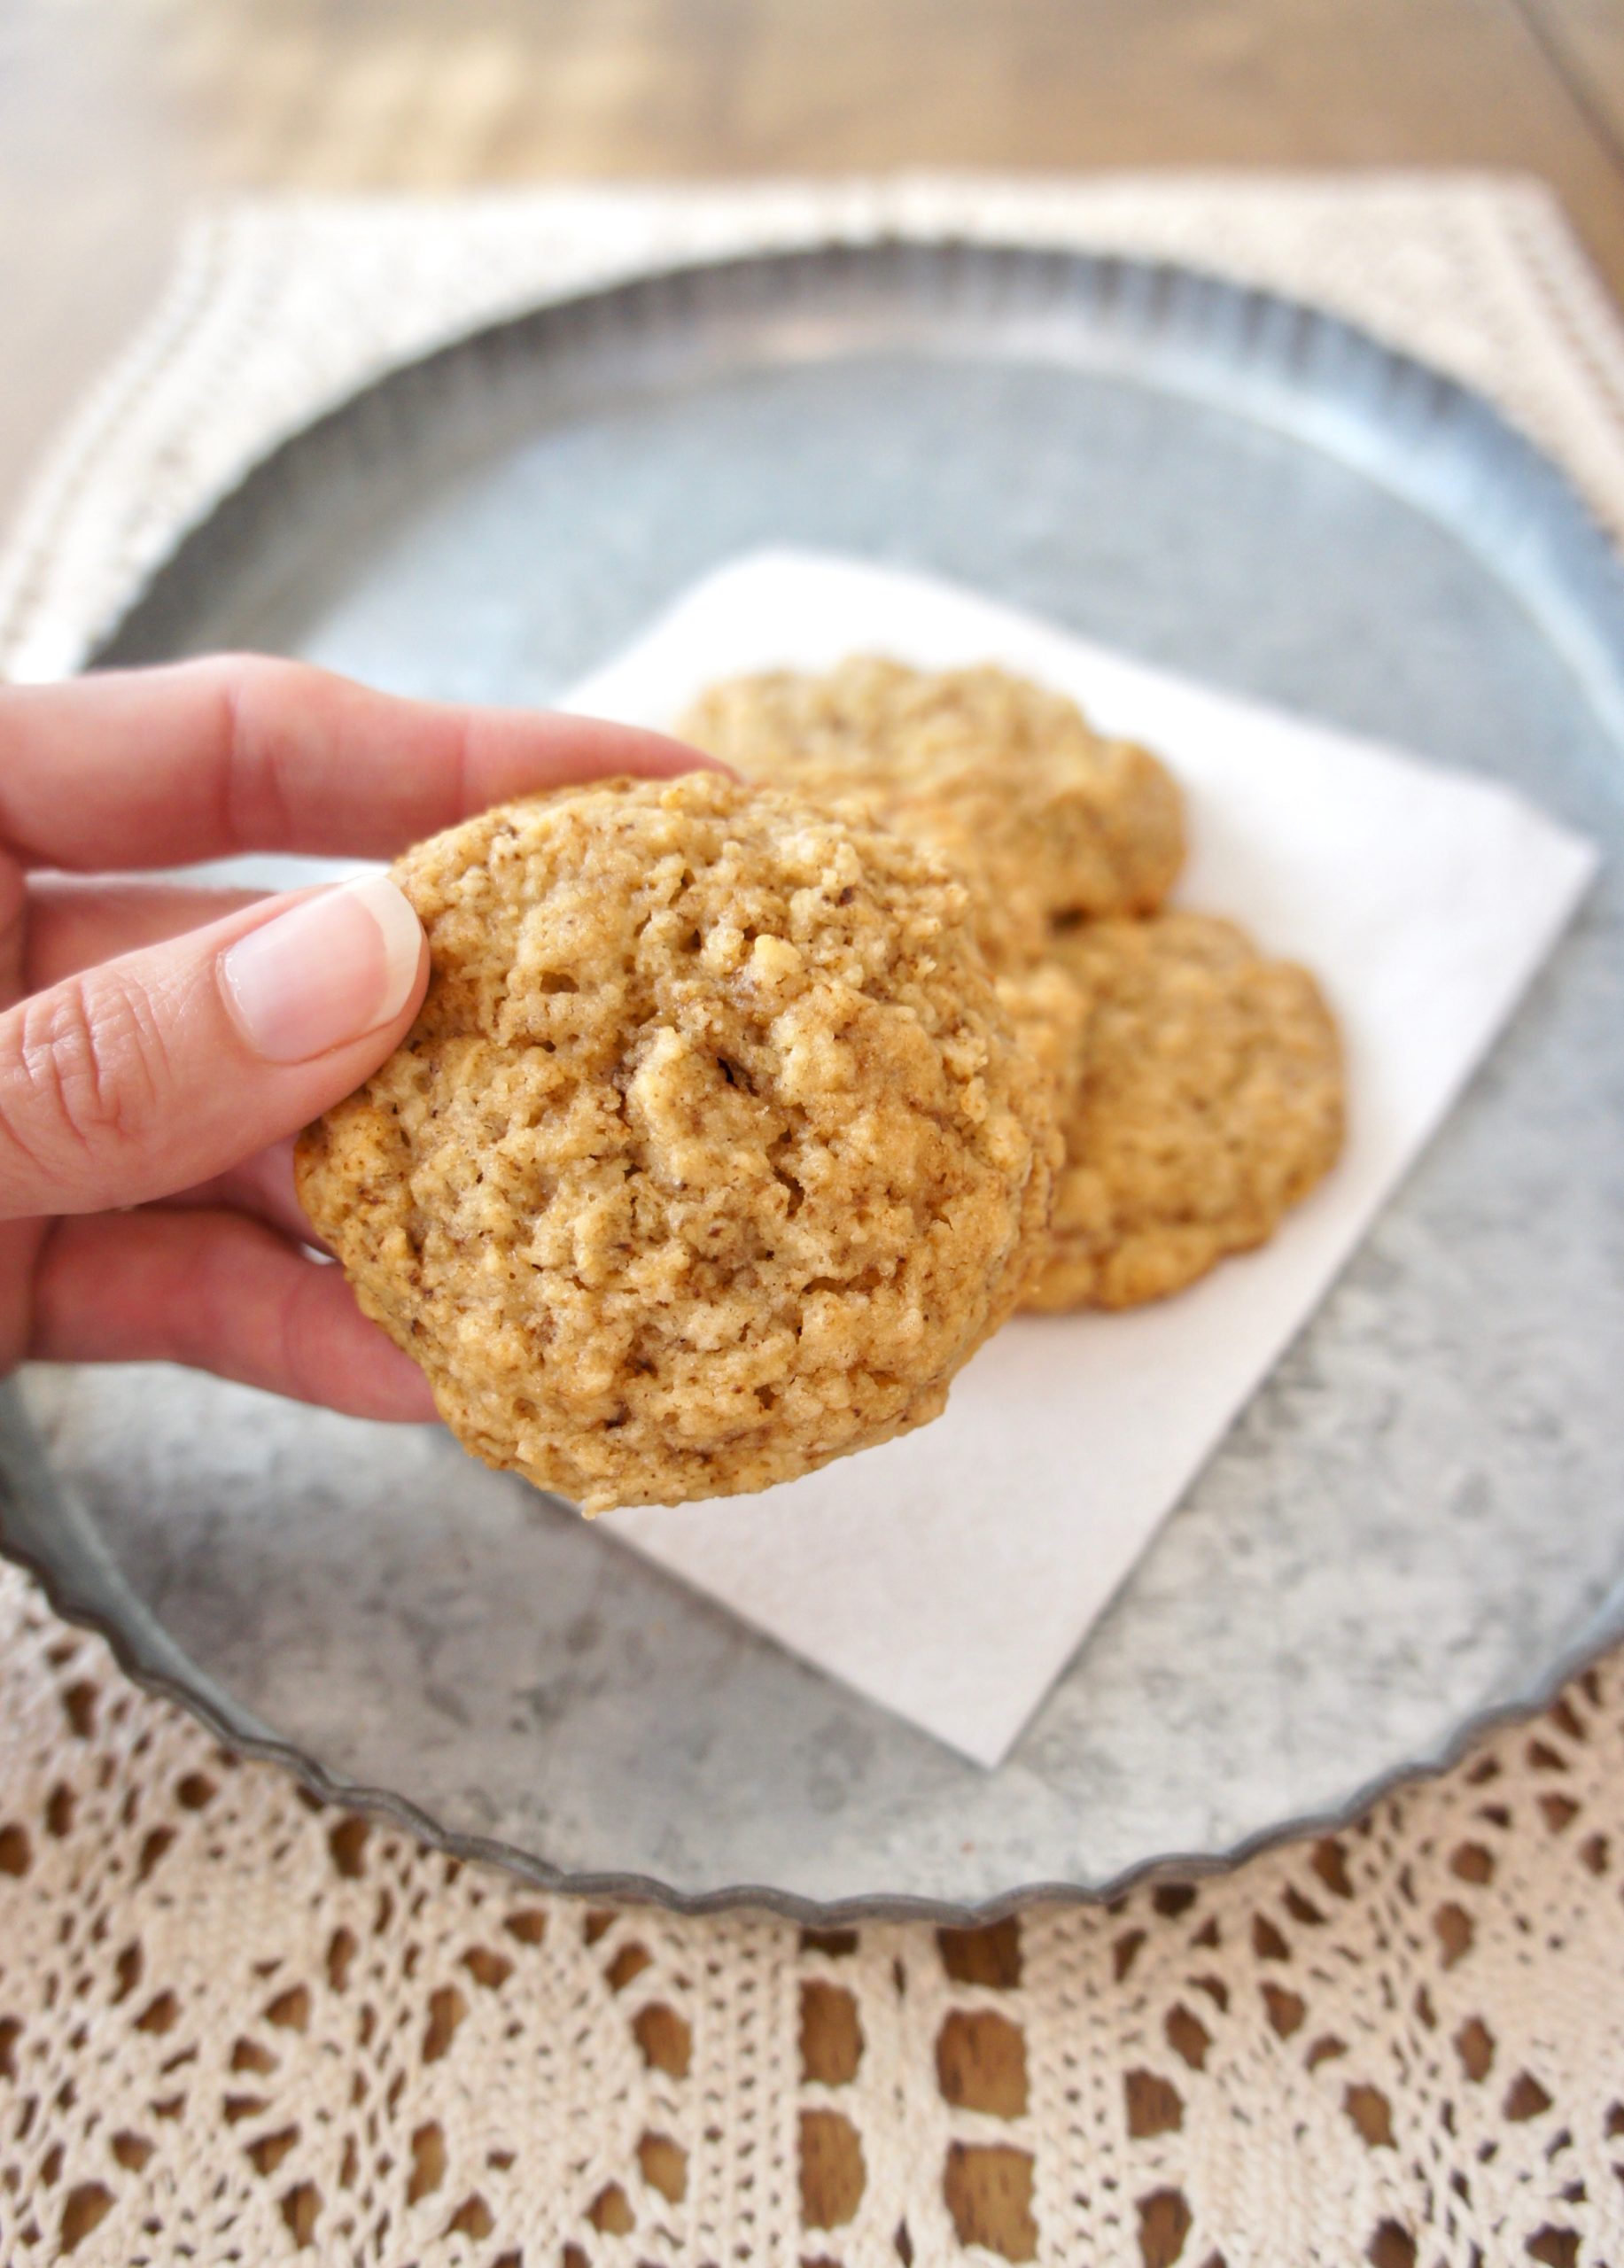
Espresso Sugar Cookies
Espresso Sugar Cookies are light and chewy, loaded with espresso flavor!

Nowhere is the phrase “necessity is the mother of invention” truer than in recipe development. And, for me, at no time is it truer than during Lent. These Espresso Sugar Cookies were born out of a little bit of culinary and spiritual necessity.
Let me explain.
In the 40 days of fasting, prayer, and almsgiving that we Catholics observe this time of year, it’s customary to make sacrifices that unite us with the sufferings of Jesus in some small way. It may sound lame or insignificant, but this year one of my sacrifices is giving up chocolate.
But mannnnn I want chocolate so. bad. every. day. I’ve had a few Reese’s pieces, which technically don’t contain any chocolate, but my husband claims that’s cheating. And hey, maybe having any sweets might be considered cheating, but for me, relinquishing chocolate for six weeks is sacrifice enough. I’m okay continuing to eat other, non-chocolatey dessert foods here and there.

That said, it’s kinda tough to find desserts I actually like that aren’t chocolate. In my efforts to scare up something a little bit like chocolate, but not chocolate, in the last nine days since Ash Wednesday, I thought I might turn to the flavor of coffee. After all, chocolate and coffee often pair together, and according to The Flavor Bible, they’re complementary tastes.
Plus, I happened to have some espresso powder hanging around from when I recently made this totally indulgent, craaaaazzy layer cake for a friend’s husband’s birthday. Why not give espresso powder a spin in non-chocolatey cookies?
Trouble is, almost every baked goods recipe on the internet that uses coffee also calls for chocolate. I mean, mocha is KING in cookies, pies, cakes, cheesecakes, and more. So it was up to me to create my own espresso sugar cookies! I’m so glad I did!
These cookies are chewy and light, with just a hint of crispiness around the edges. They taste like coffee, of course, but not in an overpowering way. They’re the perfect accompaniment to an afternoon or after-dinner cup of joe. Leaving chocolate out of the equation actually allows the espresso flavor to shine through all on its own.
So, believe it or not, I kinda love that these cookies don’t include any chocolate! Who’da thunk?

Espresso Sugar Cookies
Chewy and light, these espresso sugar cookies are perfect with a cup of coffee!
Prep Time15 mins
Servings: 18 cookies
Ingredients
- 1/2 c. butter, softened
- 1 1/4 c. white sugar
- 1 egg
- 1 tsp. vanilla extract
- 2 c. all-purpose flour
- 1 1/2 tsp. espresso powder
- 2 tsp. baking powder
- 1/4 tsp. salt
- 3-4 Tbsp. milk
Instructions
- Preheat oven to 375 degrees. Grease two cookie sheets.
- In a large bowl, cream together the butter and sugar. Add vanilla and egg and mix.
- Mix in flour, espresso powder, baking powder, and salt. Slowly add milk, t tablespoon at a time, and mix until the batter holds together but isn't visibly wet.
- Drop cookies by the tablespoonful onto the greased cookie sheets. Bake 12-14 minutes or until set. Store in an airtight container.
Notes
A Love Letter to Food original recipe.
Flourless Chocolate Hazelnut Cake
Even if you’re not gluten-free, you’ll love the rich, chocolatey flavor of this Flourless Chocolate Hazelnut Torte. Serve with fresh whipped cream!

Ready for Christmas yet? I’ll admit, even though it’s only three days away, I’m not exactly prepped for the big day. I still have a couple of gifts to buy and wrap and I’m still not 100% sure of my Christmas dinner menu. What can I say, it’s been a crazy year, right? (If there’s one upside to the Covid-19 pandemic, it’s the fact that we can all point to it as an excuse for just about anything…including not being ready for Christmas. At least that’s the story I’m sticking to.)
Even in the midst of this surreal year, I’m fortunate that my family’s Christmas won’t look too much different from our norm. We’ll celebrate Mass the afternoon of Christmas Eve, where I’ll be singing soprano in the choir (in the parking lot because #socialdistancing). Then we’ll go out to dinner at our favorite seafood restaurant, come home, and snuggle by a fire watching A Muppet Christmas Carol. Singing Muppets never get old.

However you’re celebrating the holidays this year, it’s entirely possible you’ll be eating with folks with food restrictions. (Or perhaps you have some yourself.) Among my own family and friends, I can count dozens of people who don’t eat one thing or another–and the most common no-no seems to be gluten. Fortunately, for those living the GF life, there are plenty of tasty ways to get around gluten, even when it comes to my favorite course of the holiday meal: dessert.
I made this gluten-free flourless chocolate hazelnut cake back at Thanksgiving for my GF sister-in-law–and, who am I kidding, for myself because it’s DELISH. It was definitely a hit among all the eaters gathered at my husband’s family’s holiday dinner. With 12 ounces of bittersweet chocolate, it’s super dense and rich, meaning a little bit goes a long way. I also love that it’s flavored with liqueur (chocolate liqueur or hazelnut, like Frangelico, does the job). Fresh whipped cream on the side is optional, but I’d say more or less necessary, as its fluffiness helps cut the cake’s rich texture.

Regardless of your food allergy or sensitivity status, this dessert is sure to please. Hazelnuts are, in my opinion, a totally underrated nut with plenty of fiber, magnesium, and vitamin B-6, plus a little iron. (And, yeah, ok, quite a bit of fat…but at least it’s mostly the healthy monounsaturated kind!) Besides, they’re always an excellent flavor match with chocolate. Check out their full nutrition facts here.
Wishing you a very merry Christmas filled with delicious food! Tell me if you make this Flourless Chocolate Hazelnut Cake as a last-minute dessert!
Flourless Chocolate Hazelnut Cake
This gluten-free dessert is nutty, chocolatey, and super rich! Serve with fresh whipped cream.
Ingredients
- 12 oz. 60% cacao bittersweet chocolate, chopped or chocolate chips
- 3/4 c. butter, cut into chunks
- 6 large eggs
- 1 c. packed light brown sugar
- 1/2 c. hazelnut or chocolate liqueur
- 1 c. hazelnuts, ground in the food processor
- 1 tsp. kosher salt
- Optional: Fresh whipped cream, for topping
Instructions
- Preheat to 350°F. Spray a 9-inch-diameter springform pan with cooking spray, then line bottom with a parchment paper round. Wrap the outside of pan tightly with 2 layers of heavy-duty foil.
- Combine chocolate and butter in a medium metal bowl or double boiler. Bring a small saucepan of water to a simmer and place the bowl on top. Whisk until the mixture is melted. Set aside.
- In a large bowl, whisk together eggs, brown sugar, chocolate or hazelnut liqueur. Whisk in the chocolate mixture until smooth, then stir in ground hazelnuts and salt.
- Pour the batter into the prepared springform pan. Fill a roasting pan halfway with boiling water and carefully place the pan in the center (so that water reaches about halfway up the sides of the springform pan). Tent the top of the springform pan loosely with foil and bake about 90 minutes. The top will still look shiny but should be dry to the touch.
- Remove the springform pan from the roasting pan and cool. Refrigerate about 3 hours before serving, then enjoy with fresh whipped cream!
Notes
Adapted from Epicurious.