Today I’d like to talk to you about a very important nutrition topic–one that affects each of us every day. It’s something near and dear to my heart and I can’t wait to share it with……
Not now, dear! I’m writing an important blog post! Now go and play like a nice child! I’ll be with you in a few minutes when I’m done telling my readers about the exciting topic of…….
Didn’t I just tell you to find something to do? What is so critical that you need my attention right this minute?
Ugh, no! Didn’t you just eat lunch an hour ago? Why have you been so constantly hungry ever since you’ve been home for the summer? I feel like I’m feeding you every ten minutes! Do you eat this often at school?
*Sigh…* All RIGHT. Let’s see, you already ate all the fruit in the house, and you’ve already had three bowls of cereal, and I don’t want you chowing down on unwholesome junk. How about these chewy peanut butter chocolate granola bars I made? Thankfully, they were super simple to make, and they’re nutrient-dense and not too sugary, just like a growing dinosaur needs. How does that sound?
Whew! Now where was I? It seems like there was some awesome nutrition topic I was going to write about, or maybe some great recipe? I can’t remember. With these dinosaurs home for the summer constantly needing to be fed, my blogging game just isn’t up to par. Oh, well. It’ll come to me.
Chewy Peanut Butter Chocolate Granola Bars (Adapted from Kristine’s Kitchen)
Ingredients:
2 c. old-fashioned oats (gluten-free, if necessary)
1/2 c. whole wheat flour
1/2 tsp. salt
1/2 tsp. cinnamon
2 Tbsp. butter, melted
1/3 c. peanut butter
1/2 c. applesauce
1/4 c. honey
1 tsp. vanilla extract
1/2 c. chocolate chips
Directions:
Preheat oven to 350 degrees. Grease the bottom of an 8 x 8 inch glass dish, or line with parchment paper.
In a large bowl, combine oats, whole wheat flour, salt, and cinnamon.
In a smaller bowl, whisk together melted butter, peanut butter, applesauce, honey, and vanilla.
Add wet ingredients to dry ingredients and stir to incorporate. Mix in chocolate chips.
Spread the mixture evenly in the bottom of the prepared pan. Bake 25-35 minutes. Let cool completely before slicing into bars. Store in an airtight container.
If you’ve never heard of a SNAP Challenge, you might logically be thinking it’s some kind of competition where folks get together to see who has the best snapping skills. (“Good thumb strength, adequate form. I give it a 9.2.”) At least, that’s what I probably would have thought a few weeks ago. As it turns out, though, a SNAP Challenge involves taking a week to live on the same amount of grocery money as someone on food stamps, now known as the Supplemental Nutrition Assistance Program (SNAP). For this summer’s community nutrition rotation of my dietetic internship, as a way to identify with the low-income population I am serving, I was assigned to participate in this challenge. This meant trying to eat only what $31 could buy for seven days. And whoa. It was tough. But as a result, I learned more than I ever expected, from the basic experience of how difficult it is to stretch such a limited food budget to philosophical meditations on food and personal well-being. So here goes a bit about my week and a run-down of my thoughts post-SNAP.
The picture at the very top of this post shows my week’s haul for $29.90, as this receipt reflects. Before the week started, I did some pre-planning to make sure I had enough ingredients for breakfasts, lunches, and dinners. (But holy crap, could I have bought any more carbs? Bread, tortillas, waffles, pasta, and brownies? After a week, you could break off a piece of me and it would crumble into flour. Looking back, I could have thought that through a little better. I also could have chosen some healthier items than chips and brownies. Caught red-handed!) There were some guidelines I established for myself, too, which an outside observer might call “all the ways Sarah cheated.” I figured that, to be realistic, unless you’re a refugee from another country, fleeing a domestic violence situation, or outright homeless, many people on SNAP benefits have some basic pantry items at their disposal. With this assumption, I allowed myself a few small extras, up to about a half cup. This included some vegetable oil, some flour, some butter, and a few spices. I also chose not to include my morning coffee in the budget, for the sake of my sanity and the safety of my children. Lastly, I decided that if someone offered me free food, I would take it, because if I’m on food stamps, you better believe I’m taking free meals.
I started on a Sunday at lunchtime and finished the following Sunday at breakfast, so as to do 21 meals. If you’re curious, here are the particulars of the meals I ended up eating:
SUNDAY
Lunch: What a way to start off my week–I got ragingly sick! In a way, I guess you could say it was good timing…because I didn’t even end up eating lunch on this day, thereby saving the food I would have eaten. Lucky me?
Dinner: Peanut butter on toast. (Still sick.)
MONDAY:
Breakfast: 2 toaster waffles with Greek yogurt and strawberries.
Lunch: Unexpectedly got a free lunch at my internship–score!
Dinner: Ate the lunch I had packed for work that day: an egg and cheese sandwich, potato chips, and grapes.
TUESDAY:
Breakfast: Bless me, SNAP Challenge, for I have sinned–I cheated already. (Minus 5,000 points!!) I foolishly made one of my favorite breakfasts for my family–peach almond baked oatmeal–and failed to resist the temptation. I did calculate, however, that the portion I ate cost 87 cents, so you can add that to my grocery bill of $29.90 and I still squeak in under the $31 mark.
Lunch: Peanut butter and jelly sandwich, chips, grapes.
Dinner: Chili and some cheese curds I got for free at a Dairy Council presentation that evening.
WEDNESDAY:
Breakfast: 2 waffles, Greek yogurt, strawberries.
Lunch: Leftover chili topped with cheese, grapes, brownie.
Dinner: Spaghetti with homemade tomato sauce using tomatoes and basil from our garden.
Thank goodness for our garden!
THURSDAY:
Breakfast: Toast with grape jelly.
Lunch: 2 open-faced egg sandwiches with cheese, strawberries, banana.
Dinner: I was literally about to dig in to my third bowl of chili in three days when my son piped up next to me, “I love chili! Can I trade with you?” Call it cheating if you will, but I said yes and ate his chicken, roasted potatoes, and carrots while he ate my chili.
FRIDAY:
Breakfast: Waffles with yogurt.
Lunch: Peanut butter and jelly sandwich, fruit, brownie.
Snack: Smoothie of Greek yogurt, banana, and strawberries.
Breakfast: Toast with cinnamon sugar (one of the extras I allowed myself–my guess is I used 25 cents’ worth).
Mid-morning: Cheated and had a tall Starbucks coffee.
Lunch: Leftover zucchini fritters and potatoes.
Dinner: A friend bought me dinner this evening–yep, I’ll take it!
SUNDAY:
Breakfast: Toast with grape jelly, eggs with cheese.
Here’s what was left at the end of the experiment. I didn’t use the tortillas at all (fed them to my kids instead) or the black beans and had portions of all these other items left. I’d guess I used all but about $6-7 worth of my original $31:
WHAT I LEARNED………..
1. PREPAREDNESS
As I reflect on the past week, I can’t help but think of an analogy from childbirth. When I had my first baby, I remember approaching labor and delivery thinking, “I’d like to do it naturally! Maybe I’ll just give it a try and see what happens!” HA. HA. Like every other woman who has ever said that, I was pretty much a GET ME THAT EPIDURAL NOOOOOOOWWWWW hot mess immediately after contractions started. By my third child, however, I realized that doing natural childbirth successfully requires lots of preparation. For months I meditated, made an ambient playlist, and established a headspace that allowed me to go drug-free for my daughter’s birth. A SNAP Challenge is a lot like that. If you go into it blindly, like, “Hey, I’ll just get creative! Maybe this’ll be fun!” it’s not gonna happen. To actually eat on $31 for a week takes extreme preparedness and forethought (if you don’t want to be eating THIS twice a day):
As an individual on SNAP, you also have to plan for things like fresh berries going bad faster than you can eat them, or how you’re going to use leftover odds and ends to make the most of your supply. Which leads me to…
2. STRENGTH IN NUMBERS
Having done this experiment on my own, I can guarantee you it would have been easier if I could have included my family in my meal planning. Grocery store items–well, cheap grocery store items–are not ideally suited for one-person meals for one week. There’s no way I was going to get through an entire container of grape jelly in a week, for example, but if I wanted it for PBJs, I had to buy the whole thing. Also, as someone who got married right out of college, I am at a loss as for how to cook for just myself. So that was tricky.
3. MONOTONY
Life on food stamps is undoubtedly monotonous. Chili several times in a week? Check. Peanut butter and jelly comin’ atcha again? Check. Variety costs money.
4. FOOD AS UTILITY
When it’s Saturday lunch of a food stamp week that started on Sunday, that meal is not about what you want to eat, it’s about what you have to eat. This experiment really put me in touch with the visceral sense of food as fuel, rather than food as pleasure. Only in the last century and a half or so have we become affluent enough and time-surplus-ed enough to cultivate our modern perception of food as a fun hobby. Cookbooks only began to gain popularity in the 1800s. Cause you couldn’t be a foodie caveman, you know? And you certainly couldn’t be a food blogger cavewoman. Rough lesson for a foodie like me, but an intriguing concept about the privilege we enjoy in our culture.
5. FOOD AS PERSONAL WELL-BEING
Food is an opportunity for choice–for most of us, at least three times a day. And choice gives us a feeling of freedom, and a feeling of freedom contributes to our sense of personal well-being. During my SNAP Challenge, I was shocked at how sorry for myself I felt looking at all the food my family got to eat without me, knowing it was off limits. I also came to realize that not permitting myself to eat out at all really affected my sense of personal comfort. Apparently, I get a lot out of my bi-weekly coffee shop runs. I found myself thinking things like, If I could only have one little coffee from Starbucks, I’d feel so much better. And once I cheated and did have a Starbucks coffee, that $2 indulgence meant so much to me.
All in all, I have to say I’m really glad my SNAP Challenge week is over. It was no walk in the park. I freely admit my upper middle class weenie-ness when it comes to eating on such a tight budget, and I absolutely have new-found respect for people who make it work. I would love to learn more about how to do so more healthily and help others do the same.
If you live in Phoenix, I don’t have to convince you that it’s been really…
really…
REALLY…
hot here this week. As I write this at 10:00 p.m., it’s 97 degrees outside, we’ve shattered several temperature records this week, and THIS is what greeted me this afternoon when I got into my car:
118! That’s the temperature they make beef jerky at! (Are we Phoenicians are all slowly becoming human jerky?) I’m starting to feel like Matt Damon in The Martian. Where’s my protective helmet and snazzy insulated orange suit?
Me heading to my car after work
Anyway, turning on your oven to cook or bake right now is about the same as an Eskimo chugging an Icee, but sometimes you gotta have a nice dessert. (We all have our reasons. I get it.) Barring digging into a gallon of ice cream, how do you pull off dessert with absolutely zero heat? This Strawberry Nutella Tart! It’s a 100% no-bake, no-cook dessert…that looks like you baked.
I came up with this awhile back when it wasn’t all that hot (like, you know, only 100 degrees) but I was feeling kind of lazy and wanted to make something simple with minimal ingredients for a family dessert. I’m happy to say it came together nicely, because now I have something in my dessert arsenal for weeks like this. At least even when it’s blazing hot, there can always be dessert.
No-Bake Strawberry Nutella Tart A Love Letter to Food Original Recipe
Ingredients:
1 1/2 c. crushed graham cracker crumbs
6 Tbsp. butter, melted or softened
3 Tbsp. sugar
3/4 c. Nutella
3 oz. cream cheese, softened
1 Tbsp. half and half
Sliced strawberries, for topping
Directions:
In a medium bowl, combine graham cracker crumbs, butter, and sugar. Press evenly into the bottom and sides of a greased 10-inch tart pan. Freeze at least 30 minutes.
In a medium bowl, mix Nutella and cream cheese together with a hand mixer on medium speed until well combined. Stir in half and half. Pour into prepared crust and refrigerate at least 1 hour.
Remove from the fridge and top with sliced strawberries before serving.
*Note: This dessert is best served within 24 hours of assembly!
I first heard of overnight oats a couple of years ago in one of my nutrition classes. To get a sense of how to take a diet history, I was assigned to interview the girl next to me about her typical day’s eating. Back up–actually, she interviewed me first, and striving for full disclosure, I told her about my daily sweet indulgence, my penchant for muffins, and my occasional handfuls of barbecue chips. (Along with, of course, the other good stuff I also eat.)
Then it was her turn. I think I remember her food narrative word for word because, frankly, it was so preposterous and holier-eating-than-thou. “Well, I start the day with a banana–before I WORK OUT FOR 90 MINUTES–then I have some overnight oats with organic yogurt, no sweetener. For lunch I have grilled tilapia and about three cups of vegetables…” (Who the eff eats three cups of vegetables in one meal?) Anyway, the list went on ad nauseum until I was convinced this girl was on a mission for the title of “World’s Healthiest Eater”–that or “Definitely A Healthier Eater Than You, You Scum.” But the main thing about the interview that stuck with me (other than those three cups of vegetables) was her mention of the overnight oats. What were overnight oats? I looked them up, only discover that overnight oats are an oatmeal you assemble at night, stash in the fridge, and eat cold in the morning. Well, that sounded nasty with a capital N. Cold oatmeal? Isn’t that what they feed prisoners of war?
So I can’t really remember why I decided to try it.
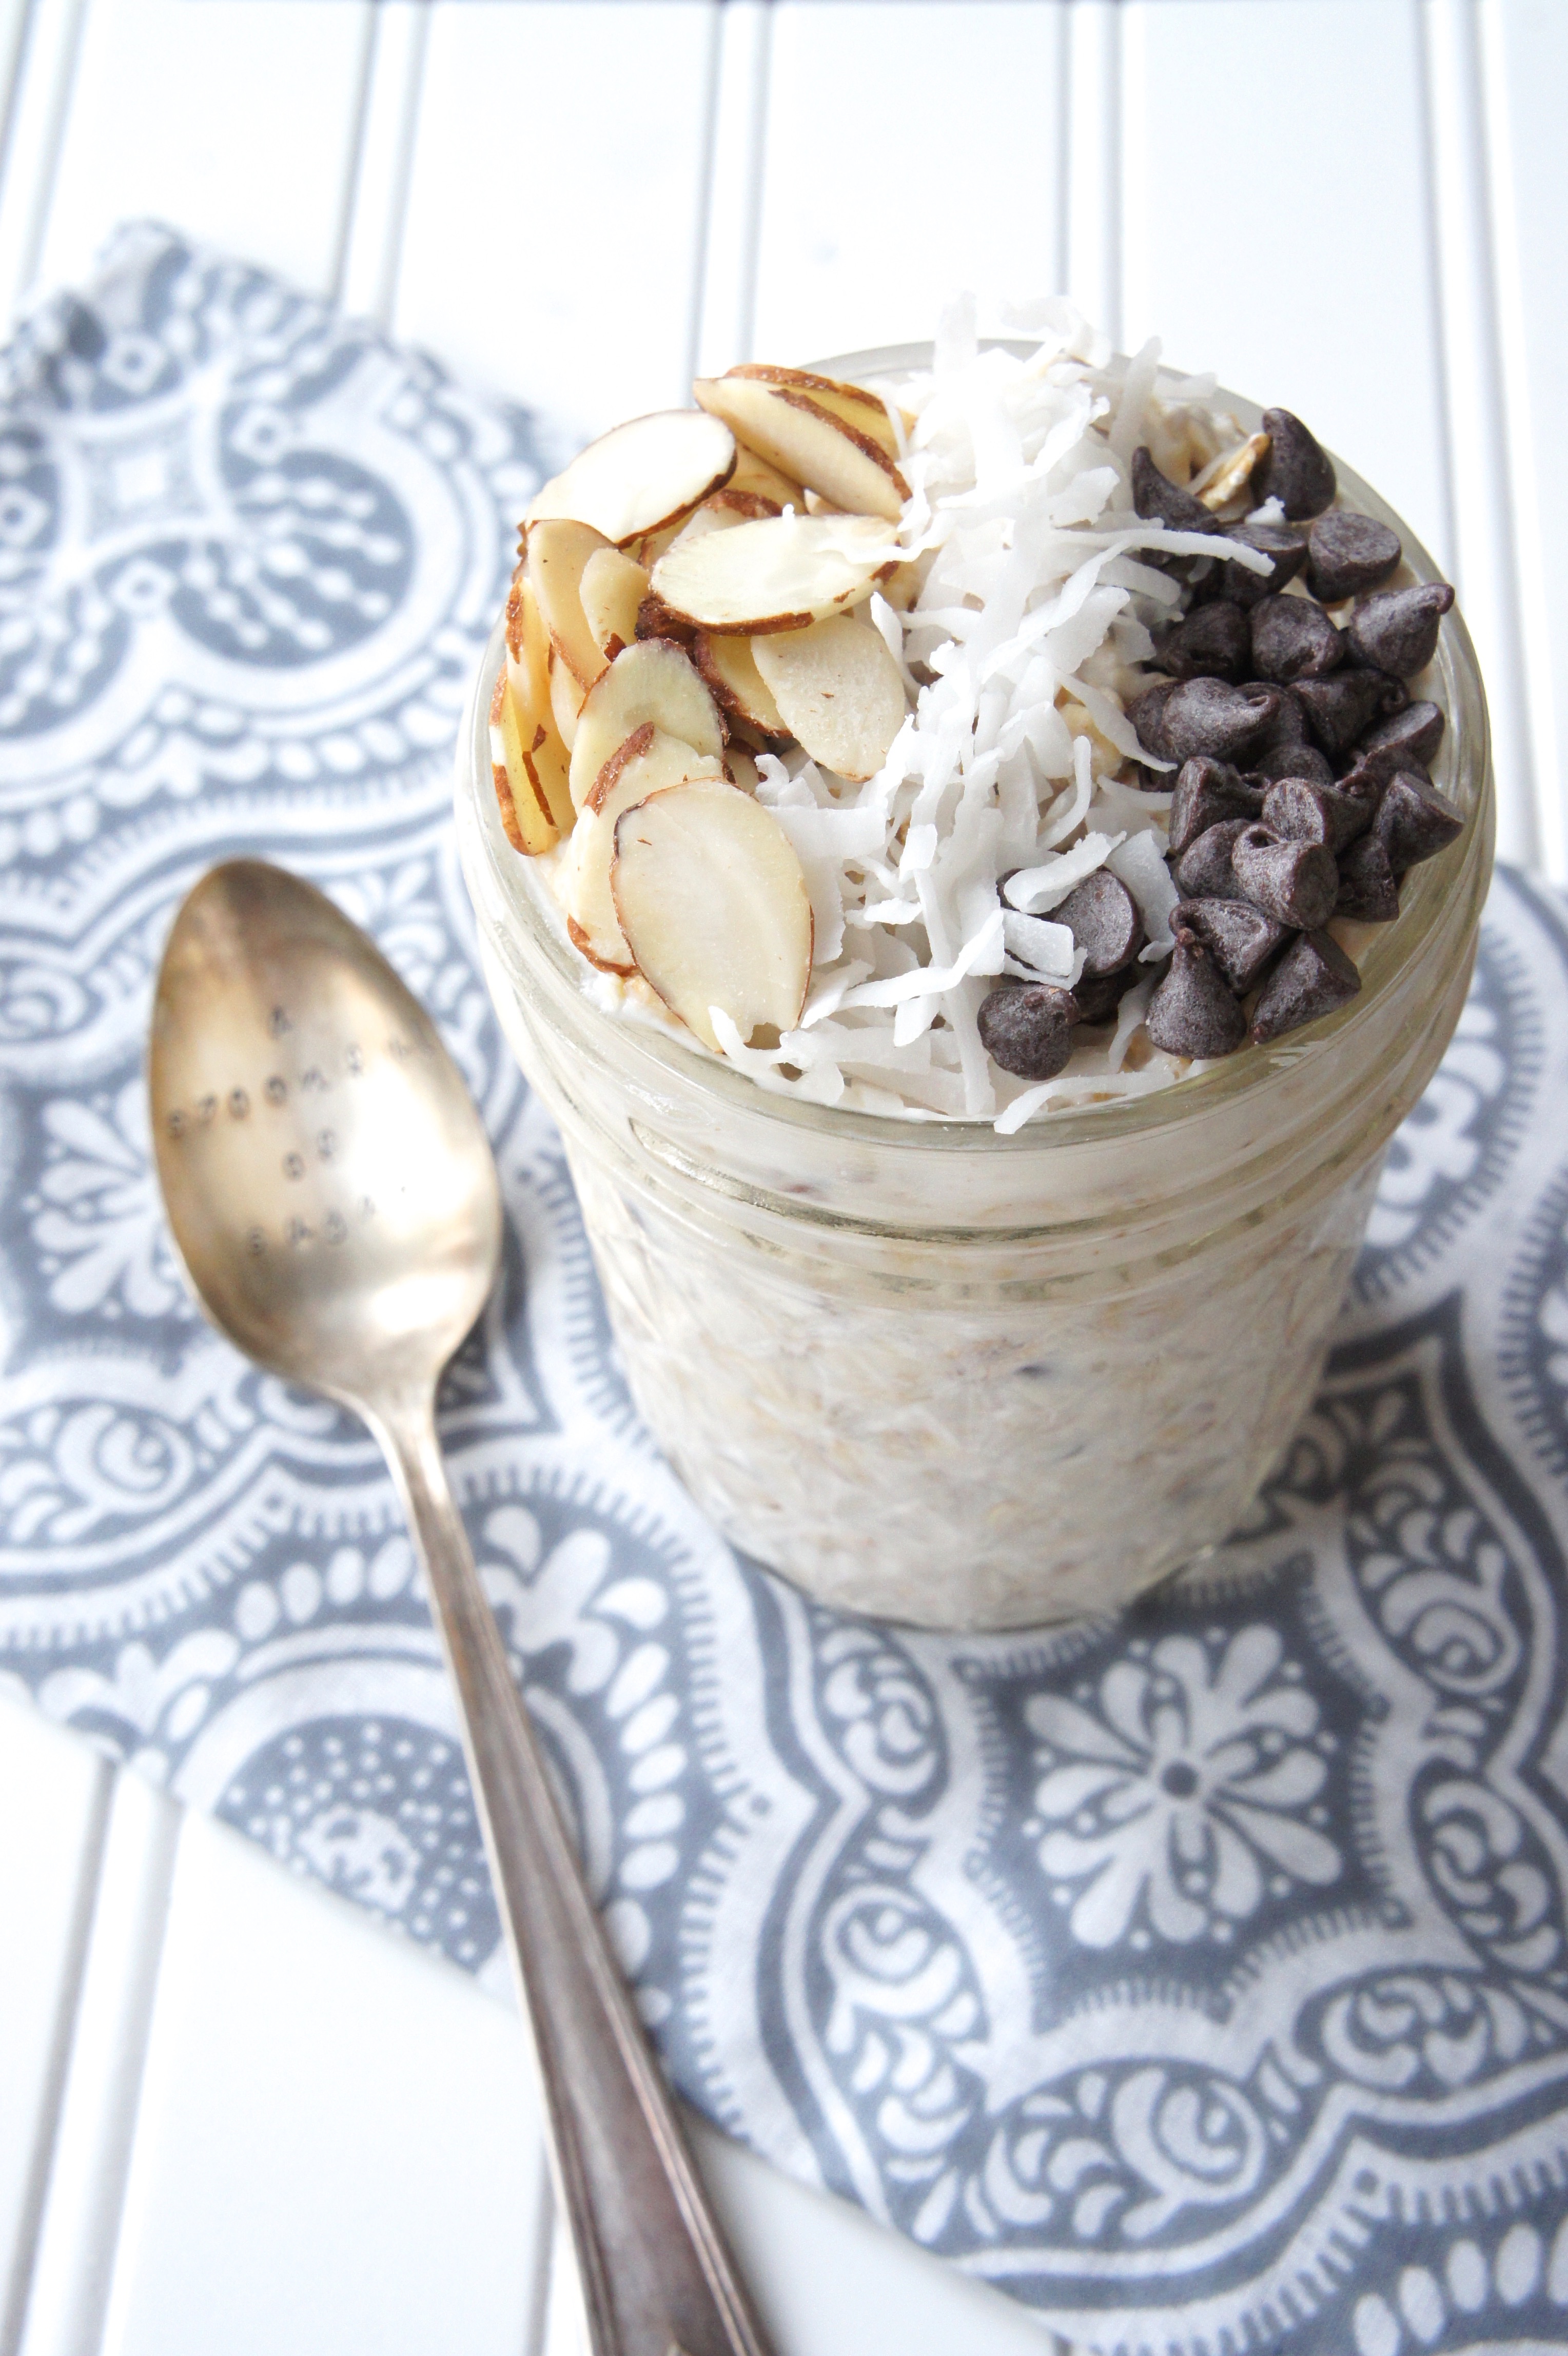
Somewhere along the way, though, I did, and was floored to realize that….shhhh…it’s basically like eating oatmeal cookie dough. Especially when you make it with ingredients that make it taste like an Almond Joy candy bar. I’m not going to claim this recipe is healthy, exactly, but it sure is a hearty breakfast that will keep you full for the hours until lunch. (You could bypass some calories by subbing more almond milk for the Greek yogurt in it, or cutting back the coconut, almonds, and chocolate chips.) I also came to realize how incredibly convenient it is to put in the work of making your breakfast the night before so you can pull out a self-contained, 100% ready-to-go meal in the morning. Totally worth it.
As a food blogger, I realize I’m pretty late to the game when it comes to the whole overnight oats phenomenon. It’s one of those trendy foods that cropped up three to four years ago or so and has been a drippy mason-jarred mainstay for food bloggers ever since. (Seriously, what’s with the drippymasonjars? I can’t help but picture these bloggers with really sticky fingers after their oatmeal photo shoots.) So, I know–overnight oats, that’s sooooo 2013. But also soooooo tasty, and soooo convenient to grab out of the fridge on a busy morning. So okay, girl next to me in nutrition class, you win this one. As for your three cups of vegetables, though…I can’t compete.
1/2 c. old-fashioned oats (gluten-free, if necessary)
1/2 c. plain Greek yogurt
1/4 c. almond milk
1 Tbsp. maple syrup
1/4 tsp. almond extract
1/2 tsp. vanilla
1-2 Tbsp. mini chocolate chips
1 1/2 Tbsp. unsweetened shredded coconut
1 1/2 Tbsp. sliced almonds
Directions:
The night before you intend to eat the oatmeal, mix all ingredients in a bowl or glass (or a drippy Mason jar–ha). Cover and store in the refrigerator overnight until ready to eat!
Awhile back, I read a Buzzfeed article called 24 Things You Know If You’re Always Hosting Dinner Parties. (Be warned, if you read it, there’s quite a bit of unnecessarily foul language in the article.) Some of the items on the list were so true that I wondered if the Buzzfeed author had been spying on my house recently as I prepared to host events. As is probably obvious from the fact that this blog has an Entertaining section, we throw a lot of parties at our house–not just dinner parties, any parties! White Elephant Christmas parties, Nacho Libre parties, Butterfly Tea Parties, Beatles Singalong Parties! With dreams for the future to host a Murder Mystery Dinner, Talent Show, and Grown-Up Prom, just to name a few. Anyway, as a frequent party hostess, I can tell you, like the Buzzfeed article, that certain truths are universal to hosting large number of people in your home. Like the fact that you always buy a ton of alcohol, thinking there’s no way people will drink it all, and they always do, or that you shouldn’t bother to vacuum your carpet before a party, only after.
BUT…the one truth that prevails above all else when you host any event that serves food–yes, the one tried and true guarantee is this:
Someone will ALWAYS bring hummus and pita chips.
When did this happen? I feel like the general American public was only introduced to hummus, like, ten years ago. How did this rookie food item rocket up the ranks of party appetizers to become El Capitan of potluck takealongs? My theory is this: it’s classier than a bag of chips but just as easy and only slightly more expensive. But psssst…I have a secret up my sleeve. If you really want to impress with your contribution to a party spread (and you just gotta have that hummus), there’s a better way than the Trader Joe’s grab-and-go standard. This richly flavored 7-layer Mediterranean dip starts with a hummus base, but builds on it with cucumber, tomatoes, red pepper, feta, artichokes, and Greek yogurt for a truly unique party dip. Layering with fresh ingredients adds vitamins, flavor, fiber, and crunch, along with bright colors that make for a visually interesting and much more substantial side than hummus alone. I served it at a recent house concert we hosted and it went over beautifully.
So give it a whirl when your next “heyyyyy, we said we’d bring something to that party this weekend” moment hits. Your friends will thank you.
(The other option, of course, besides taking it as an impressive dish to a party, is to use it as a head-’em-off-at-the-pass menu item when hosting potlucks.
“Hey, we’re coming on Saturday! How about I bring pita chips and hummus?”
“Actually, I’ve already got that covered. How about something else?”)
P.S. No hard feelings if you’re reading this and you’ve ever brought hummus to one of our parties…I still love you. 😉


