
Tag: Side Dish
German Potato Salad
A tangy potato salad with DIY pickled red onions–perfect with brats or as part of a plant-based feast!

If you’ve been following this blog for awhile (all three of you), you may recall that your family spent the summer of 2017 in Germany, mostly in Cologne. That summer was one of the most memorable times in my entire life. To this day, my husband and I talk and think about it all. the. time. and in many ways it feels like it was just yesterday.
One of our favorite parts of the whole experience–especially for my husband–was the frequency with which we visited Biergartens. (Who wouldn’t like eating brats and drinking great beer in an open-air green space? There’s truly nothing like it in the U.S.)
We both remember one particular meal with special fondness. My husband’s friend and his wife, who live in Munich, treated us to a *s p e c t a c u l a r* home-cooked, authentically German meal, which they brought in a series of large picnic baskets to the English Garden. We ate that meal over the course of probably 90 minutes, there was SO much food. Jessie, our hostess, created a flight of salads, veggies, meats, and breads I’ll never forget. Among them was, of course, a German potato salad.
Fast-forward to summer 2021. My husband’s and my 17th wedding anniversary was in July, and I’ll confess, I always struggle to land on the right gift for him. I mean, technically, the official gift for a 17th anniversary is furniture, but our house is pretty well-equipped and I wasn’t about to surprise him with a new end table or cabinet (unless maybe it’s this cow-shaped cabinet, because, come on, that’s just badass).
Somehow, though, I landed on the idea of recreating the Munich meal Jessie had made for us four years ago. I hauled out the photo album to look back at the pictures we took of that meal and, to the best of my ability, made the same brats, German beer (thanks, Total Wine!), and salads, including a zesty tomato-onion mixture and…this German potato salad!

I’m so glad this inspiration struck! This potato salad turned out tangy, savory, and the perfect accompaniment to bratwurst. (On the other hand, it’s totally vegan, so you could also make it as a part of a plant-based feast.) My husband was thrilled to have an edible reminder of the good times we enjoyed in the English Garden years ago–so I’d call it an anniversary win.
If you’re looking for a German potato salad that’s simple to make and doesn’t come with a dairy-based sauce, this is it. Despite being free of animal products, I thought this side had a smoky, almost meaty flavor. It lasted in our fridge for days on end, and we enjoyed it not only alongside bratwurst, but several other meals, both plant- and animal-based.
What will you make it with?
German Potato Salad
A tangy dressing and pickled red onions give this potato salad bite!
Prep Time20 mins
Cook Time15 mins
Servings: 12
Ingredients
- 3 lbs. baby gold potatoes
- 4 tsp. salt, divided
- 2/3 c. vegetable oil
- 6 Tbsp. rice vinegar
- 1 Tbsp. sugar
- 1 tsp. smoked paprika
- 1 tsp. black pepper
- 1/2 large red onion, thinly sliced
- 1/2 c. chopped fresh parsley
Instructions
- Place the potatoes in a large pot and cover with water by about 1 inch. Add 2 tsp. salt and bring to a boil. Reduce heat and simmer until potatoes are tender, about 15 minutes. Drain and set aside.
- Meanwhile, in a large bowl, combine the vegetable oil, rice vinegar, sugar, paprika, black pepper, and remaining 2 tsp. salt. Stir in the sliced red onions and parsley and let sit at least 10 minutes.
- Slice the potatoes in half or into quarters, depending on their size. (You want bite-sized pieces.) Add the sliced potatoes to the bowl with your dressing and onions and stir gently to coat.
- Refrigerate for several hours or overnight for best flavor.
Notes
Adapted from Once Upon a Chef.
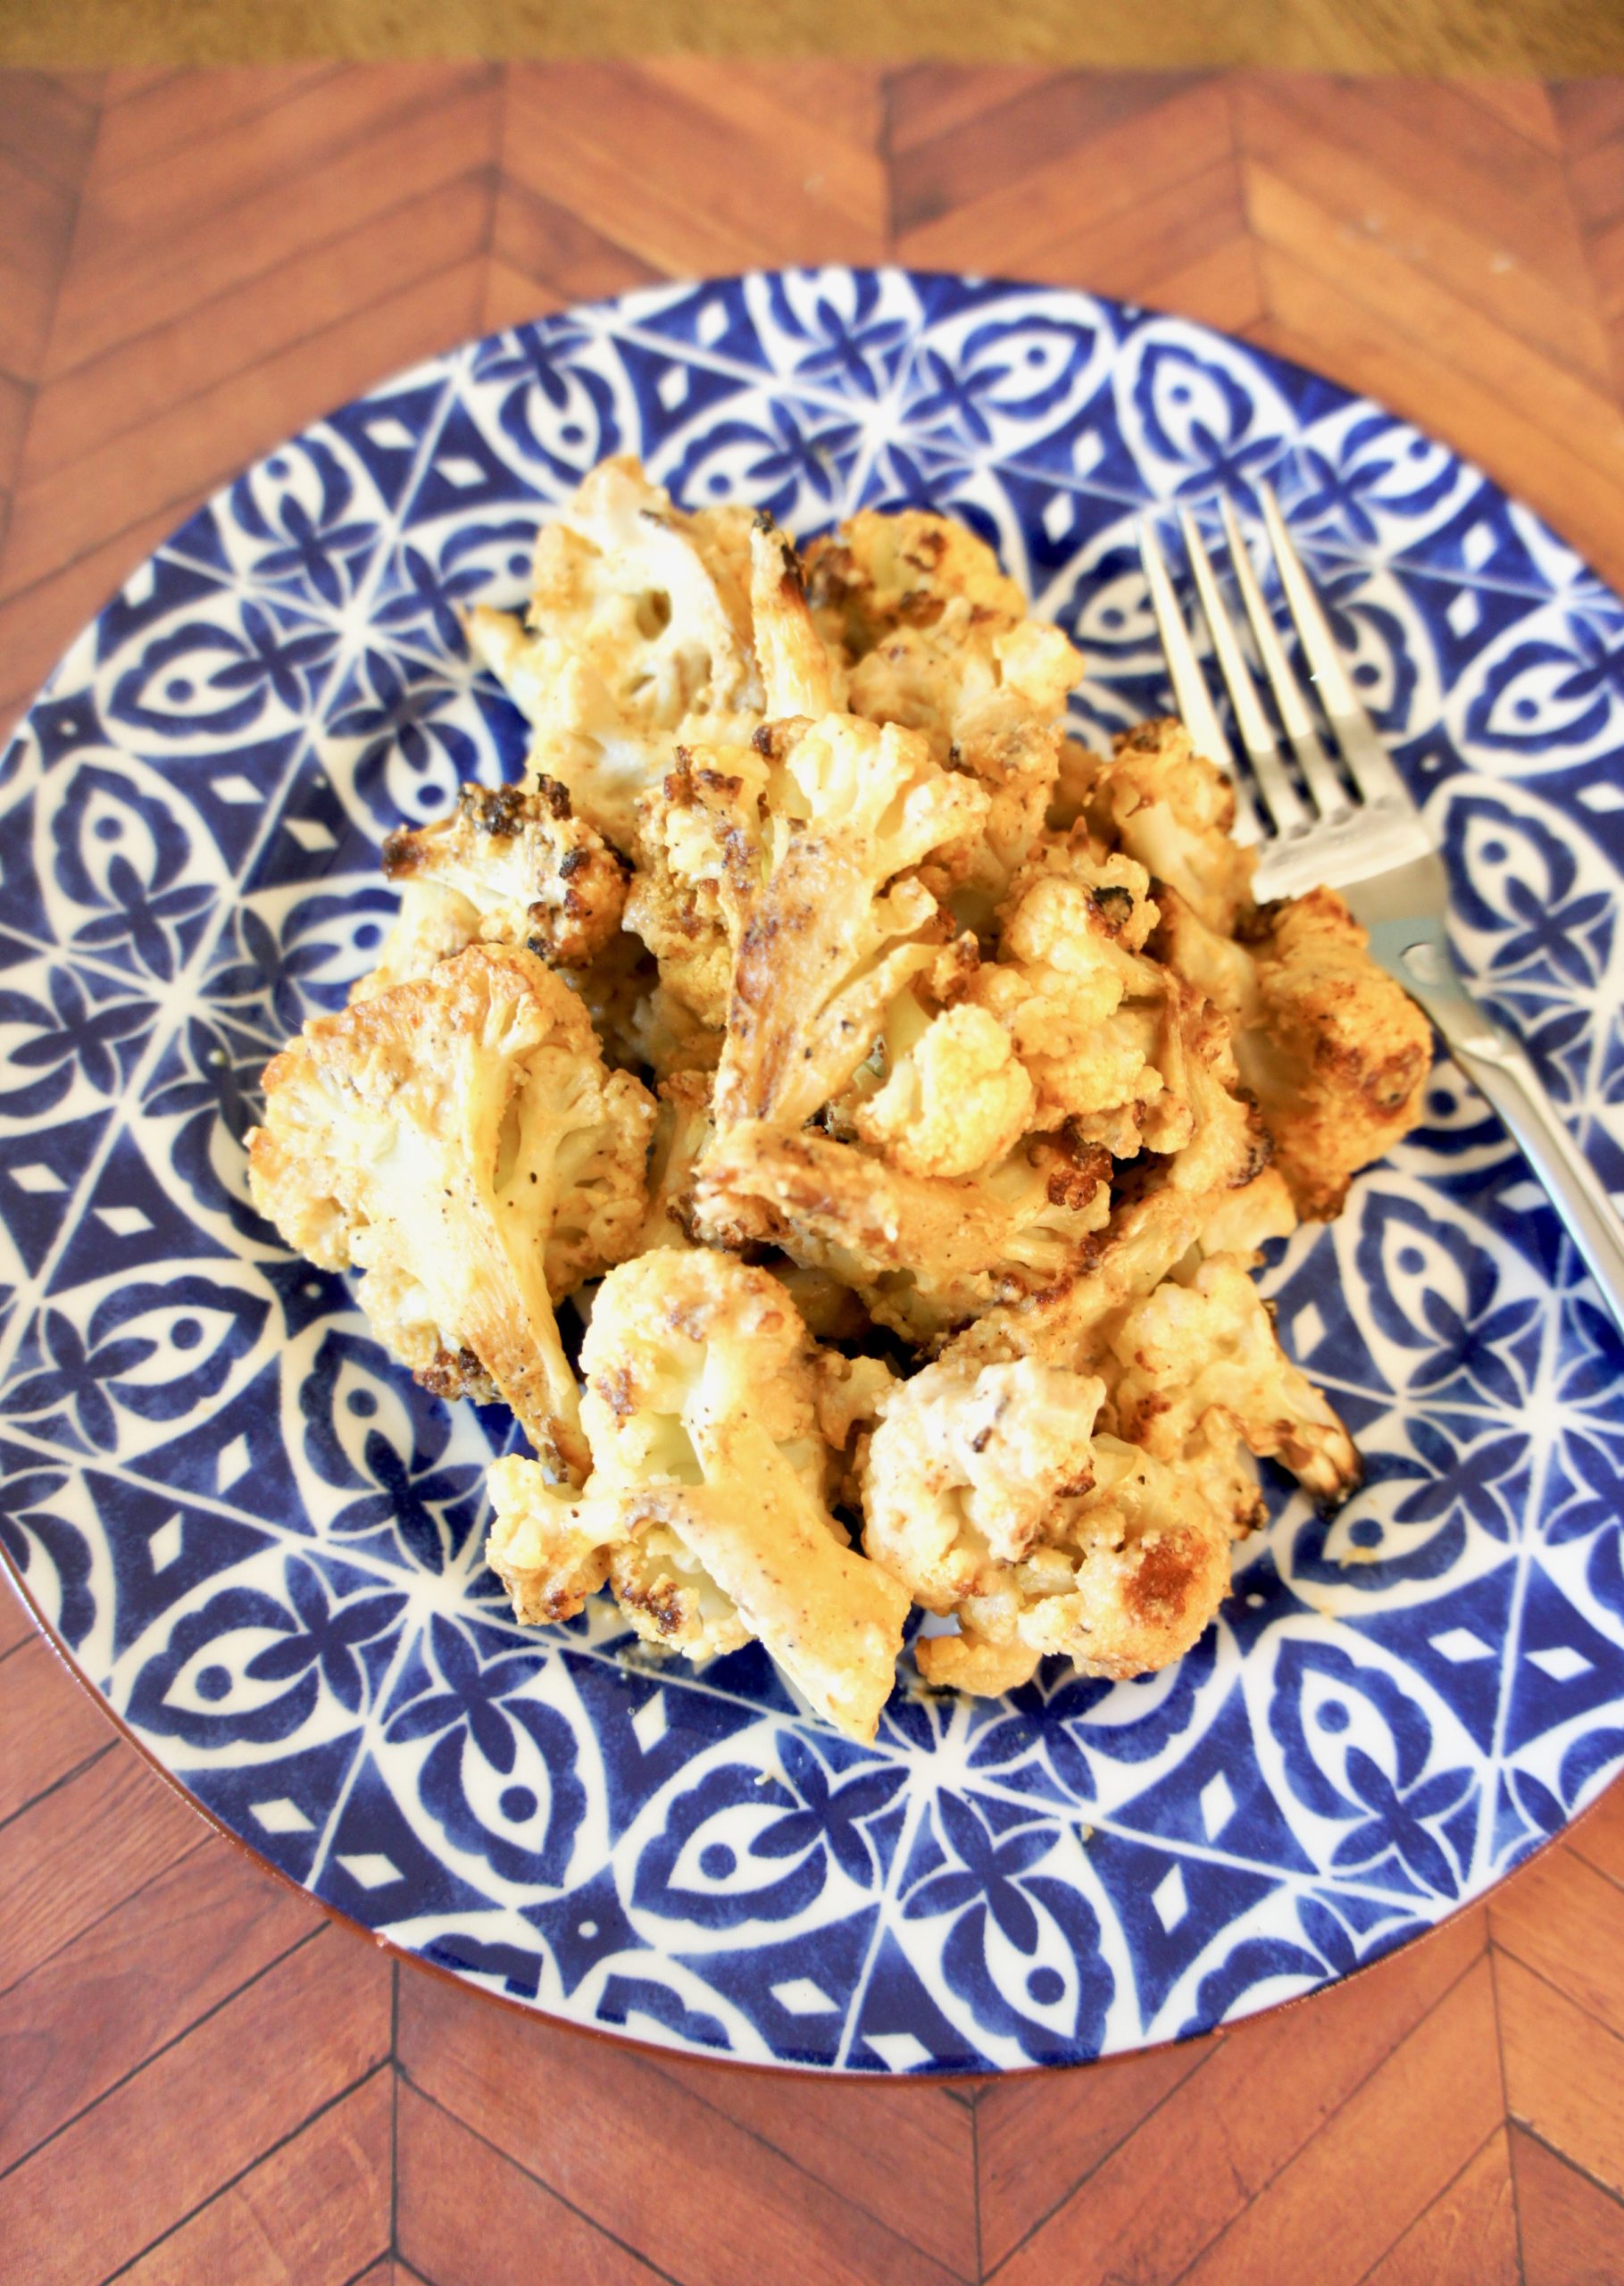
Tahini Roasted Cauliflower
This tahini roasted cauliflower is my absolute favorite! It’s the perfect crispy, slightly spicy side dish.

You know you’re really a grown-up when you get excited that your whole family is leaving the house so you can stay behind and clean. I recall the first time I shooed my family out of the house to go do something legitimately fun–roller skating, maybe?–to let me scrub counters and mop floors in peace.
In a similar way, the other night when two of my kids were eating dinner at a friend’s and my husband took my other son out for dinner, I kinda couldn’t contain my excitement. It meant I got to stay home and make myself an entire freaking head of tahini roasted cauliflower.
And this is how I know I’m a grown-up…or how I know I’m a nutritionist…or maybe just how I know I love really good food. Because, friends, this cauliflower is ahhhh-mazing. Over the next two days, I proceeded to eat the entire head myself.

If you’ve ever thought cauliflower was bland, this is the recipe for you. It starts with an Amazing All-Purpose Tahini Sauce–a flavorful blend of tahini, lemon juice, garlic, and spices. For a vegan sauce, this recipe is delightfully, surprisingly creamy. (It gets its silky texture from ground sesame seeds.) Once you’ve whipped up a batch, simply slather it atop perfectly crisped roasted florets…and voila, uber-flavorful veggies!

Not only will you get healthy fats from tahini’s sesame seed base, you’ll add even more of them by roasting cauliflower in olive oil. Meanwhile, cauliflower’s status as a cruciferous veggie makes it a nutrient-dense choice that even may have cancer-fighting properties.
So there you have it–roasted tahini cauliflower, a deliciously creamy, healthy veggie to add to your repertoire. Try it as a side dish with meat, in a grain bowl, or, like me, eat it straight off the pan as a main dish in its own right.
Tahini Roasted Cauliflower
Roasted cauliflower gets a boost from a creamy, vegan tahini sauce!
Prep Time10 mins
Cook Time25 mins
Servings: 4 as a side dish
Ingredients
For the cauliflower:
- 1 large head cauliflower, diced into florets
- 2 Tbsp. olive oil
- 1 tsp. paprika
- salt and pepper, to taste
For the tahini sauce:
- 1/3 c. tahini
- 1/3 c. water
- 1/4 c. lemon juice
- 2 cloves garlic, minced
- 1/2 tsp. cumin
- 1/4 tsp. cayenne pepper
- 1/4 tsp. salt
Instructions
Roast the cauliflower:
- Preheat oven to 425 degrees F. Toss cauliflower florets with olive oil, paprika, and salt and pepper. Spread evenly on a baking sheet. Bake 25-28 minutes, stirring once halfway through.
Make the tahini sauce:
- While cauliflower roasts, prepare the sauce by combining all ingredients thoroughly in a measuring cup.
Dress the cauliflower:
- When cauliflower comes out of the oven, dress with tahini sauce to taste. Save extra tahini sauce covered in the refrigerator.
Notes
A Love Letter to Food original recipe.
The Easiest Baked Brown Rice
The absolute easiest way to make brown rice! Baking makes for fluffy, no-mess rice.

If you had to name a food everyone can agree is healthy, you really couldn’t go wrong with brown rice. (Okay, unless you’re one of those people who think all grains are bad…which, for the record, has been disproven time and again.)
Brown rice is packed with fiber (3.5 grams per cup), protein (5 grams per cup), and important micronutrients like magnesium and selenium. It’s got a relatively low glycemic index of 50, meaning it won’t spike your blood sugar. Plus, it’s pretty dang low calorie at about 215 cals per cup. It goes with just about everything, from casseroles to Mexican food to meat dishes.
Only trouble is, well, making it.
Seems like every time I try making brown rice on the stovetop, I end up with a sticky mess that hangs on to the bottom of my saucepan like grim death. I dread cleaning any pot that has touched brown rice.
What I never realized–until recently–is that there’s actually a much better way to get fluffy, chewy brown rice that doesn’t involve scraping burnt grains off the pot for an hour after dinner. How, you ask? By baking it!
I’ll ‘fess up and say I didn’t come up with this bright idea on my own. In fact, my moment of brown rice enlightenment actually came from my kids’ favorite cookbook, America’s Test Kitchen’s Complete Cookbook for Young Chefs. My 11-year-old son decided he wanted to try making baked brown rice, and it turned out to be totally easy enough for a preteen to manage without burning the house down. Essentially, all it takes is boiling some water in a kettle, then pouring it over grains in a baking dish (with a bit of butter, of course!). Cover and bake for an hour and you’re all set.
The beauty of this recipe is not only its simplicity, but the fact that it cooks the rice perfectly evenly–unlike the stovetop method, which can yield wet rice on top and crispy grains on the bottom. And, wonder of wonders, miracle of miracles, it doesn’t stick to the baking pan.

Since learning about this easy method, I’ve been making brown rice like a fiend, and I’m not sorry about it. It’s a versatile, healthy side dish I can always find a use for. I’ll never make brown rice on the stovetop again.
So tell me…am I just late to the game? Have you tried baking brown rice in the oven? Are you as enthused about it as I am?
The Easiest Baked Brown Rice
Baking brown rice makes for a fluffy finished product that won't stick to the pan!
Prep Time10 mins
Cook Time1 hr
Servings: 5
Ingredients
- 1 1/2 c. brown rice
- 1 Tbsp. butter
- 2 1/3 water
Instructions
- Preheat oven to 375 degrees. Spread brown rice in an 8 x 8-inch glass baking dish. Cut butter into small pieces and dot over rice.
- In a kettle, bring water to a boil. Carefully pour over rice. Cover tightly with two sheets of aluminum foil.
- Bake for 1 hour, uncover, fluff, and serve.
Notes
Adapted from America's Test Kitchen's Complete Cookbook for Young Chefs.
Pearl Couscous With Apples, Cranberries, & Herbs
The unique flavors in this Pearl Couscous With Apples, Cranberries, & Herbs blend perfectly for a memorable side dish.

A few weeks ago we had some friends over for dinner.
Am I allowed to say that?
This is such a weird time where admitting to a dinner party feels like confessing an affair. (Also where coughing is the new farting.) Granted, our dinner group only just grazed the “gathering of 10 people” mark, so technically, we weren’t overstepping any official bounds. (There, now no one can yell at me in the comments.) Plus, personally, since having people over for dinner is something like a religious calling in my life, I felt pretty okay about inviting another family into our home after weeks of only virtual contact with friends.
While deciding a menu for our much-anticipated guests, I asked my husband if there was anything in particular he’d like to have on our special night. “How about that couscous thing you make?” he said, “The one with apples and herbs?”
I knew right away what he was talking about. I’ve been making this Giada de Laurentiis recipe for pearl couscous with apples, cranberries, and herbs for a few years now, and it’s one of those dishes that doesn’t *sound* like it’ll be anything spectacular–and then you eat it and go…

Not surprisingly, the wife of the couple who joined us for dinner ended up asking me for the recipe–not the first time someone has asked! Which I figure means it’s about time to share it on the blog.
So what makes this such a standout side? First of all, we have to give credit to the real star of this dish: the pearl couscous. If you’ve never had this larger, meatier type of couscous, you’re seriously missing out. It’s just the most delightful thing to eat–almost squeaky in its chewy roundness. Meanwhile, a savory olive oil and fresh herb dressing soaks into not only the couscous, but also into tart green apples, crunchy almonds, and sweet dried cranberries. While it may sound like more of an autumn combo, I think it’s one to enjoy all year round. It’s delicious all on its own, or serve it alongside grilled chicken or pork chops. Magnifico!
I’m happy I served this for our friends, and I stand by the decision to have them and their kids over for dinner. (I’ll even confess that we’ve now had friends over for dinner TWICE. Rebelzzzz.) Cooking for others after a lengthy stretch of isolation did wonders for my sense of well-being. And, if you ask me, while social distancing for physical health matters, connecting with others–yes, even in REAL LIFE–matters, too.


Pearl Couscous with Apples, Cranberries, and Herbs
Chewy pearl couscous pairs with tart green apples, sweet cranberries, and an herbed olive oil dressing in this memorable side dish.
Prep Time15 mins
Cook Time20 mins
Ingredients
For the couscous:
- 1 Tbsp. olive oil
- 2 c. pearl (Israeli) couscous
- 32 oz. chicken broth
- 1/4 c. fresh flat-leaf parsley, chopped
- 1 1/2 Tbsp. fresh rosemary, chopped
- 1 tsp. fresh thyme
- 1 c. dried cranberries
- 1/2 c. slivered almonds, toasted
- 1 Granny Smith apple, diced
For the dressing
- 1/4 c. apple cider vinegar
- 2 Tbsp. maple syrup
- 1 1/2 tsp. salt
- 1/2 tsp. black pepper
- 1/4 c. olive oil
Instructions
Cook the couscous:
- In a large saucepan, heat 1 Tbsp. olive oil over medium-high heat. Add the couscous. Cook and stir until lightly browned, 3 to 5 minutes.
- Add chicken broth and bring to a boil. Reduce heat and simmer until liquid is absorbed, 10-15 minutes.
Make the dressing:
- While couscous cooks, whisk together cider vinegar, maple syrup, salt, black pepper, and olive oil.
Put it all together:
- In a large serving bowl, combine cooked couscous, parsley, rosemary, thyme, cranberries, almonds, and apples. Stir in dressing and serve immediately.
Notes
Adapted from the Food Network.
Green Bean Casserole {No Soups, No Mushrooms}

There was a time when I thought condensed cream soups were God’s gift to the home cook. I specifically recall a Crock Pot chicken recipe I used to make that involved cream of chicken and cream of mushroom soup (and maybe Velveeta cheese?). Yes, it was creamy, and probably tasty, but also crazy high in sodium and pretty highly processed.
I’ve come a long way since those days. Now, whenever I can, I prefer to make sauces for casseroles, meat, or pasta dishes myself. I’ve found doing so cuts back on mystery ingredients, reduces sodium, and honestly just results in better quality food.
Enter this condensed soup-free Green Bean Casserole.
If you’ve ever made green bean casserole with a traditional recipe, I’ll bet it called for cream of mushroom soup. I know the recipes in both my Betty Crocker and Better Homes and Gardens cookbooks start this way. But now that I’m a fan of homemade sauces–and since I’ve never been fond of mushrooms–when I wanted a green bean casserole to go with a grilled chicken dinner recently, I thought I’d try my hand at a 100% from-scratch version. (Except for the fried onions on top. Those I’m happy to outsource to good old French’s.)
This recipe came out full of savory flavor, thanks to shallot, sage, and thyme. And thanks to a vegetable broth base, it’s totally vegetarian. Even though Thanksgiving may be several weeks off, I’d make this again for a veggie side dish any day!
Give this one a try if you’re looking for something a little less processed, or if someone in your family has the good sense to not like mushrooms. 🙂


Green Bean Casserole {No Soups, No Mushrooms}
Not crazy about mushrooms? Prefer not to use condensed soups? This delicious from-scratch Green Bean Casserole is for you!
Prep Time10 mins
Cook Time35 mins
Total Time45 mins
Servings: 8
Ingredients
- 24 oz. frozen French-style green beans
- 3 Tbsp. butter
- 1 small shallot, diced
- 3 Tbsp. all-purpose flour
- generous 1/2 tsp. salt
- 1/4 tsp. black pepper
- 1/4 tsp. dried sage
- 1/4 + 1/8 tsp. dried thyme
- 1 c. milk
- 1 1/4 c. vegetable broth
- 6 oz. crispy fried onions
Instructions
- Heat a large pot of water to boiling. Add green beans and cook about 5 minutes. Drain and set aside. Preheat oven to 350 degrees.
- Wipe out the pot and melt butter over medium-low heat. Satue diced shallot until tender and barely browned. Add flour, salt, pepper, sage, and thyme and whisk about 1 minute.
- Add milk and vegetable broth and whisk to combine. Increase heat to medium and whisk occasionally until sauce thickens. (It's ready when the whisk leaves a defined trail.) Remove from heat and stir in green beans.
- Spray an 11 x 7-inch baking dish with cooking spray. Pour in green bean mixture and smooth. Sprinkle with fried onions.
- Bake 20-25 minutes or until heated through.
Notes
A Love Letter to Food Original Recipe.