
Tag: Vegan
Coconut Chocolate Granola Bars
What would you do if you had a few extra hours to yourself per week?
Someone asked me this recently, and I didn’t have to think very hard before answering: “I’d read more, watch my favorite ’90s movies, probably go shopping for some professional clothes for an upcoming conference, and bake. Definitely bake.”
This weekend, thanks to a much-needed housecleaning service mid-week, I found myself with a bit of extra time on my hands. And, true to my prediction of what I’d do in this situation, I decided I really wanted to bake. But I didn’t want to simply follow a recipe like I normally would.

For me, it’s the creative process that makes cooking (and especially baking) not just fun, but actually therapeutic. Still, because I often have a reason my finished product needs to turn out nice-looking or at least reasonably presentable, I’m usually a recipe-followin’ gal. The trial-and-error nature of free-form baking just isn’t worth the risk if I’m preparing dessert for company or bread for family breakfast. Give me a list of steps someone else has promised will lead to success and I’ll follow like a trusting puppy dog.
Sometimes, though, I get the chance to create my own recipe just for the joy of it. Art for art’s sake, let’s say. My canvas? Today, it was a mixing bowl, a baking pan, and a blend of go-to ingredients. The end result? Granola bars! To me, these DIY noshables are a great option for experimentation. They’re low-risk (’cause, hey, they’re just a snack) and generally forgiving, with their wide-open hodgepodge of various ingredients.

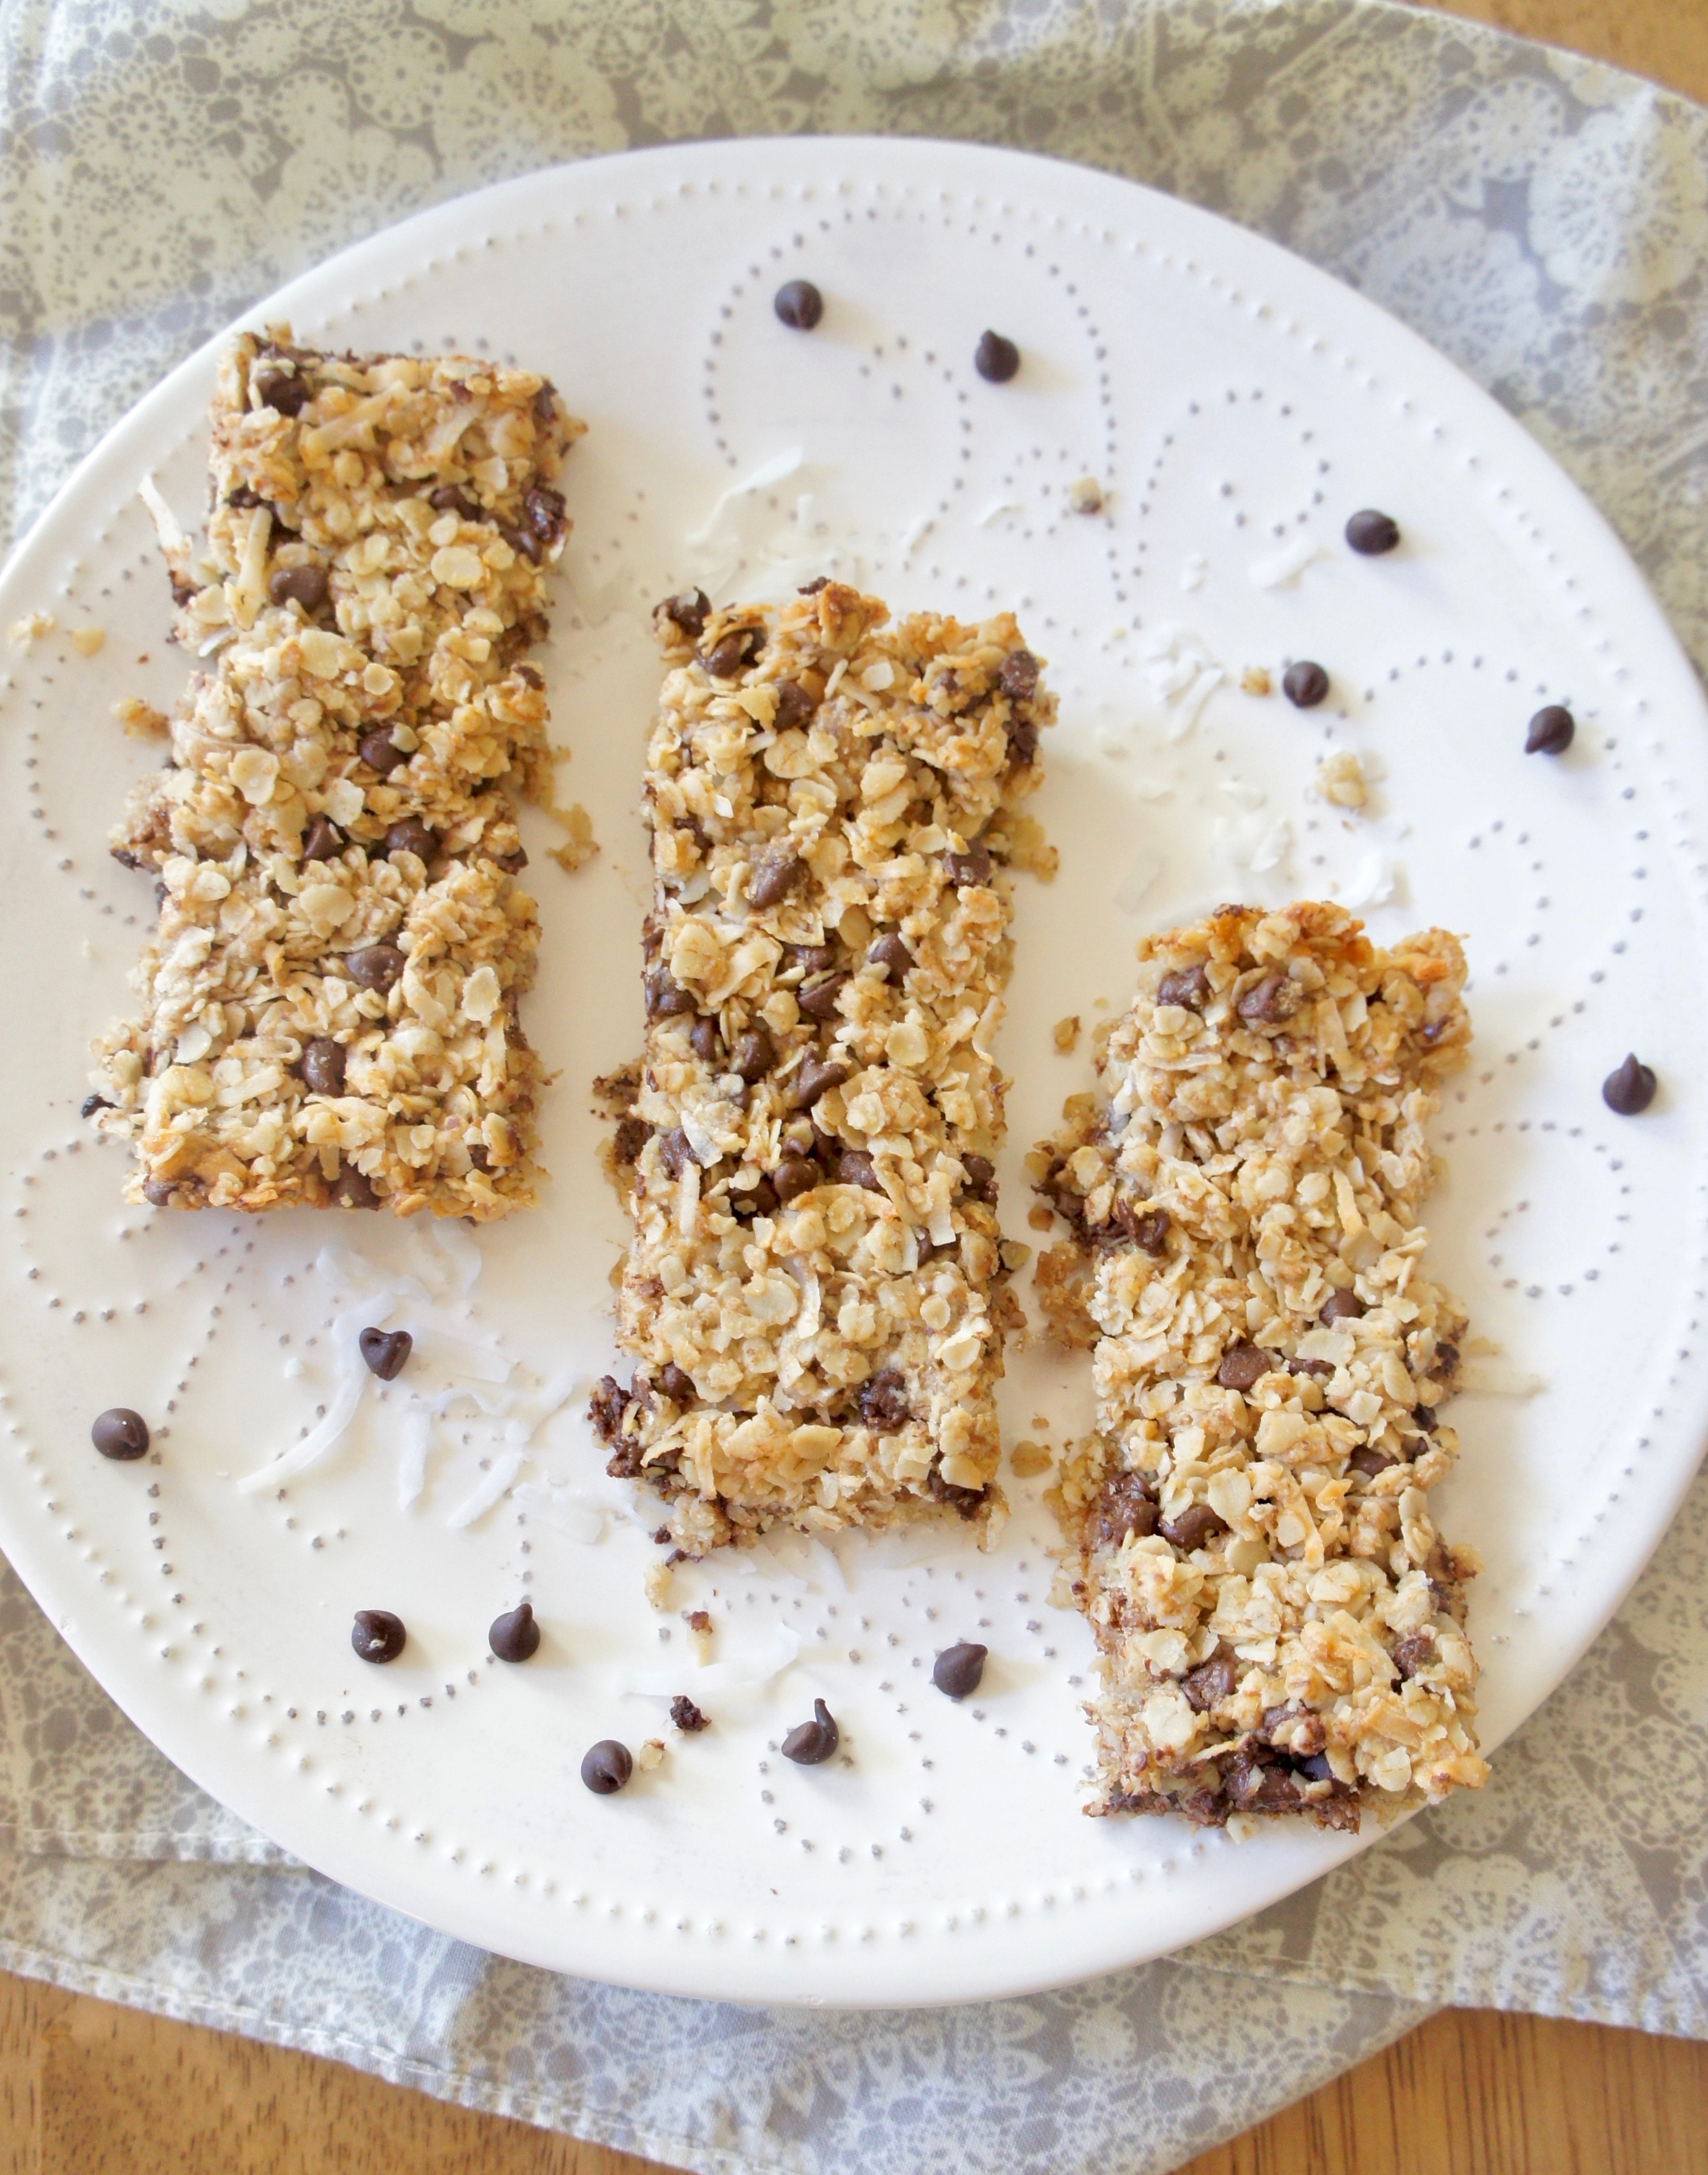
Making these Coconut Chocolate Granola Bars, I had a great time tinkering with the ratios of dry ingredients, binders, and mix-ins–and I’m happy to say they came out just right! These start with a flax egg to make them vegan (just kidding, it’s because I didn’t have any eggs). Then, wholesome additions like oats, whole wheat flour, and honey make their way into the mix, plus sweet treats chocolate chips and coconut. After a 30-minute stint in the oven, these bars emerge chewy and ready for snacking action. Our whole family loved them.
If you’re new to making your own recipes, I say start with granola bars. Or, if you’d like a recipe, start with this one! Tried and tested by yours truly, I can assure you these bars make a delicious homemade alternative to packaged snacks.


Coconut Chocolate Granola Bars
Chewy, chocolatey, and coconut-y, these homemade granola bars are a yummy alternative to the packaged variety.
Prep Time10 mins
Cook Time30 mins
Total Time55 mins
Servings: 16 bars
Ingredients
- 1 Tbsp. flax seed meal
- 3 Tbsp. water
- 2 c. quick-cooking oats
- 1/2 c. whole wheat flour
- 1/2 c. shredded unsweetened coconut
- 1/2 c. mini chocolate chips (vegan to make vegan)
- 1/2 tsp. salt
- 3/4 tsp. coconut extract
- 1 tsp. vanilla extract
- 1/4 c. honey (or maple syrup to make vegan)
- 1/2 c. almond milk
- 1/2 c. vegetable oil
Instructions
- Prepare the flax egg: In a small bowl, combine 1 Tbsp. flax seed meal and 3 Tbsp. water. Place in the refrigerator to firm up for about 15 minutes.
- Preheat oven to 350 degrees and grease a 13 x 9-inch baking dish with cooking spray.
- In a large bowl, combine all dry ingredients: oats, flour, coconut, chocolate chips, and salt. Mix in coconut extract, vanilla, honey, almond milk, vegetable oil, and flax egg. Spread in prepared pan, pressing down firmly to smooth.
- Bake about 30 minutes. Let cool 10 minutes, then slice into 16 bars. Store covered at room temperature.
Notes
A Love Letter To Food Original Recipe.
Sangria Granita

You know what this blog needs? More alcohol. And it could always use more desserts. Let’s get crazy and combine the two in a fruity, refreshing Sangria Granita.
If you’ve never had granita before, you’ve probably had something similar that goes by a different name–because it’s basically a grown-up slushie. In fact, there’s not even always anything “grown-up” about it. It pretty much IS a slushie…or, if you prefer another name name, a “shaved ice” or, for the truly refined, a “sno cone.” With origins in Sicily, granitas can be found alongside gelato all over Italy (which explains why you might ALSO hear them called “Italian ice”). A dead-easy dessert, granita typically contains just water, sugar, and a flavoring. Add some freezing time and a few rounds of ice crystal-scraping and you have the perfect sweet to hit the spot on a hot day.

With summer on the horizon, this Sangria Granita might be just the light treat you need poolside or after dinner. This version starts with Merlot and the juices of oranges, lemons, and limes, but could easily be adapted to use other wines and/or fruit juices. Let me know which combination you think would taste best!

Sangria Granita
A refreshing, light dessert that's perfect for summer!
Cook Time5 mins
Total Time3 hrs 5 mins
Servings: 4
Ingredients
- 2 c. Merlot or other full-bodied red wine
- 1 c. water
- 3/4 c. white sugar
- 1/2 c. fresh orange juice
- 1/4 c. fresh lemon juice
- 1 Tbsp. fresh lime juice
Instructions
- In a saucepan, heat wine, water, and sugar to boiling over medium heat. Boil and stir one minute, until sugar dissolves. Remove from heat and stir in fruit juices. Let cool.
- Pour mixture into an 9 x 13 baking pan (metal works better than glass for optimal freezing). Place the pan in the freezer. Remove after 30 minutes to scrape and stir the mixture with a fork so that flaky ice crystals form. Repeat every 30 minutes until frozen to your liking.
- To serve, scrape with a fork into individual bowls and serve immediately.
Notes
Adapted from Fine Cooking.
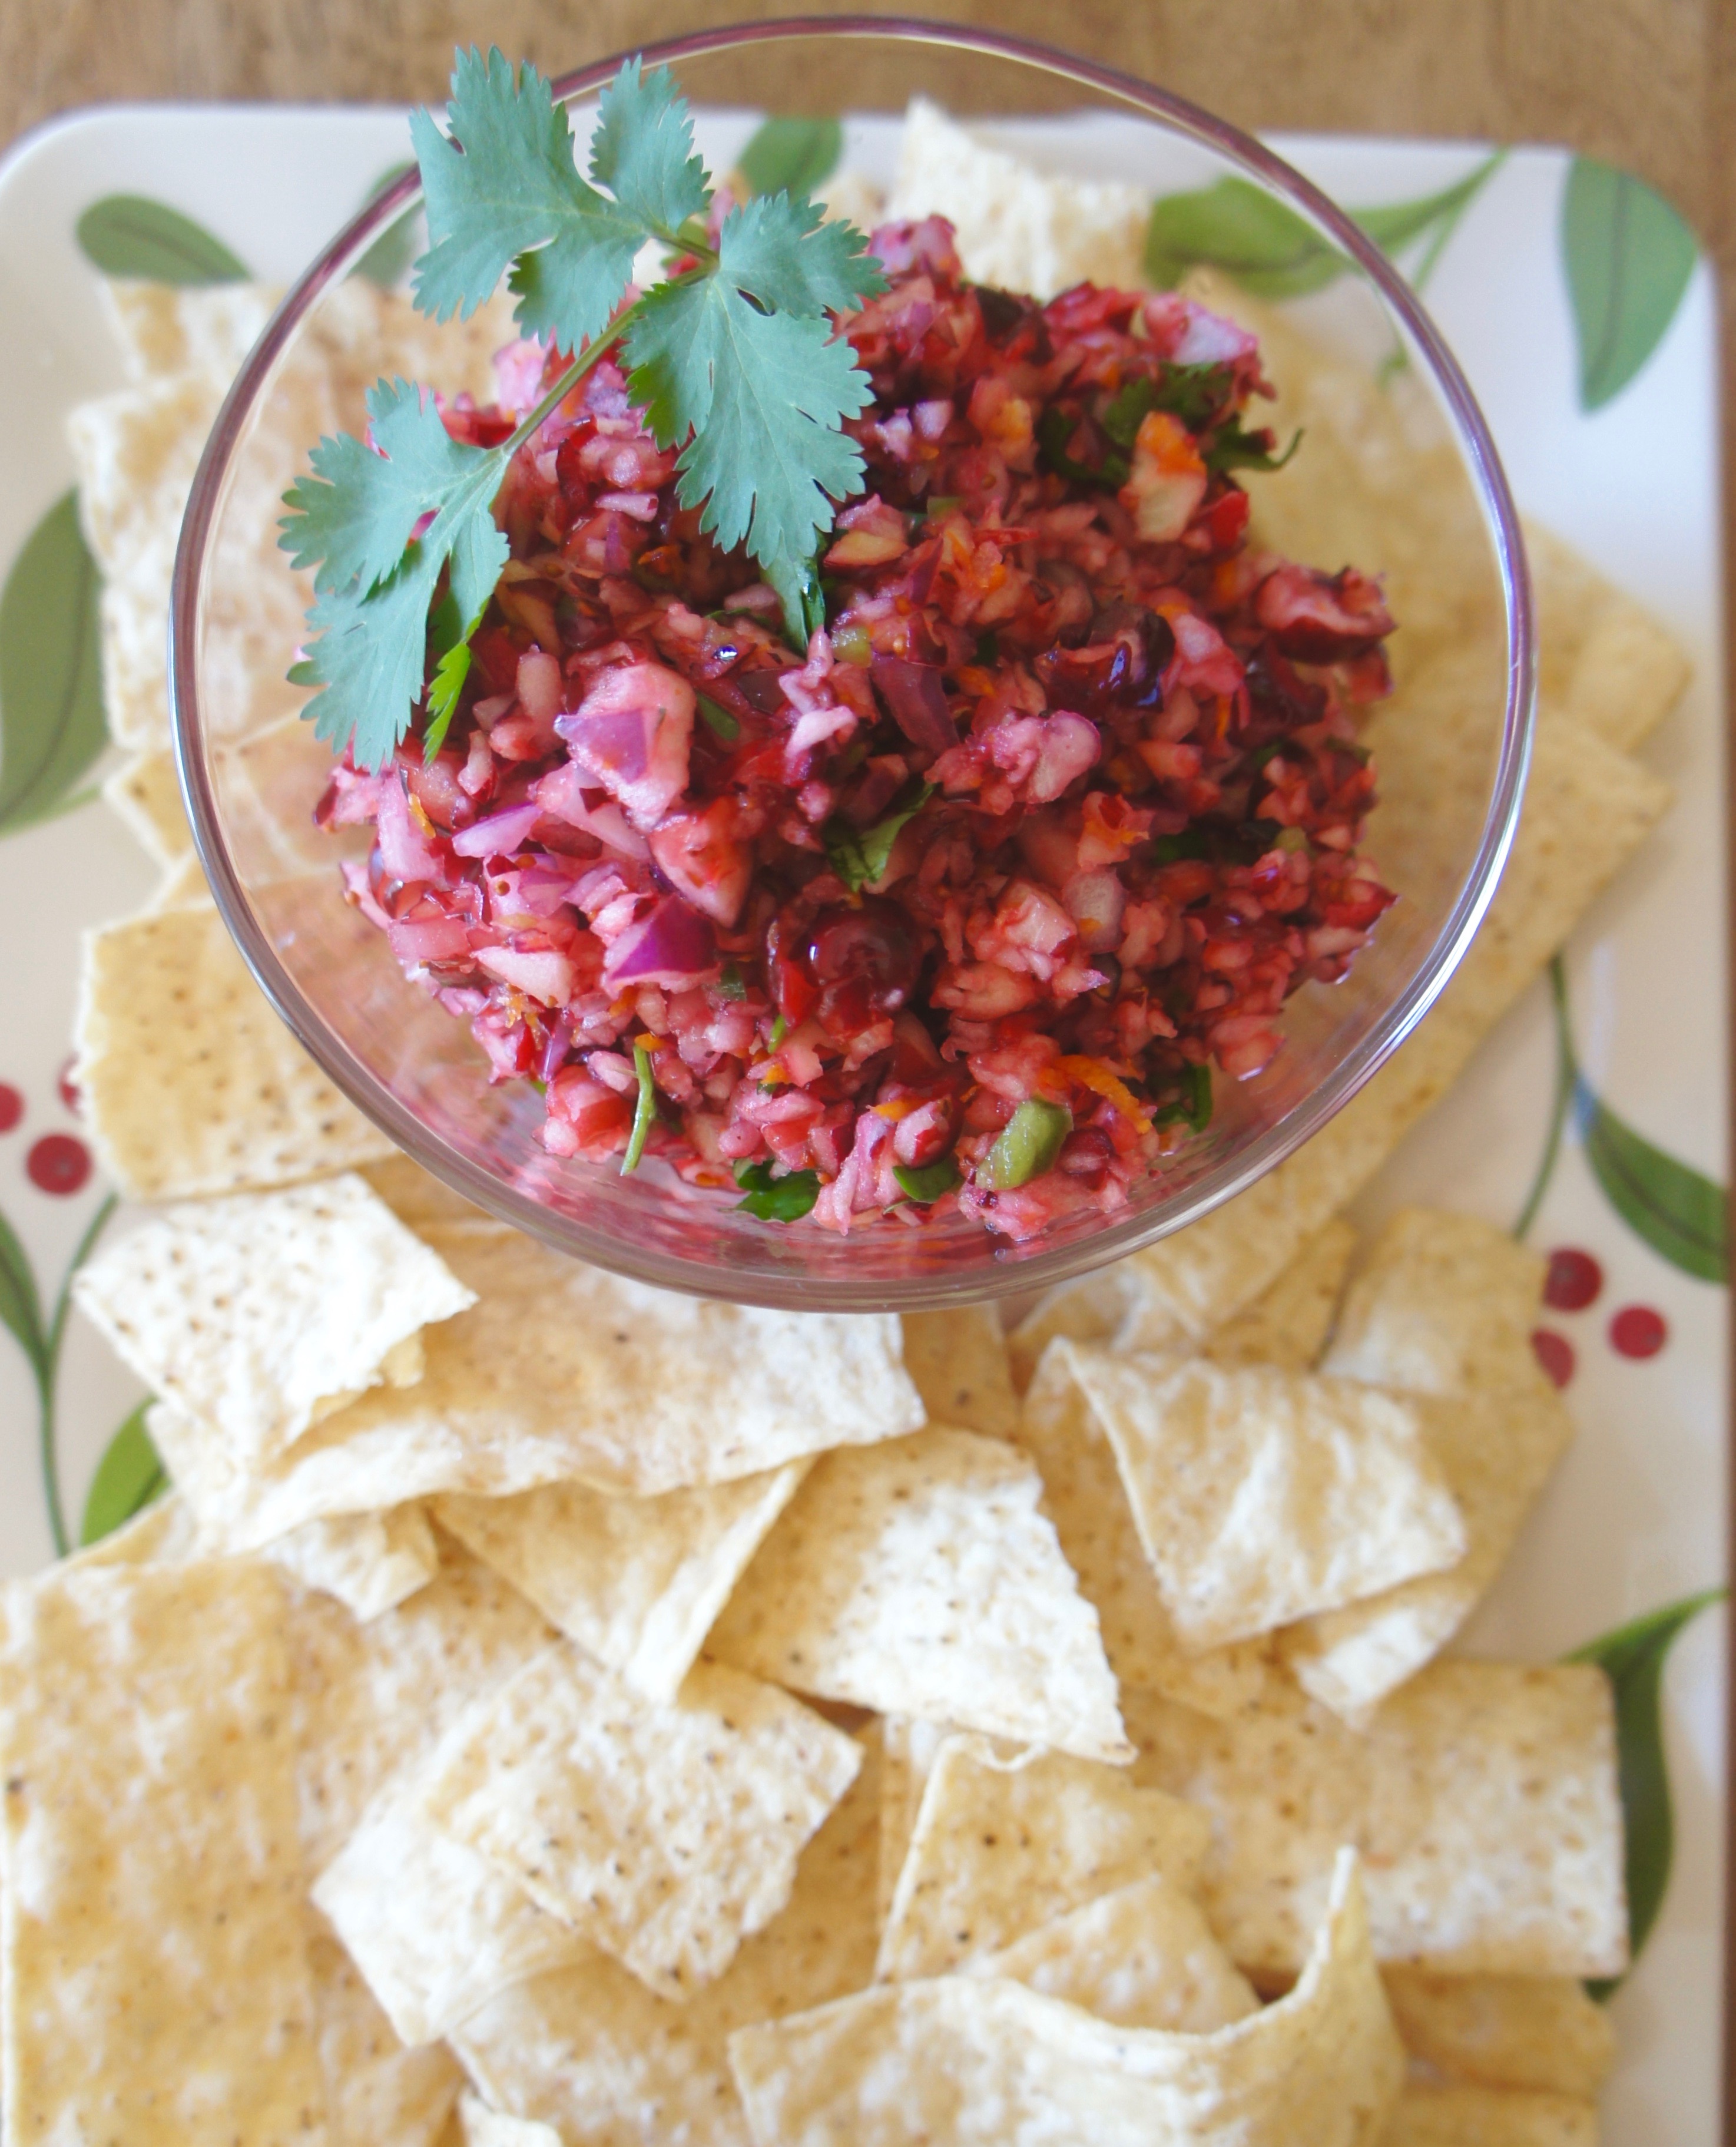
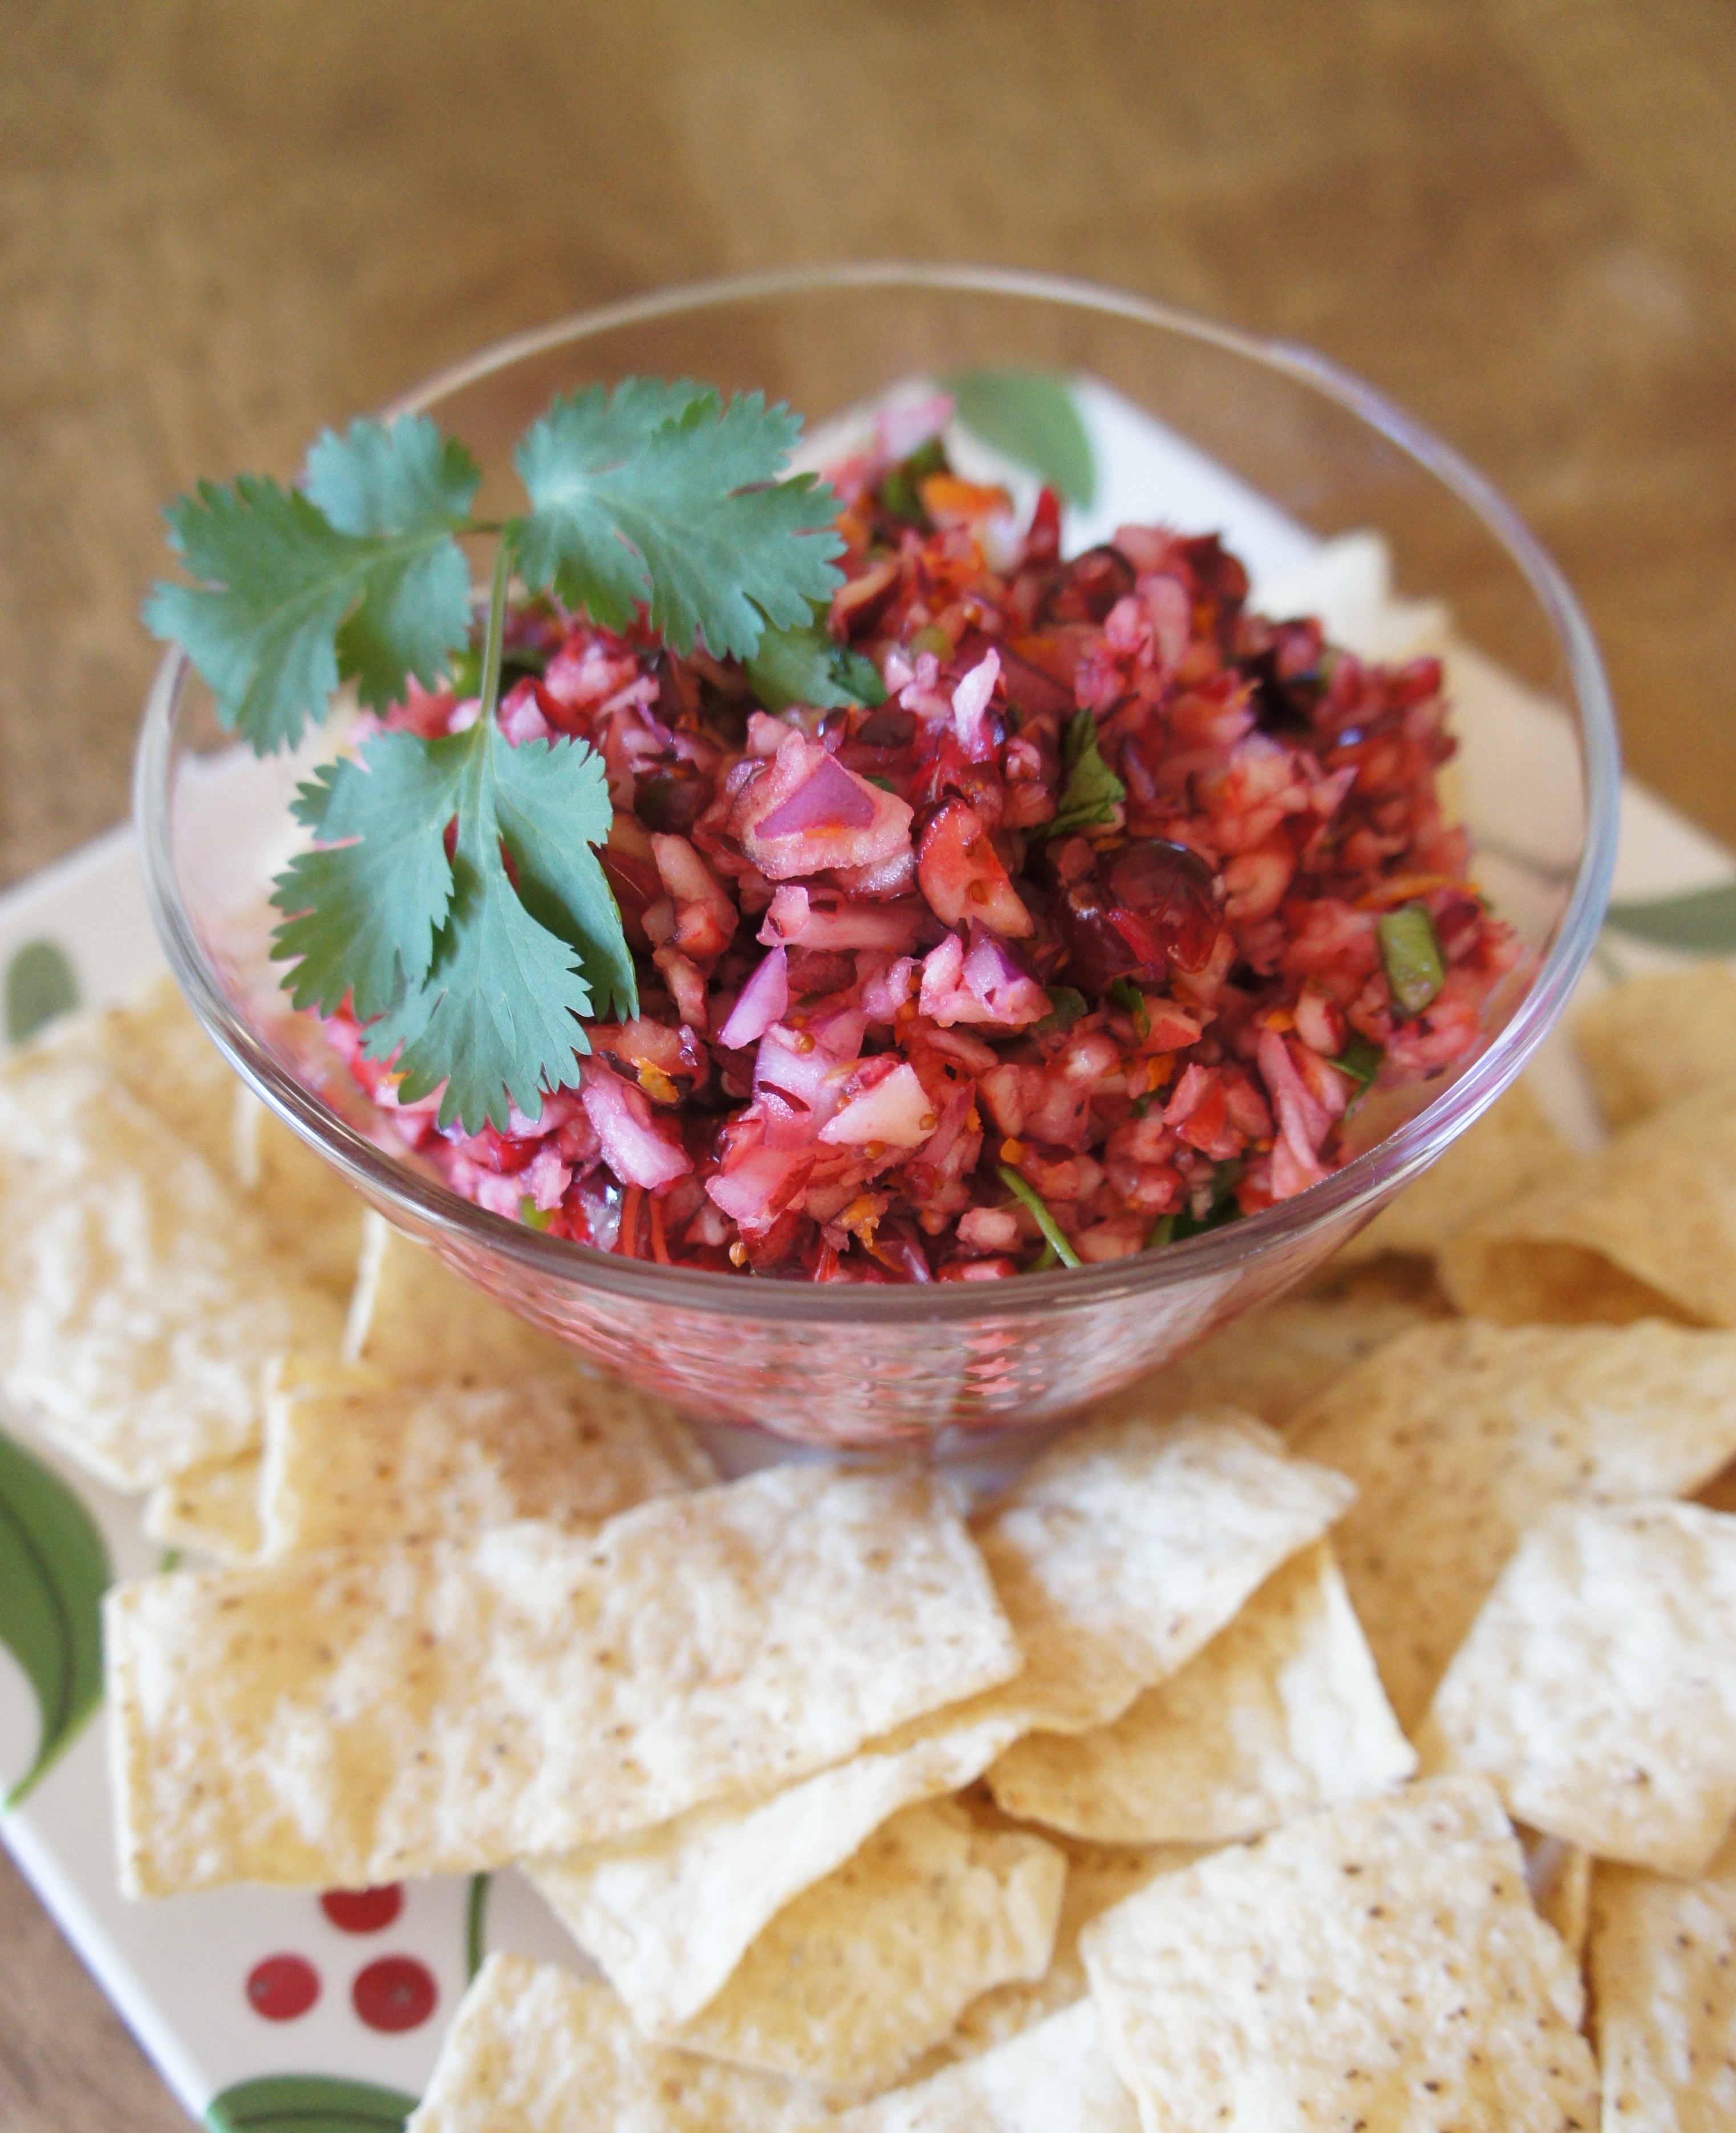
Cranberry Salsa

How often do you eat cranberries in their fresh, raw form? It seems to go without saying that sweetened dried cranberries have pretty well monopolized the Cranberry Market in recent years, edging out their plump, juicy originators by a long shot. I’d wager few of us ever go around eating raw cranberries as our go-to fruit of choice. As a matter of fact, when my six-year-old daughter saw them in our fruit crisper the other day and asked to try one, I told her to do so at her own risk. Raw cranberries are so stinking tart, they’re almost inedible on their own.
Not surprisingly, it took about two seconds before she made a horrible face and spit it into the trash.
That’s why this Cranberry Salsa–which I had the fresh cranberries in the fridge for–is so special. It features raw cranberries combined with apple, jalapeño, red onion, and a couple of other fresh ingredients for an unexpected, interesting appetizer that’s sure to be a hit at holiday parties. (It was at mine last night! The bowl I served this in was practically licked clean.)

Being a nutritionist, I’m a bit self-conscious about the food I serve when I entertain. Maybe no one is thinking about it but me, but I feel like my title obligates me to make at least some fairly healthy options for my guests. Plus, the nutritionist in me likes to offer allergy-friendly options for friends and family in the “something-free” club. This salsa fit the bill for both, since it’s vegan, gluten-free, dairy-free, soy-free–basically everything-free, since it’s made entirely with fresh fruits, sugar, and salt. Heck, it’s even RAW, if you’re into that, too.
Oh, and it’s easy. And make-ahead. And a balanced blend of sweetness and spice. And seasonal.
Can you tell I’m sold? Give this one a try for any upcoming Christmas parties and tell me how it goes!


Cranberry Salsa
This Cranberry Salsa is a festive, healthy, allergy-friendly holiday appetizer.
Prep Time15 mins
Total Time2 hrs 15 mins
Servings: 8
Ingredients
- 1/4 c. white sugar
- 2 c. fresh raw cranberries
- 1 Gala or Fuji apple, cut into chunks
- 1/2 medium red onion, cut into chunks
- 1 medium jalapeno, seeded and quartered
- 1 Tbsp. orange zest
- 2 Tbsp. fresh orange juice
- 1 Tbsp. fresh lime juice
- 1/4 tsp. salt (or more to taste)
- 2 Tbsp. fresh cilantro
Instructions
- In the bowl of a food processor, process the sugar until very fine (to create superfine sugar). Pour into a serving bowl and set aside.
- Place cranberries, apple, red onion, and jalapeño in the food processor and process until the mixture reaches a finely chopped pico de gallo-type consistency. Add to the bowl with the sugar and stir to combine.
- Add orange zest and juice, lime juice, and salt and stir to combine. Cover and chill 2-24 hours. Stir in cilantro just before serving.
Notes
Adapted from Home is Where the Boat Is, who adapted it from Southern Living.
Pumpkin Hummus + Fall Tortilla Chips

I realize Halloween is over, but can you handle one more pumpkin recipe? I know I can, but then again, I could eat pumpkin pie every day whole year round. For others less out of their gourd for gourds, now that it’s November, pumpkin fatigue may have set in. Understandable. But I hope you’ll make an exception for this Pumpkin Hummus recipe, because not only is it easy, unique, and tasty, it’s also super fun to make with DIY fall-shaped tortilla chips.

When it comes to making hummus, the main thing that usually stands in my way is that I suffer from what I think of as Tahini Block. As in, I really, really don’t want to spend eleven bucks on a jar of ground sesame seeds when all I’ll use is a couple of tablespoons at the most. Therefore, I generally refrain from homemade hummus unless I can use a tahini-free recipe. This one fits that description! Though tahini adds a signature flavor, as a general rule hummus is extremely adaptable. As long as it starts with beans and ends up with a nice consistency, I say you’re safe to call it authentic even if no tahini is involved.

Now let’s talk tortilla. DIY fall shaped tortilla chips, to be exact. Of course you could buy tortilla chips at the store–I mean, who really needs to make their own chips?–but once you’ve cut your own shapes with delightful fall-themed cookie cutters, there’s no going back. Pumpkin and leaf-shaped dippers add a whole extra layer of seasonal character alongside this pumpkin hummus.
So for your next play date, Thanksgiving potluck, or Tahini Avoiders Anonymous meeting, give this fun combination a try!


Pumpkin Hummus + Fall Tortilla Chips
A savory, tahini-free pumpkin hummus paired with fun DIY tortilla chips!
Prep Time10 mins
Total Time10 mins
Servings: 6
Ingredients
For the hummus:
- 1 large clove garlic
- 1 c. pumpkin puree
- 1 c. garbanzo beans, drained
- 2 Tbsp. lemon juice
- 1/4 tsp. salt
- 1/4 tsp. cumin
- 1/8 tsp. paprika
- 1/8 tsp. cinnamon
- 1 Tbsp. olive oil
- pepitas, for garnish, if desired
For the tortilla chips:
- 12-18 6-inch corn tortillas
- olive oil cooking spray
- your choice of herbs and spices for sprinkling (paprika, cumin, oregano, garlic powder, etc.)
Instructions
To make the hummus:
- Place garlic clove in the bowl of a food processor and run on low briefly to mince. Add all remaining ingredients and process until smooth. Serve garnished with pepitas, if desired.
To make the chips:
- Preheat oven to 350 degrees. Line a rimmed baking sheet with aluminum foil.
- Using fall-themed cookie cutters, cut shapes out of tortillas. (You can either discard the remaining tortilla scraps or include them for other, funky-shaped chips.) Spray both sides of cutouts lightly with olive oil cooking spray, then sprinkle to taste with herbs and spices. (Or for sweet chips, try sprinkling with cinnamon and sugar.)
- Place on prepared baking sheet and bake 7 minutes, then flip chips and bake another 7 minutes. Serve with pumpkin hummus.
Notes
A Love Letter to Food Original Recipe
Vanilla Chai Granola

A friend of mine recently posted a bit of a rant on Facebook about food blogs that make you scroll through 6,000 pictures and an 800 word banal anecdote before you can actually get to the recipe. I get it. Certainly, recipes are the main reason people visit food blogs…at least, I assume so. That’s the reason I visit food blogs, anyway. We’re not here for the story of how your dog is so adorable and that somehow relates to this casserole, or how you spilled all your Worcestershire and were forced to make this sauce with soy sauce instead. (“But it turned out AMAZING!”)

The truth is, though, as a food blogger, sometimes it’s a bit of a stretch to come up with anything meaningful to say about, say, a salad that just came together on a weeknight and was good enough to share. Cause that’s kind of the whole story. And people end up trying way too hard, when maybe the recipe can speak for itself.

Sorta the case with this Vanilla Chai Granola. All I’ve really got to say is: it’s tasty, easy, and goes great with some Siggi’s vanilla yogurt and some strawberries in a breakfast parfait. Other than that, I could see it as a unique topping for a fruit crumble or a simple start to the day with a splash of milk.
So since I’m not talking your ear off about the recipe…can you forgive a couple extra pictures? 😉


Vanilla Chai Granola
A mixture of warmth and sweetness make this Vanilla Chai Granola a special breakfast treat!
Servings: 8
Ingredients
- 2 1/2 c. old-fashioned oats (gluten free, if necessary)
- 2/3 c. pecan pieces
- 1/3 c. slivered almonds
- 1/4 c. canola oil
- 3 Tbsp. maple syrup
- 1/4 c. brown sugar
- 2 tsp. vanilla
- 3/4 tsp. cinnamon
- 1/4 tsp. ground ginger
- 1/4 tsp. ground cardamom
- 1/8 tsp. ground cloves
- 1/8 tsp. ground coriander
- pinch salt
Instructions
- Preheat oven to 300 degrees and spray a baking sheet with non-stick cooking spray. In a large bowl, stir together oats, pecans, and almonds.
- In a medium bowl, combine canola oil, maple syrup, brown sugar, and vanilla.
- In a small bowl, combine cinnamon, ginger, cardamom, cloves, coriander, and salt.
- Pour oil mixture over oat mixture and stir to coat, then do the same with the spice mixture over all.
- Spread in a layer on the baking sheet and bake about 45 minutes, stirring every 15 minutes. Store in an airtight container at room temperature.
Notes
A Love Letter to Food Original Recipe.