Banana Almond Butter Muffins

Why is it that every time you search for a recipe with almond butter (especially baked goods) everything that comes up is touted as Paleo? Do a quick Google search for almond butter muffins and you’ll find results like this:

Almond Butter Muffins {Paleo}!

SUPER Paleo Banana Almond Butter Protein Bites {PaleoPaleoPaleo}

Flourless Almond Butter Muffins With Secret-Ingredient Buffalo Meat–As Paleo As It Freakin’ Gets!

Apparently, in the world of Paleo (aka the way our ancestors supposedly ate) peanuts are legumes, not “real” nuts, so for some reason, hunter-gatherers wouldn’t have eaten them. Almonds, on the other hand, are allowed on the diet.

Since I’m a freelance food and nutrition writer and I usually write for other people, sometimes it’s such a joy to get to write my own opinions on my own blog. So let me just say, I think all this Paleo almonds-versus-peanuts business is nonsense. Looking at the nutrient profile of peanuts and almonds, I think we’re splitting hairs, so I don’t really care whether my furry forebears ate or didn’t eat one or the other. I’m just trying to find a decent almond butter muffin recipe because I happen to like almond butter, mmkay?

So what’s a girl to do when she can’t find a muffin recipe that’s not made with rice flour or coconut sugar (and/or buffalo meat)? Make her own!

These Banana Almond Butter Muffins are a riff on the always-reliable Sally’s Baking Addiction’s skinny peanut butter banana muffins.

They do have a couple of unique ingredients, like some flax seed for extra fiber and omega-3 fats, and in place of almond milk, I used an interesting banana nut plant-based coffee creamer I’ve been trying out. But of course, if you don’t have flax seed or banana-nut coffee creamer, whole wheat flour and any kind of milk will do. (Even cow’s milk–take that, Paleo!) Heck, you could even revert to peanut butter instead of almond butter. In addition to these ingredients, you’ll find Greek yogurt, honey, whole wheat flour, and a couple of mashed bananas.

Healthy? Yes. Delicious? Absolutely. Paleo? Nope, not for me.

Print Recipe
5 from 1 vote

Banana Almond Butter Muffins

Creamy almond butter meets wholesome whole wheat flour, mashed banana, and ground flax seeds in this healthy breakfast recipe. Chocolate chips optional but necessary.
Prep Time10 mins
Cook Time17 mins
Total Time27 mins
Servings: 14 muffins

Ingredients

  • 2 large bananas, mashed
  • 1/4 c. honey
  • 1/4 c. brown sugar
  • 1/2 c. 2% plain Greek yogurt
  • 1 egg
  • 1/3 c. banana nut coffee creamer (or almond or any other milk)
  • 1/2 c. creamy almond butter
  • 1 tsp. vanilla
  • 1 1/2 c. white whole wheat flour
  • 1/4 c. ground flaxseed
  • 1 tsp. cinnamon
  • 1 1/2 tsp. baking soda
  • 1/4 tsp. salt
  • 1/2 c. mini chocolate chips (optional)

Instructions

  • Preheat oven to 425 degrees and grease 14 muffin cups.
  • In a large bowl, combine mashed banana, honey, brown sugar, yogurt, egg, creamer/milk, almond butter and vanilla.
  • To the same bowl, add white whole wheat flour, ground flaxseed, cinnamon, baking soda, and salt. Stir until just combined. Fold in chocolate chips, if using.
  • Divide batter evenly between muffin cups. Bake in preheated oven for 5 minutes, then reduce temperature to 350 degrees and continue baking 12 minutes. Muffins are done when a tester inserted in the center comes out clean. Store in an airtight container, preferably in the refrigerator.

Notes

Inspired by (but heavily edited from) Sally's Baking Addiction.

Herbed Tuna in Heirloom Tomatoes

I could sit down with a good cookbook like a good novel. A nice night in, to me, is poring over a new cookbook, imagining each step of each recipe, and picturing the delicious finished product. It’s basically the equivalent of fantasy fiction for cooks.

With a fairly large collection of cookbooks (plus compulsively checking them out from the library, as I do) there are always those recipes I bookmark during my perusing and think, I’ll make that eventually. But time goes by, I find new and exciting ideas on Pinterest, and sometimes things I think I’ll make fall by the wayside.

These Herbed Tuna in Heirloom Tomatoes are one such recipe.

For years I’ve been a fan of Real Simple’s line of cookbooks, and this recipe called out to me from Meals Made Easy as long ago as–dare I admit it–2009. I thought it looked healthy, easy, and bit unique. I mean, how often do you put fish in a tomato? Sounds kinda weird…but not in a bad way. Plus, I find the idea of food as its own serving container ADORABLE and kind of a genius way to minimize on doing dishes.

The thing is, though, heirloom tomatoes are only in season so often. And even when they are, I usually pass them by in the grocery store, thinking they’re just a little too fabulous for me. They’re the fine china of vegetables: Fancy and gorgeous, but really? For everyday?

You know what, though? Yes! Why NOT splurge on something as healthy (not to mention gorgeous) as heirloom tomatoes? I picked up these multi-colored models yesterday determined to finally put fish in a dang tomato!

The results were worth the wait. (Of ten years, haha.) I really enjoyed not only the process of stuffing these heirlooms for unique presentation, but also the fun of eating them. The tuna mixture is flavored with a Mediterranean profile of lemon juice, olive oil, capers, parsley, and pepper, but could be played with any way you like. Plus, if you have dietary restrictions like gluten-free or dairy-free, these fit the bill.

Give them a try for a tasty, healthy, seasonal summer lunch!


Herbed Tuna in Heirloom Tomatoes

This light and healthy Mediterranean-flavored lunch is a fun way to soak up the flavors of summer!
Servings: 2 as a main course

Ingredients

  • 3-4 large heirloom tomatoes
  • 2 6-oz. cans tuna, drained, preferably albacore packed in olive oil
  • zest of 1 lemon
  • juice of 1/2 lemon
  • 2 Tbsp. capers
  • 1/3 c. fresh parsley, chopped
  • 1/4 tsp. black pepper
  • drizzle olive oil, if you used tuna packed in water

Instructions

  • Using a paring knife, slice a circle in the top of each tomato. Scoop the flesh out of tomatoes, leaving about a 1/4 inch-thick tomato "shell." Drain any excess water out of the flesh you've scooped and dice it into 1/4 to 1/2-inch pieces.
  • Place diced tomato in a mixing bowl. Add all remaining ingredients and mix to combine.
  • Scoop the mixture into your tomato shells and serve.

Notes

Adapted from Real Simple.

Orange Olive Oil Bundt Cake

Need a dessert to feed a crowd? This Orange Olive Oil Bundt Cake with yogurt icing is just the ticket!

Every other Sunday for the last fifteen years, my husband and I have had Sunday dinner with his family. Coming from a New York Italian family as he does, Sunday dinner is almost more of a religious observance than a simple meal. Barring an act of God, it WILL happen. And it will probably involve sausage.

Over the years, as we’ve gotten together, the family has seen many changes. While Sunday dinner started out at his parents’ house every week, we’ve now transitioned to rotating between the homes of his mom and his siblings. And whereas, fifteen years ago, there were seven of us around the dinner table, there are now eighteen adults and kids. When it’s our turn to host, you can find me searching for recipes that feed a crowd.

I’ve assembled a handful of go-to entrees to serve for dinner, from chili to casseroles to barbecue chicken sandwiches (thank God for the Crock Pot). But sometimes the course that leaves me stumped is dessert. A single pan of brownies no longer suffices for this many people, and forget about a single pie–or even two. One dessert I come back to time and again is the ample, flexible bundt cake. It’s easy to slice and serve for any portion size, it doesn’t require the effort of frosting of a layer cake, and it always turns out so pretty. Plus, who doesn’t like cake?

I made this Orange Olive Oil Bundt Cake for our most recent Sunday dinner. Lately I’ve been digging in to a bit of “research” (aka baking and eating) on replacing butter or other fats with heart-healthier olive oil. This particular olive oil baking experiment was certainly a success! The cake turned out slightly–but not overly–dense, with a delightfully almost-crunchy crust. Drizzled with a yogurt icing with a hint of orange, each slice was a little bit of citrus heaven, especially when accompanied by a dollop of vanilla ice cream.

To complete a Mediterranean-themed meal, I served this after my Twice-Baked Spaghetti Squash with Sausage and Kale. (See? I told you sausage would be involved.) For Sunday dinner or to feed any crowd, I’d say you can’t go wrong with bundt cake–especially this one.


Print Recipe
5 from 1 vote

Orange Olive Oil Bundt Cake

Serve up a slice of citrus heaven with this orange olive oil bundt cake topped with yogurt drizzle!
Prep Time15 mins
Cook Time45 mins
Total Time1 hr
Servings: 16

Ingredients

For the cake:

  • 1 1/2 c. white sugar
  • 4 eggs
  • 2/3 c. high quality extra virgin olive oil
  • 2 tsp. vanilla extract
  • 1/2 tsp. orange extract (optional)
  • 2 Tbsp. fresh orange zest
  • 6 Tbsp. fresh-squeezed orange juice
  • 2 1/2 c. all-purpose flour
  • 2 tsp. baking powder
  • 1 tsp. baking soda
  • 1 tsp. salt

For the orange-yogurt glaze

  • 2 c. powdered sugar
  • 3 Tbsp. fresh-squeezed orange juice
  • 1 Tbsp. full-fat plain yogurt
  • extra orange zest for garnish

Instructions

Make the cake:

  • Preheat oven to 350 degrees and generously grease a 12-cup bundt pan.
  • In a large bowl, mix sugar and eggs with a hand mixer on medium speed. Add olive oil, vanilla, and orange extract and mix until smooth, then repeat with orange zest and juice.
  • Add flour, baking soda, baking powder, and salt and mix with hand mixer until no lumps remain.
  • Pour into prepared bundt pan and bake 40-45 minutes or until a tester inserted in the center comes out clean. Let cake cool completely before frosting.

Make the glaze:

  • In a medium bowl, whisk together powdered sugar, orange juice, and yogurt until smooth.
  • Drizzle icing over cooled cake. Garnish with additional orange zest. Refrigerate until ready to serve.

Notes

Adapted from Food Network, glaze my own recipe.

Coconut Chocolate Granola Bars


What would you do if you had a few extra hours to yourself per week?

Someone asked me this recently, and I didn’t have to think very hard before answering: “I’d read more, watch my favorite ’90s movies, probably go shopping for some professional clothes for an upcoming conference, and bake. Definitely bake.”

This weekend, thanks to a much-needed housecleaning service mid-week, I found myself with a bit of extra time on my hands. And, true to my prediction of what I’d do in this situation, I decided I really wanted to bake. But I didn’t want to simply follow a recipe like I normally would.

For me, it’s the creative process that makes cooking (and especially baking) not just fun, but actually therapeutic. Still, because I often have a reason my finished product needs to turn out nice-looking or at least reasonably presentable, I’m usually a recipe-followin’ gal. The trial-and-error nature of free-form baking just isn’t worth the risk if I’m preparing dessert for company or bread for family breakfast. Give me a list of steps someone else has promised will lead to success and I’ll follow like a trusting puppy dog.

Sometimes, though, I get the chance to create my own recipe just for the joy of it. Art for art’s sake, let’s say. My canvas? Today, it was a mixing bowl, a baking pan, and a blend of go-to ingredients. The end result? Granola bars! To me, these DIY noshables are a great option for experimentation. They’re low-risk (’cause, hey, they’re just a snack) and generally forgiving, with their wide-open hodgepodge of various ingredients.

Making these Coconut Chocolate Granola Bars, I had a great time tinkering with the ratios of dry ingredients, binders, and mix-ins–and I’m happy to say they came out just right! These start with a flax egg to make them vegan (just kidding, it’s because I didn’t have any eggs). Then, wholesome additions like oats, whole wheat flour, and honey make their way into the mix, plus sweet treats chocolate chips and coconut. After a 30-minute stint in the oven, these bars emerge chewy and ready for snacking action. Our whole family loved them.

If you’re new to making your own recipes, I say start with granola bars. Or, if you’d like a recipe, start with this one! Tried and tested by yours truly, I can assure you these bars make a delicious homemade alternative to packaged snacks.


Coconut Chocolate Granola Bars

Chewy, chocolatey, and coconut-y, these homemade granola bars are a yummy alternative to the packaged variety.
Prep Time10 mins
Cook Time30 mins
Total Time55 mins
Servings: 16 bars

Ingredients

  • 1 Tbsp. flax seed meal
  • 3 Tbsp. water
  • 2 c. quick-cooking oats
  • 1/2 c. whole wheat flour
  • 1/2 c. shredded unsweetened coconut
  • 1/2 c. mini chocolate chips (vegan to make vegan)
  • 1/2 tsp. salt
  • 3/4 tsp. coconut extract
  • 1 tsp. vanilla extract
  • 1/4 c. honey (or maple syrup to make vegan)
  • 1/2 c. almond milk
  • 1/2 c. vegetable oil

Instructions

  • Prepare the flax egg: In a small bowl, combine 1 Tbsp. flax seed meal and 3 Tbsp. water. Place in the refrigerator to firm up for about 15 minutes.
  • Preheat oven to 350 degrees and grease a 13 x 9-inch baking dish with cooking spray.
  • In a large bowl, combine all dry ingredients: oats, flour, coconut, chocolate chips, and salt. Mix in coconut extract, vanilla, honey, almond milk, vegetable oil, and flax egg. Spread in prepared pan, pressing down firmly to smooth.
  • Bake about 30 minutes. Let cool 10 minutes, then slice into 16 bars. Store covered at room temperature.

Notes

A Love Letter To Food Original Recipe.

7 Creative Ways to Use Dried Fruit

When you think of dried fruit, what comes to mind? “Part of a gift basket we always give Grandpa for his birthday”? “A grab-and-go snack for hiking”? “Shriveled excuse for real fruit”?

Historically, I was never too impressed with dried fruit. (Though, one thing it has going for it is that, here in the States, we don’t call it “desiccated fruit” like I’ve seen in the UK. Sounds more like roadkill than a tasty treat.) Part of my issue was that I always believed it to be less nutritious than regular fruit. With the water drawn out of it, I figured, you get none of the digestion-promoting, skin plumping, all-around body-boosting hydration you would from regular fruit.

But come to find out, just because water is removed doesn’t mean all nutrients have left the building. Dried fruit retains (almost all) its antioxidants, micronutrients, and fiber—more, in fact, per weight, than fresh fruit. So, in one sense, dried fruit could be considered more nutritious than fresh.

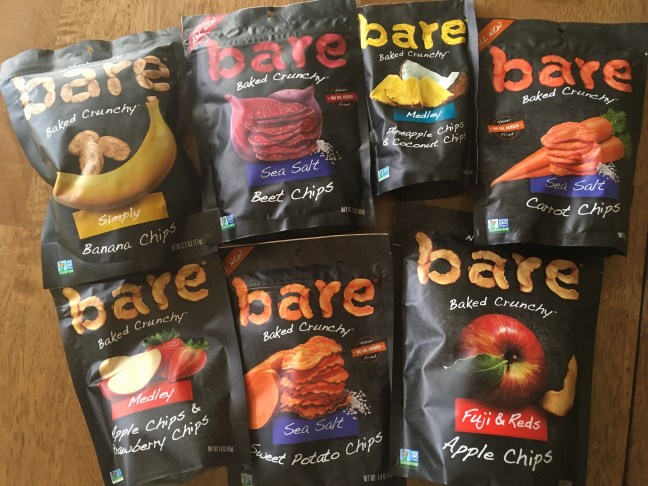
Still…even though it turns out dried fruit is actually healthy, I never knew what to do with it. Eating it plain always did remind me a bit too much of Grandpa’s annual fruit basket birthday gift, and not in the most appealing way. So when the friendly folks at Bare Snacks reached out to see if I’d like to try a smattering of their dried fruit and veggie products, I was intrigued. Were there more creative ways to use dried fruits and veggies I just hadn’t thought of yet?

The short answer: Yes!

The bountiful sample Bare sent over invited a whole new world of experimentation with dried produce. The last month or so has been a fun process of discovering the many delightful uses of dried strawberries, apples, bananas, coconut, pineapple, and more.

Here are seven creative (and tasty) ways to reap the health benefits of dried fruit:

1. Make a popcorn trail mix.


Call me crazy (it’s okay, my family does anyway) but I sometimes think popcorn could use a little boost. That’s why I so enjoyed adding dried strawberries and bananas—and chocolate chips, obvs—to this tasty popcorn trail mix. The sky’s the limit for what kind of dried fruit you’d like to mix in for a unique movie night snack.

2. Top cereal with it.

What’s the difference between cereal you see in commercials and the cereal that actually comes out of the box? FRUIT, baby.

(Everyone knows Crispix doesn’t come with raspberries, right?)

Add a little luxury to your breakfast bowl by sprinkling it with dried berries. You might even feel like you’re in a classic, overly enthusiastic 80’s cereal commercial.

3. Make a fruity PB-graham cracker snack.

Peanut butter graham crackers are one of my go-tos for an afternoon snack. Adding dried strawberries and apples makes them a bit more interesting (and tangy! and nutritious!).

4. Make granola or oatmeal with it.

For me, breakfast is the toughest meal of the day to include fruits and veggies in. I honestly have to “trick” myself a lot of the time by incorporating them into the package of whatever I’d choose anyway, like a baked oatmeal or bowl of granola. Try using dried apples in place of fresh in this Peanut Butter Apple Baked Oatmeal, or pump up the nutrition in Vanilla Chai Granola by adding dried coconut or mango to the mix.

5. Use it in a yogurt parfait.

Don’t have time to make homemade granola to put in a parfait to start your day? No worries. Simply use dried fruit all by its lonesome. You’ll still get a pleasing crunch mixed in with smooth and creamy yogurt.

6. Put it in cookies.

There’s SO much more to the world of dried fruit in cookies than slipping some Craisins into your Toll House recipe. Jazz up your cookie game (and add some fiber, vitamin C, and vitamin K, among others) with the dried apricots, figs, and cherries in Ina Garten’s nearly all five-star-reviewed Fruitcake Cookies.

Alllllll the jazz hands for jazzed-up cookies.

7. Use it as an ice cream topping.

Don’t worry, I don’t mean ruining perfectly good Oreo ice cream with dried apricots or some such nonsense. I mean enhancing ice cream with a similarly-flavored dried fruit, like adding some dried coconut and pineapple bits to a bowl of piña colada gelato. Instant added fiber and nutrients plus added yummy taste!

What’s YOUR favorite way to eat dried fruit?