Popped Sorghum Protein Balls

Crunchy and sweet, these healthy Popped Sorghum Protein Balls make a super-easy vegan, gluten-free snack!


Whaddaya know about sorghum? You may have heard of this grain as the base for syrups or food flavorings, or maybe you have a vague association of it with endless Midwestern fields of grains–but have you ever tried it all by itself? If not, you’re in for a treat, both eating it all by its lonesome and using it in these tasty, nutty Popped Sorghum Protein Balls.

What is sorghum?

Like most Americans, I haven’t exactly thought of popped sorghum as a go-to snack throughout my 38 years of life. In fact, I had never given the stuff a second thought until I attended a nutrition conference last year and was introduced to it as not just a ho-hum grain that flavored cereals (maybe? or something?), but a snack in its own right.

Sorghum is an African ancient grain that has found a home on American soil. It’s not only gluten-free, vegan, high in fiber, and rich in antioxidants, its growing practices are pretty darn good for the environment, too. According to the presenter at my most recent nutrition conference, 90% of American sorghum farmers do not irrigate, saving valuable water. Plus, three-quarters of them use conservation tillage practices, which conserves soil by reducing erosion. A sorghum habitat even protects and increases wildlife! I don’t claim to be a soil expert (I’ll leave that to my uncle Scott in Quincy, Illinois) but it’s nice to know the majority of sorghum grown in the U.S. has a top-notch environmental profile.

Okay, but what is popped sorghum?

All well and good, I hear you say, but I’m here for the food.

Me too!

I recently had the chance to try out Nature Nate’s Popped Sorghum, which takes sorghum grains and pops them to create itty-bitty bites of salty deliciousness that are, essentially, like shrink-rayed popcorn. 

Look how cute! So tiny!

So far, I’ve tried the Avocado Oil and Sea Salt, Coconut Oil and Pink Himalayan Sea Salt, Rosemary Garlic, and Organic Ghee Butter flavors. In terms of taste, I’d say popped sorghum is like a slightly nuttier popcorn, with a somewhat softer texture. Bonus: There’s no giant, tooth-cracking kernel in the middle just waiting to throw you under the bus for dental work.

My 13-year-old son is our family’s biggest popped sorghum fan. After school, he sits on the couch with a large bowl. My only complaint is, being a teenage boy, he pretty much always leaves the bowl (and the crumbs) for me to clean up.

I digress.

With savory flavor, scoopable size, and crunchy (but not too crunchy) texture, popped sorghum makes for great snacking. But, as a recipe developer, my mind is always churning out thoughts of how else I can use a food. (You know, ’cause eating something all by itself just isn’t exciting enough.)

I’m a fan of energy bites, which always seem tastier with a hint of crunch. So I figured the Avocado Oil and Sea Salt Popped Sorghum from Nature Nate’s could be just the thing to add to a quick batch of peanut buttery protein balls. Sure enough, the little crunchies brought a unique, salty twist (and a boost of fiber and nutrients) to these snacks.

With just six ingredients and one bowl, these bites came out sweet and salty, crunchy and chewy. They also formed up nice and easily into portable, poppable balls. (I’m now trying to convince my 13-year-old to eat them instead of just popped sorghum to save on crumbs.) If your afternoon snacks have gotten a little boring lately, give them a try!

Other ways to use popped sorghum

Got some extra popped sorghum left after you make protein balls? Here are some creative ways to eat this unique grain:

  • Sprinkle some in a trail mix
  • Use it as a salty topping on ice cream
  • Scatter some throughout a chocolate bark
  • Add crunch (and extra fiber) to oatmeal

Print Recipe
5 from 1 vote

Popped Sorghum Protein Balls

Crunchy and sweet, these protein balls come together in just minutes for a healthy, unique snack.
Prep Time10 mins
Servings: 12 balls

Ingredients

  • 1/2 c. Nature Nate's Avocado Oil and Sea Salt popped sorghum
  • 1/2 c. creamy peanut butter
  • 2 Tbsp. maple syrup
  • 1/4 c. flax seed
  • 1/2 c. old-fashioned oats
  • 1/4 tsp. ground cinnamon

Instructions

  • In a large bowl, mix together all ingredients until well combined.
  • Using your hands, form into golf ball-sized balls.
  • Refrigerate in an airtight container for up to a week.

Notes

A Love Letter to Food Original Recipe.

Disclosure: This post sponsored by Nature Nate’s Popped Sorghum. All opinions my own.

Pumpkin Olive Oil Muffins

Pumpkin Olive Oil Muffins bring the heart-healthy goodness of olive oil to your breakfast table.


Is olive oil all it’s cracked up to be? You hear it touted as the heart-healthy oil–almost a savior of recipes. Something’s got three pounds of cheese and oodles of bleached, refined flour but it has olive oil???? Must be healthy!

As a nutritionist, I wouldn’t go so far as to say that olive oil automatically makes anything good for you, but it does come with significant health benefits.

As part of a Mediterranean diet, it can reduce the risk of cardiovascular disease (CVD), especially if you’re already at risk. One study in the New England Journal of Medicine found that people at risk of CVD who followed a Mediterranean diet supplemented with–get this–extra olive oil had fewer major adverse cardiovascular events than those who supplemented with nuts. In another, more olive oil (yes, more fat and calories!) helped reduce body fat and improved blood pressure.

Wiki-wiki-whaaaaa?

I’m convinced that subbing olive oil for other oils and butter whenever possible is a smart choice. I’m especially into including it in baked goods. (These delicious banana chocolate muffins and orange cake are among my favorites.) As long as the olive flavor isn’t overpowering, I find it a really nice, mellow complement to the sweetness of most baked goods.

So, being that it’s fall and therefore time for ALL THINGS PUMPKIN, I of course wanted to give olive oil a whirl in some pumpkin muffins. Trouble was, I had a hard time finding a recipe. When I Googled “Pumpkin Olive Oil Muffins,” it yielded very few results. “Pumpkin olive oil face mask” was much more popular. (Why would you put these delicious ingredients on your face without putting them in your mouth??)

Clearly, it was time to get creative. I adapted this recipe from the one on Olio Olive Oils’ website. A bit less sugar, a bit more time in the oven, and a yogurt-milk blend instead of time-consuming DIY buttermilk made these turn out perfecto–full of pumpkin spice flavor with a delicate, chewy crumb.  I *may* have conveniently hidden the Tupperware full of these muffins under our countertop bread stash, where my kids wouldn’t readily notice them.

If you’re looking to add more olive oil to your home baking, you won’t be disappointed with these perfect-for-fall treats!

P.S. Want to know more about cooking oils? You can learn more about which oils work best for which types of cooking in this guide I wrote on Healthline.com.

Pumpkin Olive Oil Muffins

Bring the heart-healthy goodness of olive oil to your breakfast table with these pumpkin muffins!
Prep Time15 mins
Cook Time22 mins
Servings: 12 muffins

Ingredients

  • 1/4 c. extra-virgin olive oil
  • 1/4 c. unsweetened applesauce
  • 2 eggs
  • 1/4 c. plain Greek yogurt
  • 1/4 c. milk, any variety
  • 1 c. canned pumpkin
  • 1 c. all-purpose flour
  • 1/2 c. whole wheat or white whole wheat flour
  • scant 1/3 c. white sugar
  • scant 1/3 c. brown sugar
  • 1/2 tsp. baking powder
  • 1 tsp. baking soda
  • 1/2 tsp. salt
  • 1 tsp. cinnamon
  • 1/2 tsp. ground ginger
  • 1/4 tsp. ground cloves
  • 1/8 tsp. nutmeg

Instructions

  • Preheat oven to 375 degrees. Spray a 12-cup muffin tin with baking spray (even better if it's olive oil-based.)
  • In a large bowl, stir together olive oil, applesauce, eggs, yogurt, milk, and pumpkin until smooth. Add all remaining ingredients and combine until no lumps remain.
  • Distribute among prepared muffin cups and bake 20-22 minutes. Let cool 5-10 minutes.

Notes

Adapted from Olio Olive Oil.

Cashew Butter Oatmeal Cookies

Cashew butter puts a unique spin on the expected in these chewy Cashew Butter Oatmeal Cookies.

Not too long ago, I received an assignment from one of the publications I write for about the nutrition of cashew butter. Having limited experience with this particular nut butter, I was basically starting at square one. I’m your typical American when it comes to nut butters–as in, peanut butter is my gold standard. When our family lived in Germany a few years ago, the lack of this grocery staple in stores led to much weeping and gnashing of teeth (until my mom arrived from the States bearing some precious PB).

Doing a bit of research for my article led to some interesting revelations about cashew butter. Even though it has a teeny bit more calories than peanut butter, its fats are 80% unsaturated (aka the healthy kind). Plus–how weird is this?–certain antioxidant compounds in cashews have been associated with improved vision and eye health. You can read my full article with all cashew butter’s health benefits here.

Coincidentally, I happened to receive a few samples of cashew butter shortly after writing my article. One of which was this intriguing salted caramel variety.


Up until now, I’ve been noshing it slathered on graham crackers and as a dip for green apples. (Not sure if it’s giving me superhuman vision yet, but it sure is tasty.) With its creamy texture and comparable flavor to peanut butter, I figured I could put it to work in some of the other vehicles I’d normally use PB for…like cookies!


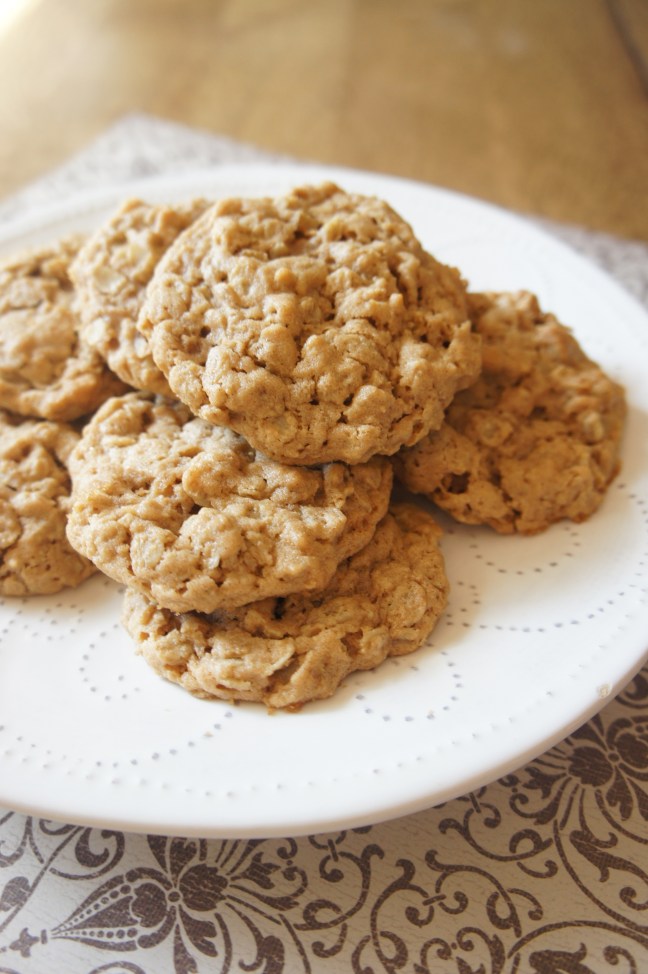
These Cashew Butter Oatmeal Cookies are a twist on the usual peanut butter oatmeal cookies. They’ve got the craveable crispy-on-the-outside, tender-on-the-inside you know and love in the best peanut butter oatmeal cookies, with a slightly different taste. I especially enjoyed the hint of salted caramel in the variety I used, but you can easily use any kind of cashew butter here.

I guess I’ve come full circle on my cashew butter journey. Now that I know a bit more about it and have used it in several ways, I’m all aboard on the nut train. And I’m pretty sure if you try these cookies, you will be, too.

Print Recipe
3.67 from 3 votes

Cashew Butter Oatmeal Cookies

Put a unique spin on the usual oatmeal cookies with cashew butter! These cookies have the crispy-on-the-outside, soft-on-the-inside texture you crave.
Prep Time10 mins
Cook Time12 mins
Servings: 2 dozen

Ingredients

  • 1/2 c. butter, softened
  • 1/2 c. cashew butter
  • 1/3 c. brown sugar
  • 1/2 c. white sugar
  • 1 tsp. vanilla extract
  • 1 egg
  • 1 1/2 c. old fashioned oats
  • 1/2 c. all-purpose flour
  • 1/2 tsp. baking soda
  • generous 1/4 tsp. salt
  • 1/2 tsp. cinnamon

Instructions

  • Preheat oven to 350 degrees and grease a large baking sheet with cooking spray.
  • In a large bowl, combine butter, cashew butter, brown sugar, white sugar, vanilla, and egg. Blend with a hand mixer until well mixed, 1-2 minutes.
  • Add oats, flour, baking soda, salt, and cinnamon. Mix by hand until combined.
  • Form into balls and drop onto greased baking sheet. Bake about 12 minutes until tops of cookies are set. Cool 10 minutes and store in an airtight container.

Notes


Maple Almond Latte

This Maple Almond Latte is a quick and easy way to turn an ordinary cup of coffee into something extra special!


I drink coffee every day, without fail. In fact, being a creature of habit of almost robot-level proportions, I’m a bit militant about it. Get up in the morning, go to the bathroom, brush my teeth (yes, before breakfast, I know it’s weird), make coffee. This is my essential morning routine. In fact, when my husband and I recently binge-watched our way through the TV series Alone, where contestants fend for themselves in the wilderness, living off the land for up to 100 days, I wasn’t thinking so much about how much I’d miss my family and friends if I were on the show. I was thinking: I could NOT go without coffee that long.

So it’s a little strange how little I seem to experiment with the stuff. I’m a drip-coffee-plus-creamer gal to my core.

Before I got tuned in to (mostly) healthy eating and ultimately became a nutritionist, I was no stranger to the Starbucks super-sized dessert disguised as coffee. Many of my college study sessions were fueled by grande brownie frappuccinos. (The only reason they weren’t venti is I was too poor.) Once I realized that I didn’t really want to drink so many calories, though, I gradually transitioned to my standard order of coffee plus cream, even at coffee shops. Now, I’d say I get it 90% of the time.

Then again, as a foodie, I can’t help the occasional experimentation with my favorite beverage. Especially with fall at least sort of on the horizon–it arrives in Phoenix around November 15th–hot coffee calls my name with increasing frequency. Maybe there’s more I could do with my same old, same old cup of drip coffee.

Yea, verily, there is. With just a few simple ingredients, this recipe for a Maple Almond Latte is proof that it doesn’t take special equipment or fancy add-ins to elevate a simple cup of coffee into something a little more special. And, bonus–it doesn’t take that much time, either.

The latte is made simply by pouring brewed coffee over maple syrup, then adding a bit of almond extract. Milk heated in the microwave and shaken turns into the frothy stuff of lattes you’d look for at Starbucks. Dust with cinnamon for added sensory experience and you’re all set. If you’re a fan of anything maple or almond, I think you’ll dig blending the two dreamy flavors together.

My favorite part? Drinking this aromatic latte doesn’t mean taking in a whole meal’s worth of calories, or a donut’s worth of sugar. At 96 calories, it’s the perfect slightly sweet drink to pair with an afternoon snack without filling you up well past dinner.

Print Recipe
4 from 1 vote

Maple Almond Latte

A coffeeshop quality drink (with half the calories) in just 5 minutes! Sweet maple and earthy almond flavors blend perfectly with coffee.
Prep Time5 mins
Servings: 1
Calories: 96kcal

Ingredients

  • 12 oz. brewed coffee (I used a dark roast)
  • 1 Tbsp. maple syrup
  • 1/3 c. 2% milk
  • 4 drops almond extract
  • cinnamon, to dust on top

Instructions

  • Brew coffee.
  • Wihle coffee brews, heat milk in a mason jar or other sealable container for 30-45 seconds until hot. Screw the lid on tightly and shake vigorously for 30 seconds or until milk gets frothy.
  • Pour maple syrup into a mug, then stir in coffee, frothed milk, and almond extract. Sprinkle with a bit of cinnamon, if desired.

Notes

A Love Letter to Food original recipe.

The Easiest Baked Brown Rice

The absolute easiest way to make brown rice! Baking makes for fluffy, no-mess rice.

If you had to name a food everyone can agree is healthy, you really couldn’t go wrong with brown rice. (Okay, unless you’re one of those people who think all grains are bad…which, for the record, has been disproven time and again.)

Brown rice is packed with fiber (3.5 grams per cup), protein (5 grams per cup), and important micronutrients like magnesium and selenium. It’s got a relatively low glycemic index of 50, meaning  it won’t spike your blood sugar. Plus, it’s pretty dang low calorie at about 215 cals per cup. It goes with just about everything, from casseroles to Mexican food to meat dishes.

Only trouble is, well, making it.

Seems like every time I try making brown rice on the stovetop, I end up with a sticky mess that hangs on to the bottom of my saucepan like grim death. I dread cleaning any pot that has touched brown rice.

What I never realized–until recently–is that there’s actually a much better way to get fluffy, chewy brown rice that doesn’t involve scraping burnt grains off the pot for an hour after dinner. How, you ask? By baking it!

I’ll ‘fess up and say I didn’t come up with this bright idea on my own. In fact, my moment of brown rice enlightenment actually came from my kids’ favorite cookbook, America’s Test Kitchen’s Complete Cookbook for Young Chefs. My 11-year-old son decided he wanted to try making baked brown rice, and it turned out to be totally easy enough for a preteen to manage without burning the house down. Essentially, all it takes is boiling some water in a kettle, then pouring it over grains in a baking dish (with a bit of butter, of course!). Cover and bake for an hour and you’re all set.

The beauty of this recipe is not only its simplicity, but the fact that it cooks the rice perfectly evenly–unlike the stovetop method, which can yield wet rice on top and crispy grains on the bottom. And, wonder of wonders, miracle of miracles, it doesn’t stick to the baking pan.

Look how easily it scoops! No sticking!

Since learning about this easy method, I’ve been making brown rice like a fiend, and I’m not sorry about it. It’s a versatile, healthy side dish I can always find a use for. I’ll never make brown rice on the stovetop again.

So tell me…am I just late to the game? Have you tried baking brown rice in the oven? Are you as enthused about it as I am?

Print Recipe
5 from 1 vote

The Easiest Baked Brown Rice

Baking brown rice makes for a fluffy finished product that won't stick to the pan!
Prep Time10 mins
Cook Time1 hr
Servings: 5

Ingredients

  • 1 1/2 c. brown rice
  • 1 Tbsp. butter
  • 2 1/3 water

Instructions

  • Preheat oven to 375 degrees. Spread brown rice in an 8 x 8-inch glass baking dish. Cut butter into small pieces and dot over rice.
  • In a kettle, bring water to a boil. Carefully pour over rice. Cover tightly with two sheets of aluminum foil.
  • Bake for 1 hour, uncover, fluff, and serve.

Notes

Adapted from America's Test Kitchen's Complete Cookbook for Young Chefs.